Unlock the secrets of the 4×6 photo size in this guide that covers everything from basic dimensions to resizing instructions.
Have you ever held a photograph and wondered, “What does a 4×6 picture look like?” or “Is it in this size now?” Well, it’s more than just a piece of paper—it’s the most popular photo size that fits perfectly in your hand! In this post, we’ll explore every angle of the 4×6 photo, from its dimensions in pixels, inches, cm, and mm to its versatile uses in both personal and professional photography.
Let’s dive into the world of this classic photo size and uncover its significance!
What is a 4×6 Photo?
 What exactly do we mean when we talk about a “4×6 photo”? Simply put, it’s one of the most familiar photo sizes out there—measuring 4 inches by 6 inches. This is the go-to size for most of your photo printing needs because it perfectly matches the 2:3 aspect ratio used by the viewfinders of many digital cameras. It’s a universal size, which is right for everything from your casual snapshots to professional prints!
Your AI-Powered Photo Editor for MacOS and Windows
But there’s a little twist when it comes to smartphone photography. Unlike traditional cameras, smartphones tend to have a different aspect ratio. So, if you’re shooting with an iPhone or Android and want to get a 4×6 print, you’ll likely need to crop your image to fit.
Knowing this can save you a bit of a headache, especially if you’re planning to frame your photos. Let’s discuss what makes this photo size so universally used and useful!
Learn more: How to Check Image Size and Dimensions on Your Computer or Online?
How Big Is a 4 by 6 Picture
In Inches
Is 4×6 a standard picture size? Yes, at 4 inches wide and 6 inches tall, the 4×6 photo is ideally sized for standard frames and albums—no wonder it’s such a popular choice! It’s about as long as a pencil or slightly shorter than a dollar bill, making it an easy fit for displaying your favorite memories without any fuss about resizing.
In Pixels
When we are talking about digital displays, pixels are the name of the resolution data there. The clarity and detail of your 4×6 photo in pixels depend largely on your chosen resolution, which is usually measured in pixels per inch (PPI).
For crisp, clear prints, a standard resolution is 300 PPI. So, at this resolution:
-
The width would be 1,200 pixels (4 inches x 300 PPI).
-
The height clocks in at 1,800 pixels (6 inches x 300 PPI). This setup ensures your photo looks sharp whether it’s on a screen or in a frame.
In Centimeters and Millimeters
If you’re working internationally or prefer the metric system, knowing these conversions is crucial.
A 4×6 inch photo converts to about:
-
10.16 centimeters wide by 15.24 centimeters tall.
-
Or, for those who need even more precision, that’s 101.6 millimeters wide by 152.4 millimeters tall. These dimensions are particularly handy when dealing with printing and framing outside the U.S.
By understanding these measurements, you can ensure your photos are just the right size for whatever project you have in mind, from creating a photo wall at home to preparing a professional portfolio!
Aspect Ratio of a 4×6 Photo
 When we talk about aspect ratio, we’re really discussing the shape of the photo. For a 4×6 photo, it’s 3:2. This means it’s 3 parts wide to every 2 parts tall—pretty standard in the world of photography, and exactly what you see through most digital cameras.
Note: If you’re using your smartphone, you’re likely capturing shots in a 4:3 ratio. If you want to fit those into a 4×6 frame, you’ll need to crop the edges a bit, which is a better option than stretching or squishing them.
Want to keep the whole scene without cropping? You can use GenExpand AI—an image extender that uses artificial intelligence to fill in the edges of your photo based on its existing content. It’s a helpful way to adjust your image to a 4×6 frame without cutting anything out.
Popular Uses of 4×6 Photos
 Why do we love the 4×6 photo so much? Because it’s perfect for almost everything! From snapping that sunny beach day to catching the laughter at family dinners, the 4×6 is your go-to photo size.
-
Everyday Snapshots: The 4×6 is ideal for all those moments you want to keep close. It’s the classic choice for family portraits and holiday snaps that will be in your albums and cover your fridge.
-
Creative Cards: Turn a 4×6 photo into a personal postcard or a festive greeting card. It makes every message a bit more special and is a simple way to share life’s big events and small wins.
-
Home Decor: This size fits almost any frame, making it easy to decorate your space. Whether it’s setting up a gallery wall of your favorite travels or just having a few cherished memories on your desk, a 4×6 picture fits beautifully into your life and decor.
These photos bring your digital memories into the real world, where you can touch and see them every day. So print a few, frame them, or mail them off to someone special—the 4×6 is always the perfect fit.
Exclusive Tools of Endless Possibilities in One AI Editor
How to Resize a Photo to Print 4×6
 If you’re looking to print your favorite moments in the classic 4×6 format, Luminar Neo makes it incredibly easy to get it just right. This editor preserves the quality and detail of your memories. Here’s how you can use the image resizer for your photos for that perfect print:
1. Open your image in Luminar Neo
Start by loading the photo you want to print. The standard aspect ratio for a 4×6 print is 2:3, so that’s what you’ll need to set.
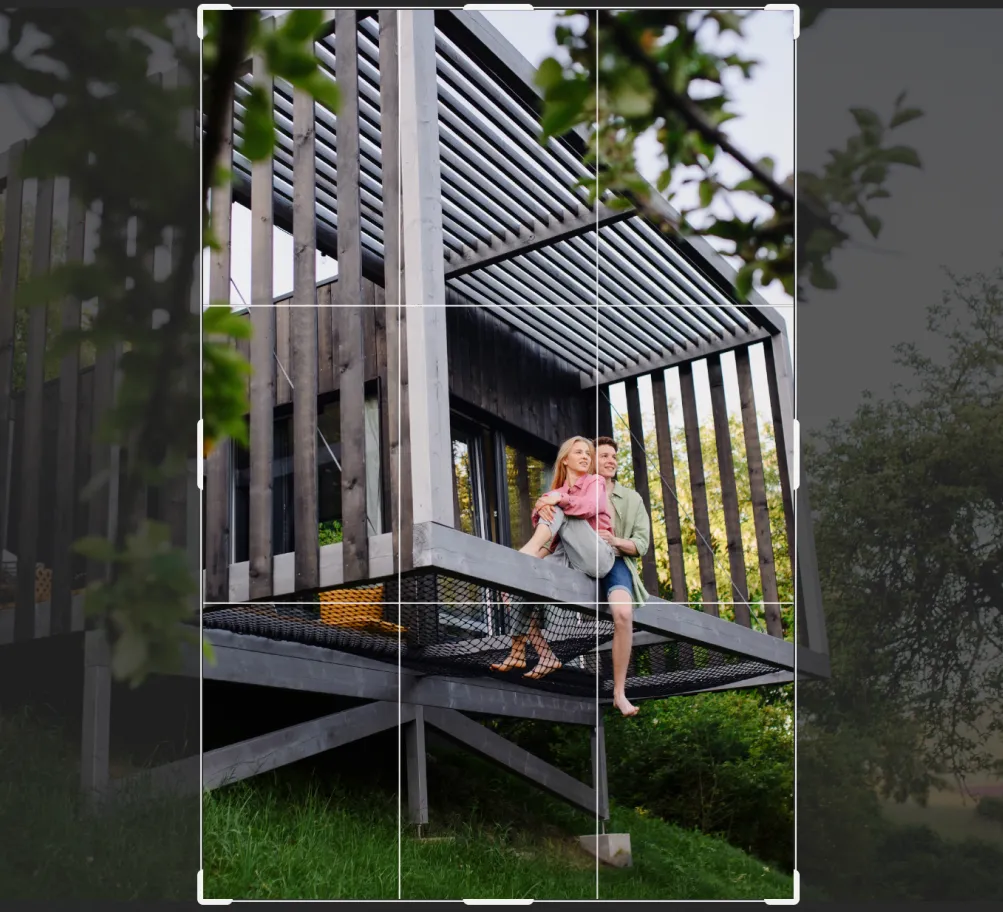
2. Use the Crop AI tool
Head to the Crop AI tool and select 3:2 from the aspect ratio dropdown. The AI can help suggest the best crop for your composition. You can always fine-tune it manually to keep the key parts of your image in frame.
3. Check alignment
Don’t forget to straighten your photo before finalizing—crooked lines are easy to miss on screen, but really stand out on paper.
4. Resize before export
When you’re ready to export, click on the Export button – New Export and find the Resize block. This ensures the image stays sharp when printed.
5. Preview and print
Give your image one last look, make any small adjustments, and you’re ready to print. That’s all!
Learn more: How to Reduce Photo Size Without Quality Loss
Before You Print
 Printing isn’t just about hitting ‘print’—there’s an art to turning digital into physical that keeps your photo’s soul intact. Before you print your 4×6 photos, there are a couple of things you should keep in mind to make sure they come out looking fantastic.
Choosing the right paper is crucial. Whether you go glossy for vibrant colors and shine, matte to avoid glare, or luster for a bit of both worlds, the paper type can drastically affect how your photos look and feel. Think about where the photo will be displayed and how you want the colors to appear, and choose accordingly.
Resolution is your best friend when it comes to clarity and detail. To avoid any disappointing blurriness or pixelation, aim for a resolution of at least 300 PPI. This ensures your prints are just as sharp and clear as they appear on your screen, capturing every detail perfectly.
With these tips in mind, you’re all set to print photos that not only capture moments but also look great anywhere—from your wall to your wallet.
Conclusion
That’s the end of our guide to the 4×6 picture size. Now you know everything from its measurements to how to adjust your photos if they started off in a different size. With these tips, you’re ready to turn your digital memories into perfect 4×6 prints.
Let’s print some great images and fill our albums now!