Learn how to use the Sunny 16 rule in photography to master daylight exposure without a light meter. Discover tips, examples, and adjustments for different lighting conditions.
Let’s say you’re standing in the blazing midday sun. Things are happening quickly, and your meter freaks out, but you want a quality shot. The Sunny 16 rule is here to help you.
In this guide, you will learn what this rule is and how to use it, adapting to different shooting conditions. We will connect it to the exposure triangle, compare it with light meters, and highlight common mistakes to avoid for stunning shots.
What is the Sunny 16 Rule and Why is It Important?
The Sunny 16 rule is a simple exposure guideline for shooting in direct sunlight. It sets a baseline combination of aperture, shutter speed, and ISO without relying on a light meter.
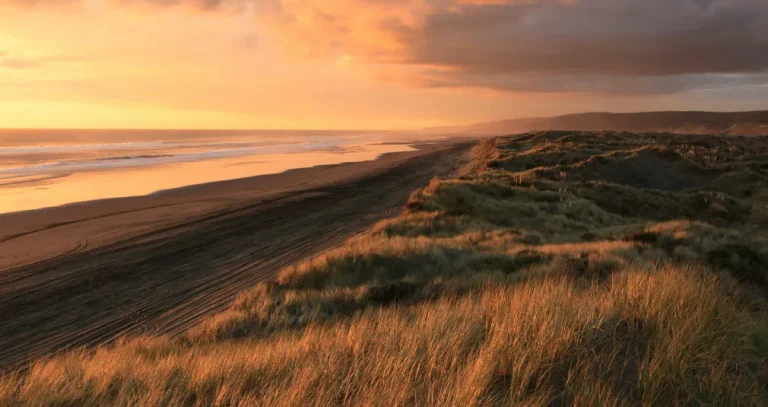
It helps achieve a perfectly balanced exposure without a lighting meter. If you are new to photography terminology, it ensures your photo is not too light or dark. This rule came to us from the film era. However, it works on digital cameras too. It was a way for photographers to learn light instead of relying on machines for decisions. It is particularly useful for scenes with reflected light. These scenes include beaches, snow, backlight, etc.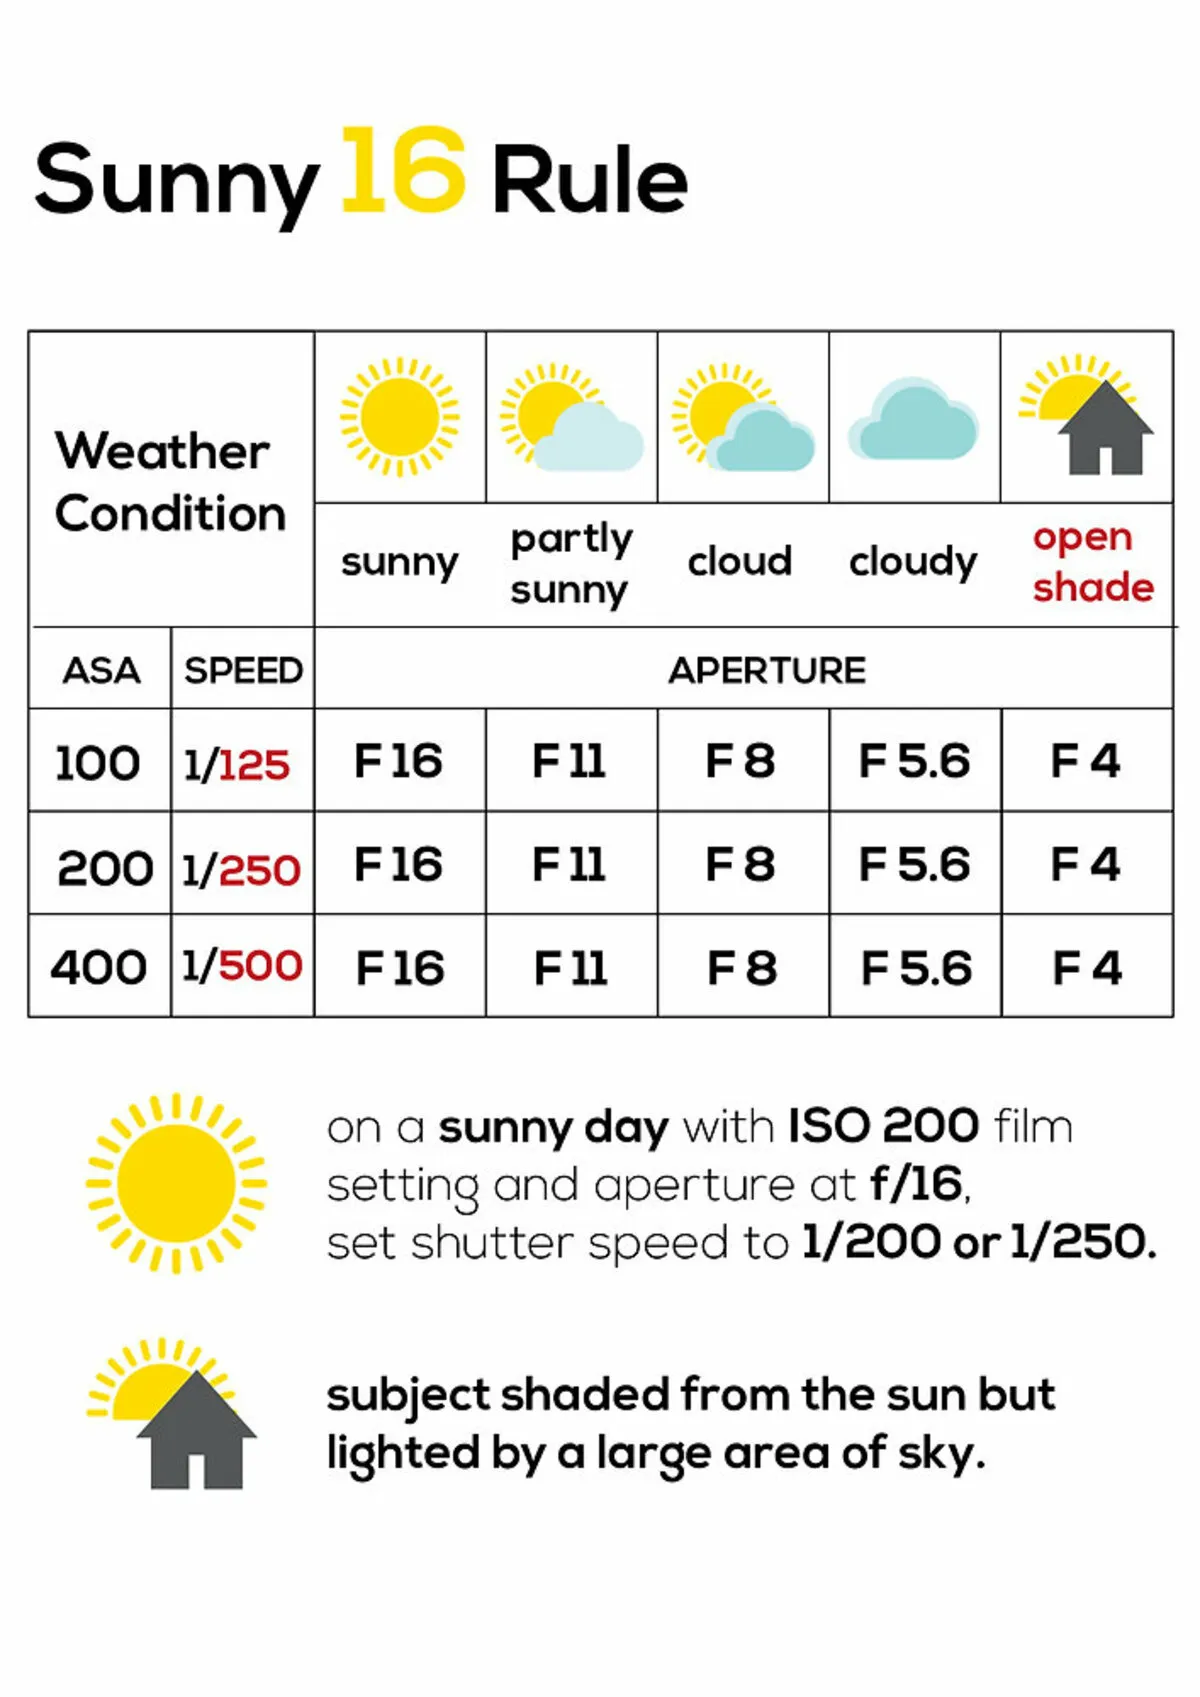
Master the Art of Photo Clarity with AI-powered Sharpen Tool
Understanding the Exposure Triangle in Relation to the Sunny 16 Photography
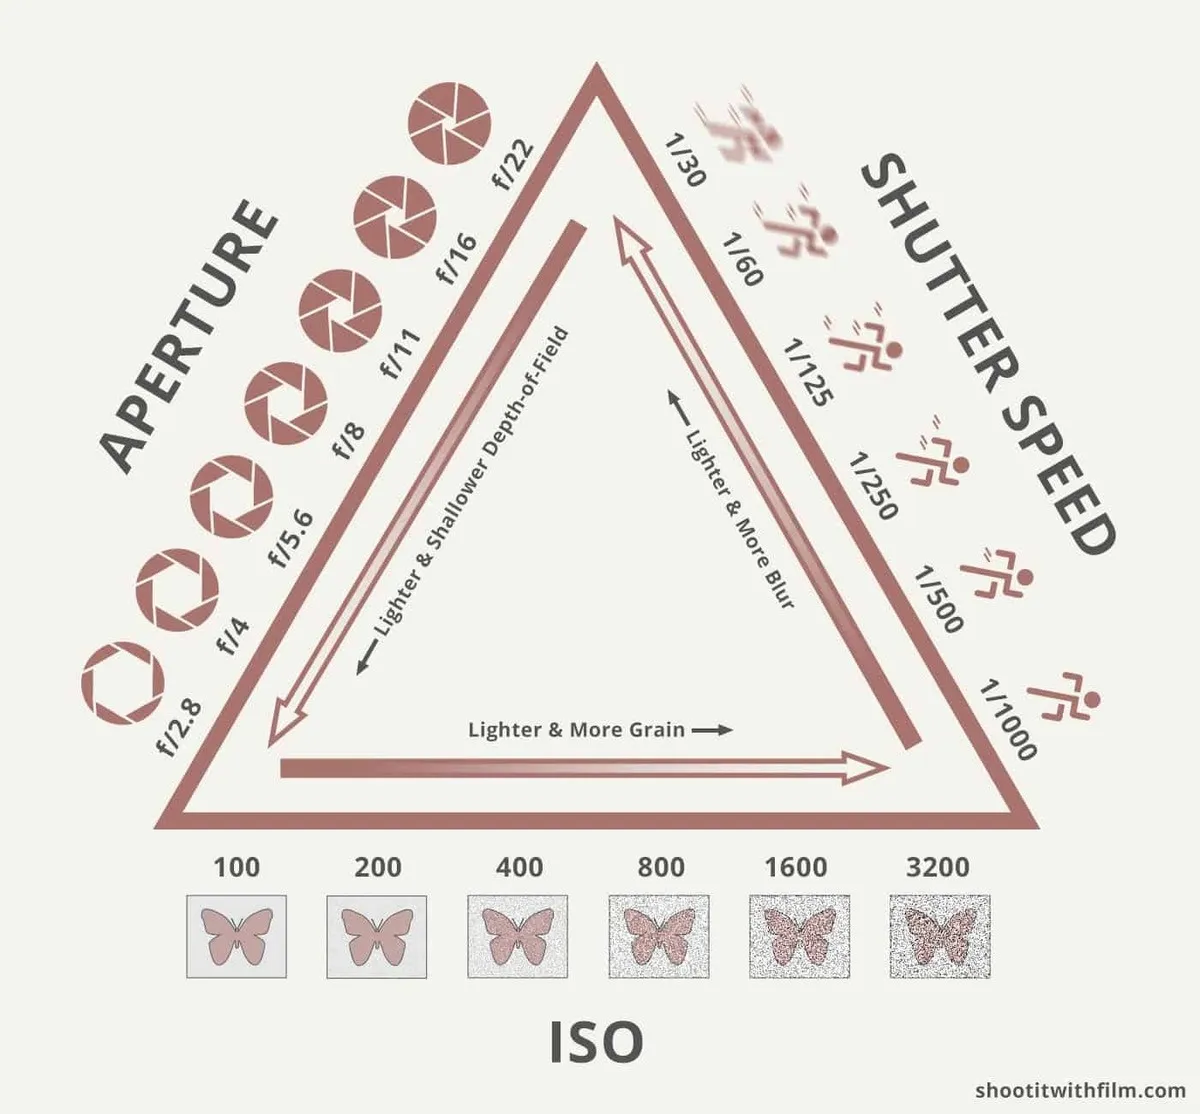 The Sunny 16 rule’s effectiveness depends on the interaction between aperture, shutter speed, and ISO. This trio of parameters makes up the exposure triangle. It defines how well your picture will be lit. Your creative choice comes from how you trade one setting for another.
We know that the f/16 aperture is ideal for bright sunlight. However, there are times when you can “sacrifice” one setting for another and have your images be well-exposed. For instance, you may have to dial a faster shutter speed to freeze movement. You may also want to widen the aperture for a portrait with a dreamy bokeh. Other parts of the exposure triangle should be changed accordingly. It is the only way to keep the exposure balance.
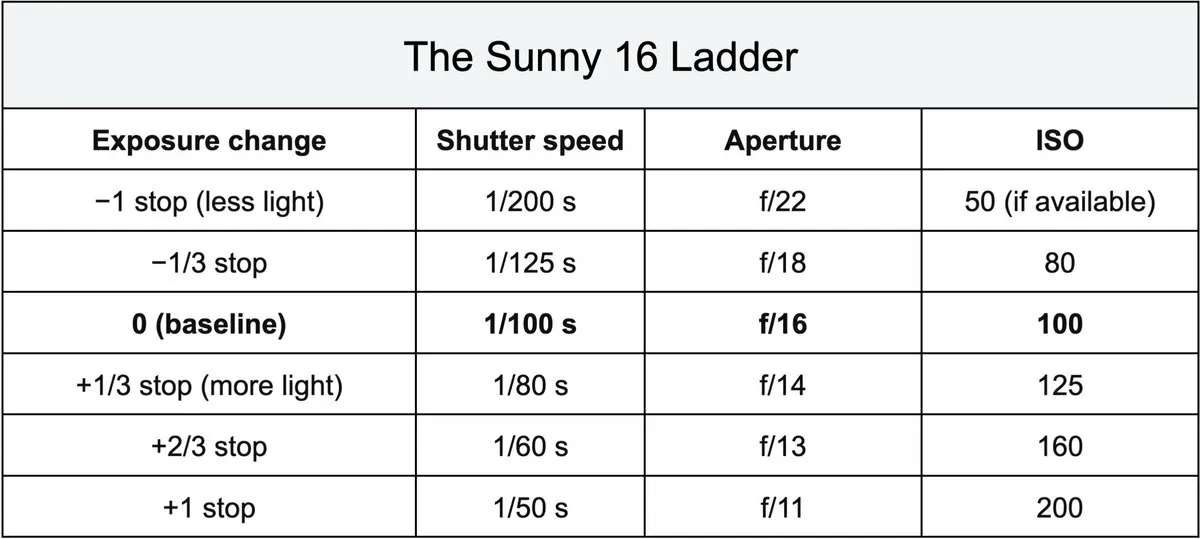
The photographers developed a special chart called “The Sunny 16 ladder” for use in these situations. It relies on reciprocity. It means that everything you do to alter one dial, you have to reverse on the other. Therefore, if you want the least amount of light on your sensor or film, you will be making the apertures bigger and the ISO higher while making faster shutter speeds. If you are going to let more light in, do the opposite.
Look at the table below:
 Set the Sunny 16, decide what matters most (sharp action, creamy background, or ultra-clean files), then adjust one control for the look and compensate with another to keep exposure even. Confirm with your histogram or a highlight warning.
How the Sunny 16 Rule Works: A Step-by-Step Guide
-
Keep your ISO as low as possible. ISO 100 gives you enough output for a bright Sunny day. Boost it only when shooting moving subjects and you need a faster shutter speed.
-
Use the aperture of f/16 to help control the highlights. It provides a good depth of field for landscape, street, and travel photography.
-
Match the shutter speed to the ISO. At ISO 100, use 1/100s (or close, since 1/125s is more common). At ISO 200, use 1/200s, and so on. It will ensure a realistic illumination balance with no obscured or washed-out details.
-
Nudge for the subject. Add or subtract 1/3–1 stop in your exposure settings (see the table “The Sunny 16 ladder”). Adjust this parameter according to the subject’s skin tone, dark or reflective clothing, or shiny surfaces. Use your histogram or highlight alert as a checkpoint.
-
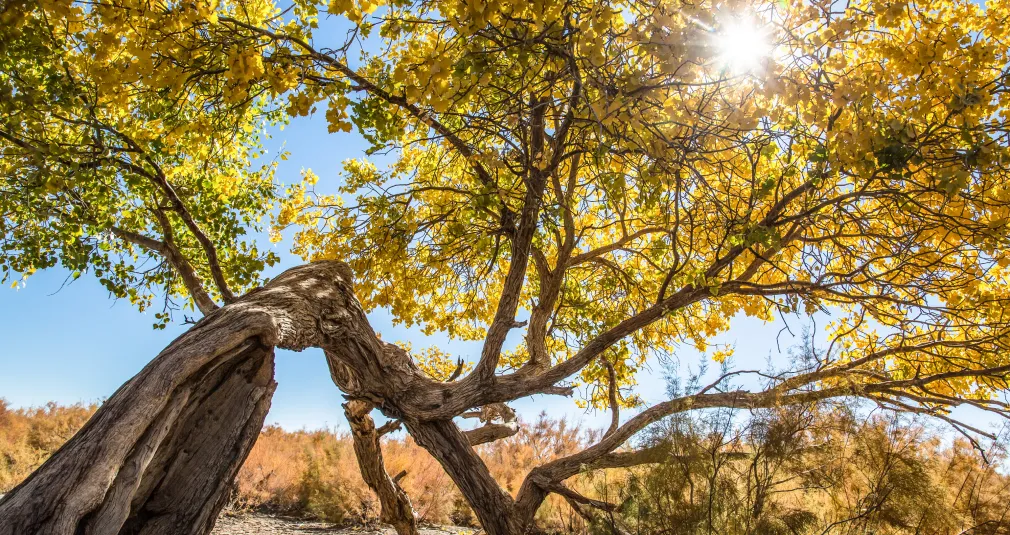
Mind the angles. Angles in photography are fundamental. In our case, they determine how bright your subject appears. The Sunny 16 rule relies on incident light (light falling on the subject), so the front angle is prioritized. Opening up ~1/3–2/3 stops will work if faces look too dim when shooting from the side. Backlighting makes the subjects appear much darker. Open up 1–2 stops for the subject. You can also keep the baseline to preserve rim-lit highlights and let the subject go into silhouette. At certain viewpoints, reflective surfaces spike highlights. A small shift can remove glare or add it. If a reflective surface flares, step left/right or tilt slightly before you change settings.
Exclusive Tools of Endless Possibilities in One Editor
Sunny 16 Rule for Different Lighting Conditions
Adjusting for Cloudy, Overcast, and Low Light Situations
In photography, the Sunny 16 rule gives you a daylight baseline. When light softens or drops, shift exposure in full stops from that anchor.
On a slightly overcast day, you might set your aperture to f/11 for a landscape shot. Maintaining the proper contrast in photography will make your image well-lit without sacrificing details. If the photo is still too dark, play with the shadows and softness in post-processing.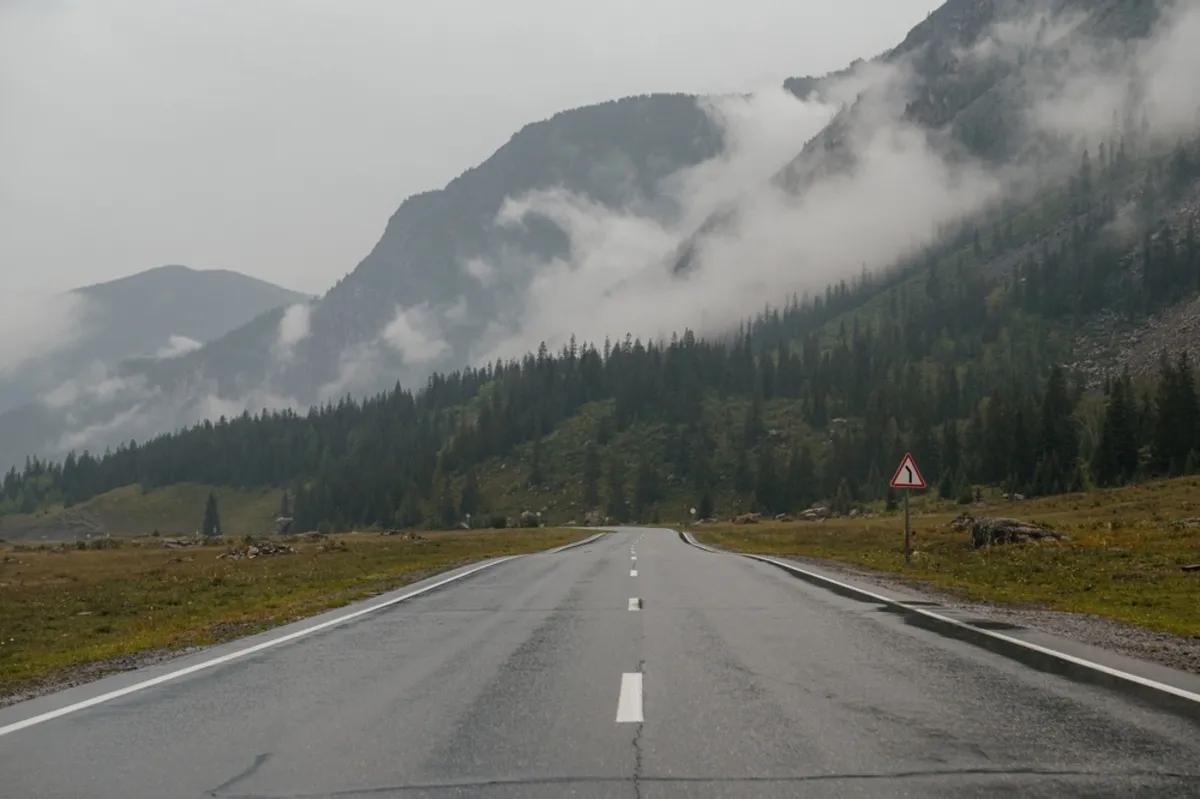
When shooting a subject in open shade, like under a tree or a shadow of the building on a clear day, you will need a larger aperture, around f/5.6. It will compensate for the reduced light.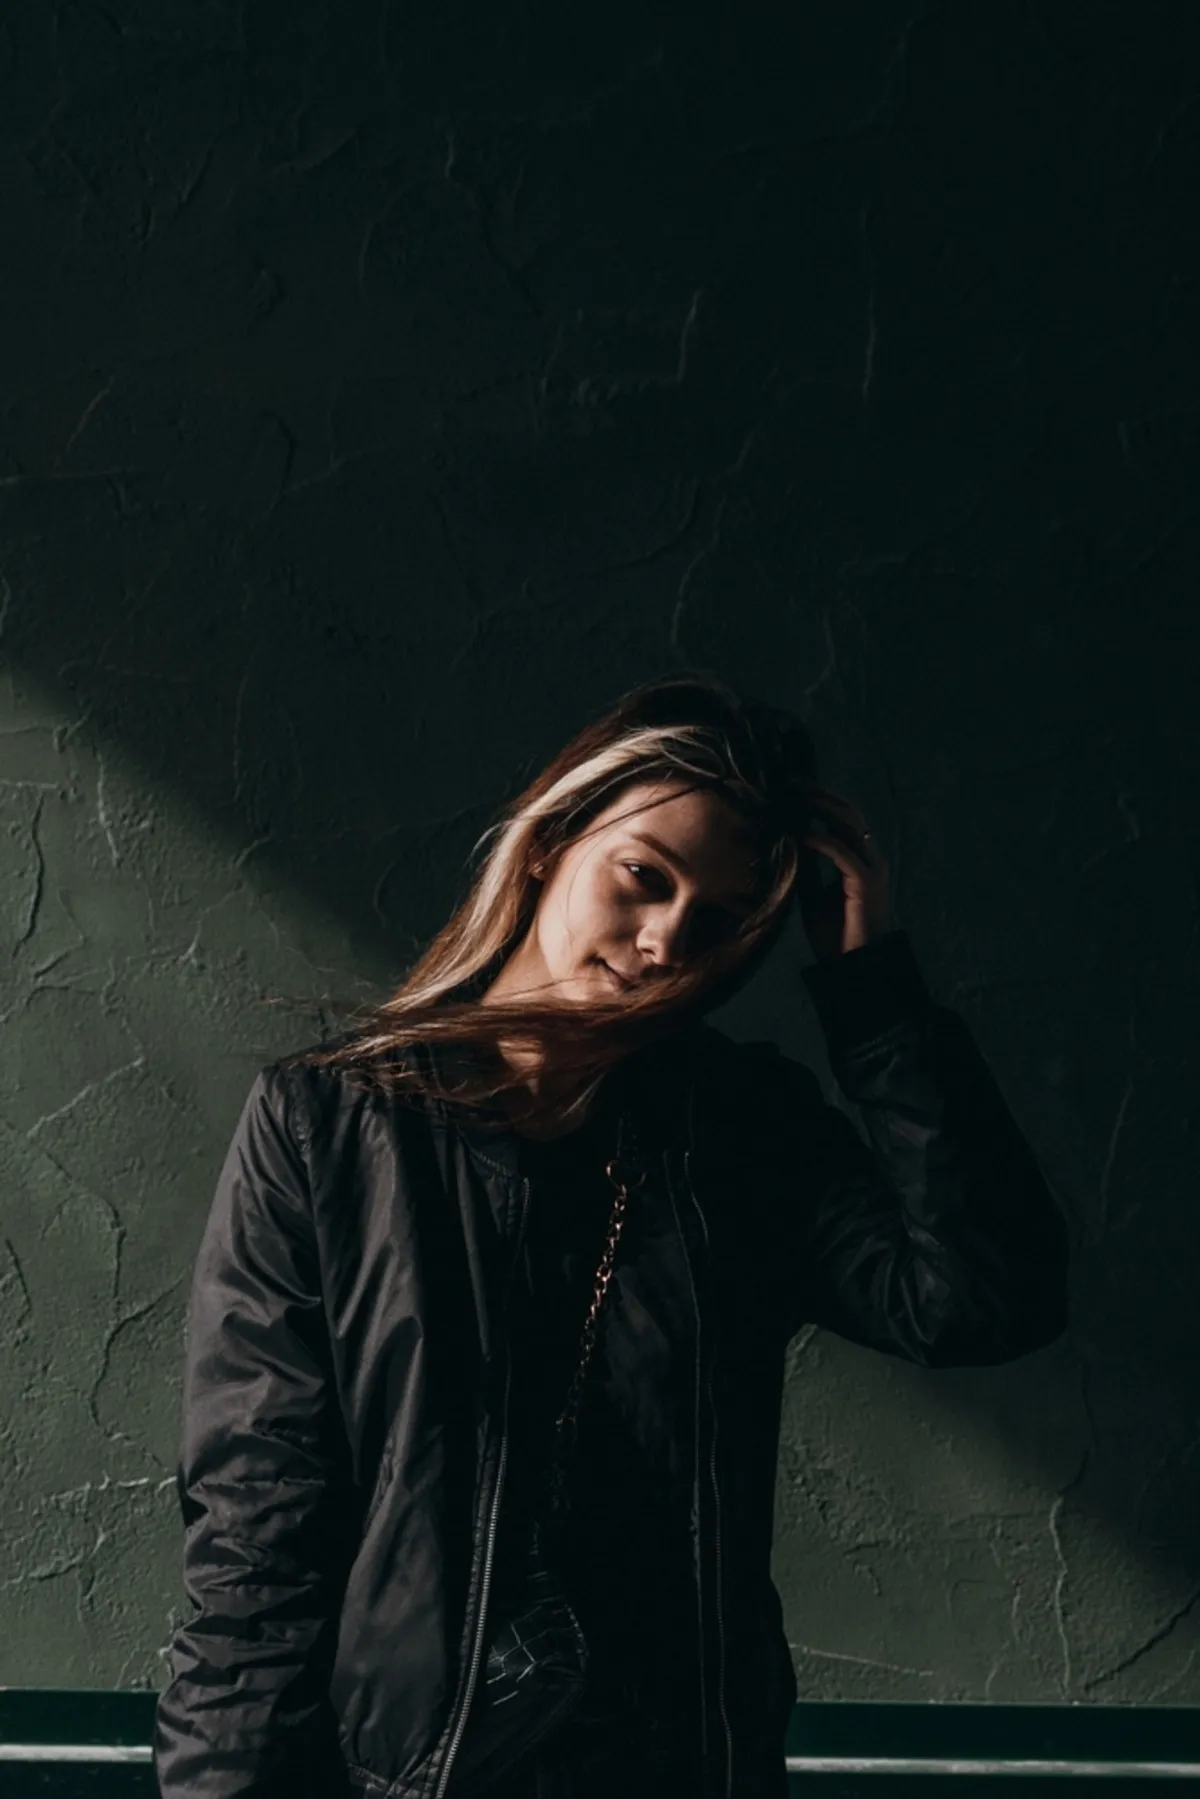
Wide apertures (like f/4) can fill the frame in golden hour portraiture and landscape. When shooting with a scene that has bright, reflective surfaces, stop down to f/22. It will cut out the glare on the snow, water, or sand. Should the light happen to flip every 10 seconds, lock your ISO, choose your shutter for motion, and “ride” the aperture ring in full-stop increments.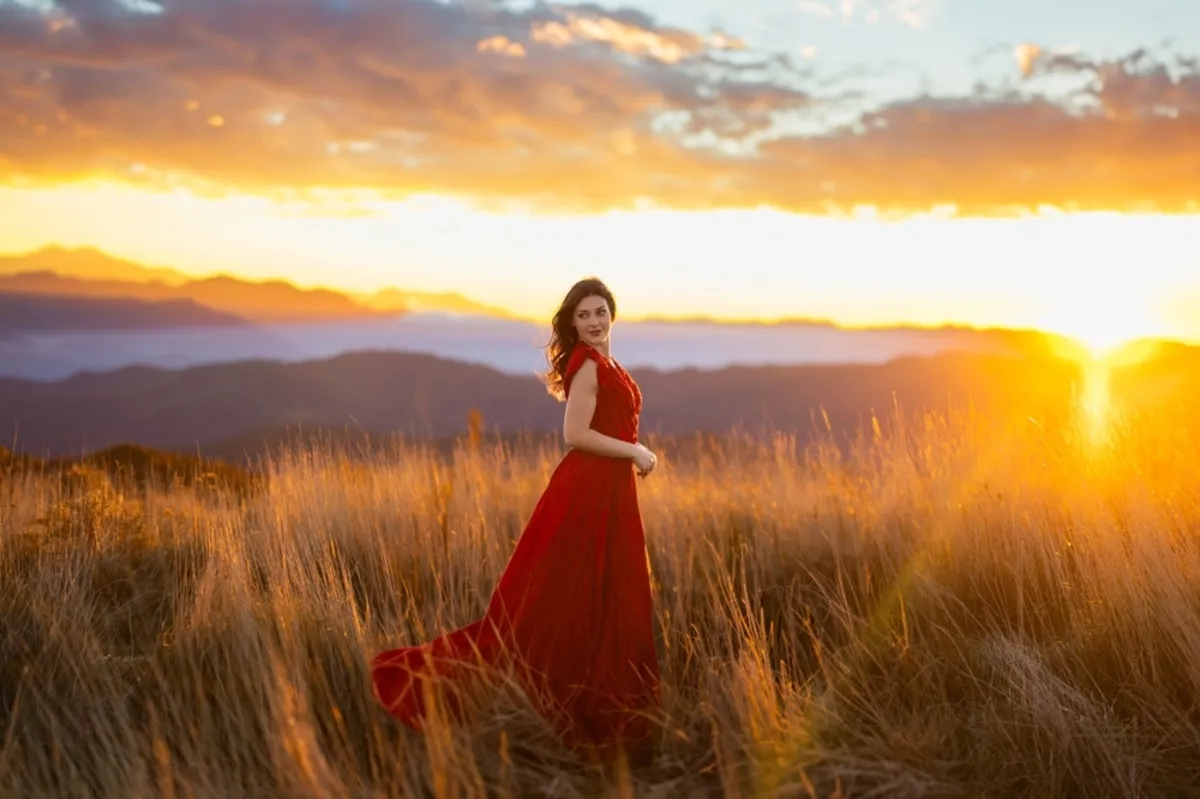
The Sunny 16 Rule is generally not applicable for very low-light conditions, such as indoors or night photography. The Sunny 16 rule is not suited for very low-light or artificial-light situations. Indoor lighting and nighttime scenes usually provide far less illumination than bright daylight, so a light meter or test shots are needed instead. Also, you can rely on the best image editors to balance the inconsistencies post-shot.
What About Other Aperture Values?
On certain sensors, extremely small apertures (e.g., f/22) can reduce the sharpness of fine detail. Step to f/11 or f/8 if you see softness that is not motion blur or focus error. 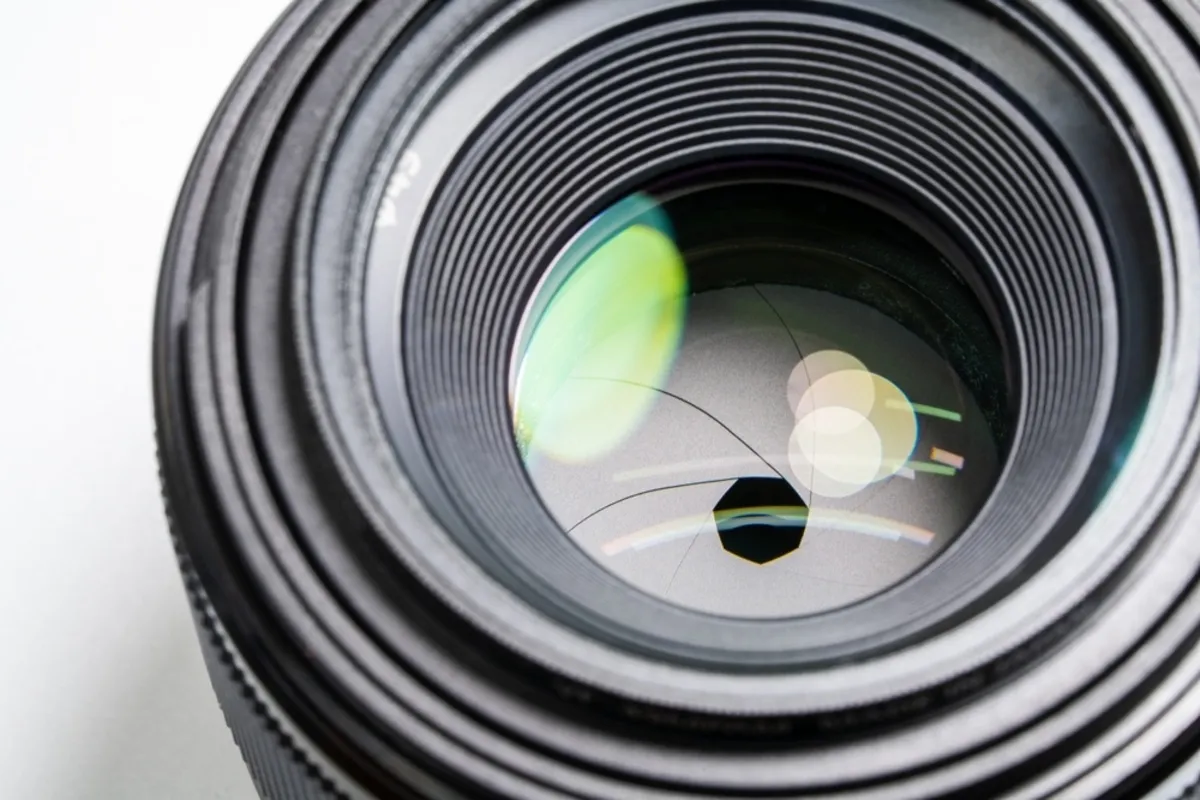
Keep in mind that wide apertures separate the subject, while narrow apertures encompass more of a scene. Choose the creative look (shallow depth of field / deep focus) first, dial in the appropriate setting from the Sunny 16 ladder, and compensate with the shutter speed.
Using a Light Meter
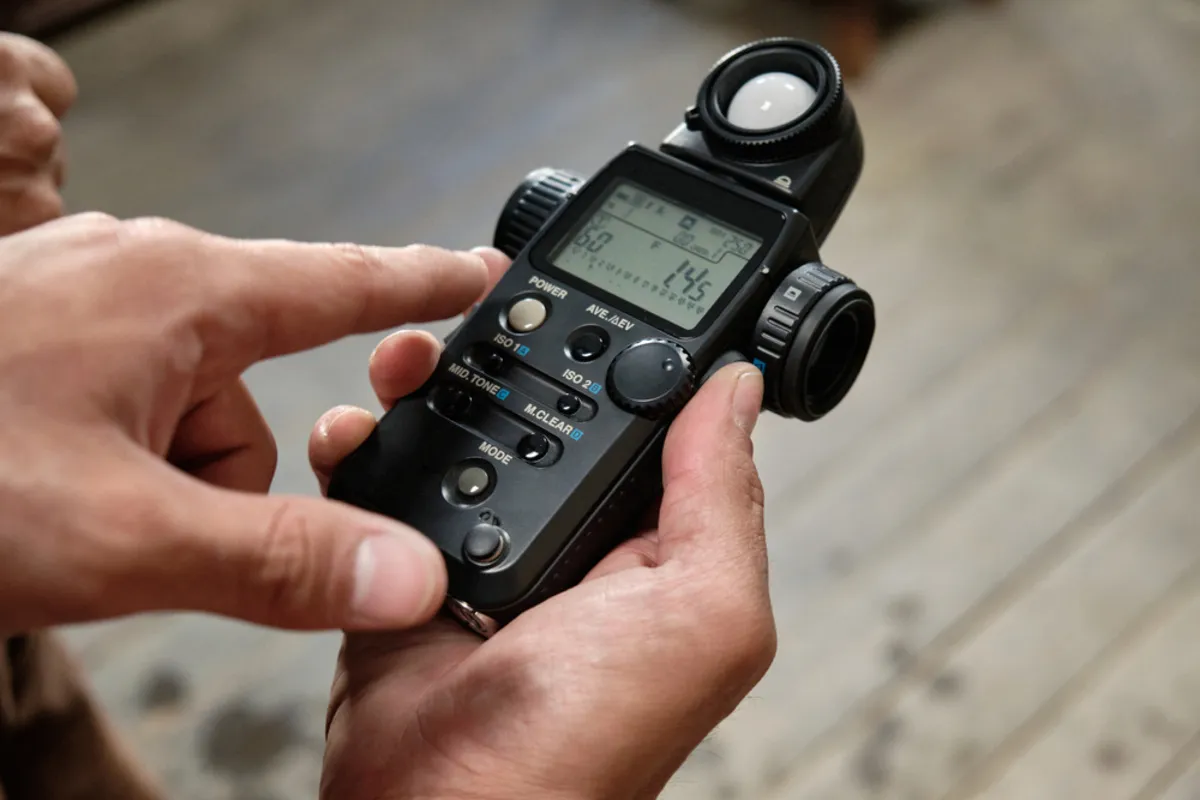
Do I Need the Sunny 16 Rule if I Have a Light Meter?
Yes, the Sunny 16 remains valuable for photographers even when they use metering devices. It gives you a ready-made starting point before you even raise the camera. Your camera’s metering system can malfunction or be inaccurate. The rule helps deepen your understanding of exposure fundamentals and provides a quick estimate of settings. It is essential for dynamic environments, such as wildlife or event photography.
What to Trust: The Meter or the Sunny 16 Rule?
You can trust both, but understand the nuances. It implies that a black cat or a dark suit can overexpose the light meter, and a wedding picture could be too dark due to the bridal dress. Manually setting exposure using Sunny 16 yields better results. Nothing beats an incident meter for challenging lighting conditions – such as dappled shade, stage lighting, or mixed color temperatures.
A 7-day Free Trial of Luminar Neo with No Obligation
Common Mistakes and How to Avoid Them

-
Not locking one variable. Decide on the aperture priority for portraits or the shutter speed priority for action shots. After that, you can manipulate other controls.
-
Ignoring the lighting conditions and creative demands. The Sunny 16 works only in brightly and evenly lit outdoor environments and stable subjects. Capturing the architecture shot on a cloudy day, add one stop. It will make the building’s details more prominent. Seascapes and snowy landscapes require narrowing the aperture even in the great light.
-
Ignoring the highlight warnings. If blinkies crawl over skin or key detail, pull back 1/3–2/3 stop.
-
Neglecting bracketing. Three quick frames at 1/0/+1 EV can rescue tricky contrast or mixed lighting. Mind that your images can turn out blurry if you are shooting handheld. Use a tripod to stabilize your shooting. Learn free programs like Photoshop to improve clarity in post-processing.
-
Personal baseline: many photographers adapt the Sunny 16 for their locale (altitude, haze, humidity) and gear.
Conclusion
What is the Sunny 16 rule? It is a fast daylight exposure hack for your awesome shots. It builds confidence and teaches you to trust your eyesight, not only your gear. Use it as your starting point: capture the scene, take a bold first frame, and work from there. It forces you to shoot faster, prevents highlights from blowing out, and lets you get creative.