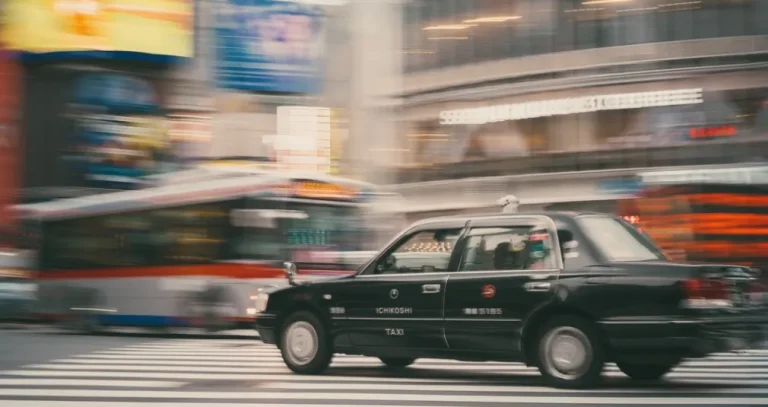
There are a lot of compositional terms flying around a beginner’s head as they lift the camera to their eye. Should I use the Rule of Thirds? The Golden Ratio? Leading lines? A Dutch angle? Sometimes you’ll even hear that centring your subject isn’t the best choice because other compositions are supposedly more aesthetically pleasing, but that couldn’t be further from the truth.
For me, every scene dictates its own composition. My job as a photographer is to recognise it, not force one upon it. And sometimes, the scene demands a central composition, making your photograph much stronger because of it.
So, in this article, we’ll look at which situations suit a central composition and how you can use it to improve storytelling and create more impactful images. Let’s get started.
Why Centre Compositions Work

Let’s look at why central compositions can improve your photographs. One of their biggest strengths is the sense of balance they create. With your subject placed in the centre of the frame, the scene feels naturally harmonious, making the image immediately pleasing to the eye.
That balance also gives you a much better opportunity to create symmetry, resulting in photographs that feel calm, organised, and impactful all at the same time.
There’s also something wonderfully simple about a central composition. Your viewer immediately understands where to look, making it much easier to direct attention towards your subject.
So now that we’ve looked at the why, let’s move on to the how.
Exclusive Tools of Endless Possibilities in One Editor
Example 1: Reflections
Since we just spoke about symmetry, let’s start with one of my favourite uses of central composition: reflections.
If you’re photographing reflections, it often makes perfect sense to centre your subject so the frame can fully showcase the symmetry. Lakes reflecting buildings, puddles reflecting bridges, or people standing in front of mirrors are just some of the many opportunities to create beautifully balanced images.
Because your subject is centred, the reflection naturally becomes centred too, producing an image that feels satisfying to look at and easy for the eye to explore.

That being said, not everything has to be perfectly balanced. You could allow the reflection to take up two-thirds of the frame with your subject positioned in the upper third. In doing so, the reflection itself becomes the main subject. Alternatively, let the reflection occupy only the bottom third, with your subject in the centre and the sky filling the top third. Feel free to experiment with the horizontal proportions while keeping your subject centred, and the composition will still retain its pleasing balance.
For the best reflections, look for still or gently moving water. If the reflection isn’t quite sharp enough, try using a long exposure with a stationary subject. The longer exposure smooths out ripples in the water, leaving you with a much cleaner reflection.
Example 2: Lone Figures
Another fantastic use of central composition is photographing lone subjects. This could be a single person in an open space, a solitary tree in a field, or a lonely mountain. And it’s that word lonely that often becomes the theme of your photograph.
By positioning your subject centrally, it’s easy to create feelings of isolation and loneliness.
You can approach this in two different ways. The first is to ensure your subject is genuinely alone within the scene, surrounded by very few other elements. Think of a lone yacht out at sea or a person barely visible within thick fog. The absence of surrounding distractions creates a clean, minimal composition where your viewer instantly understands what they’re looking at.
But you can also approach it from the opposite direction.
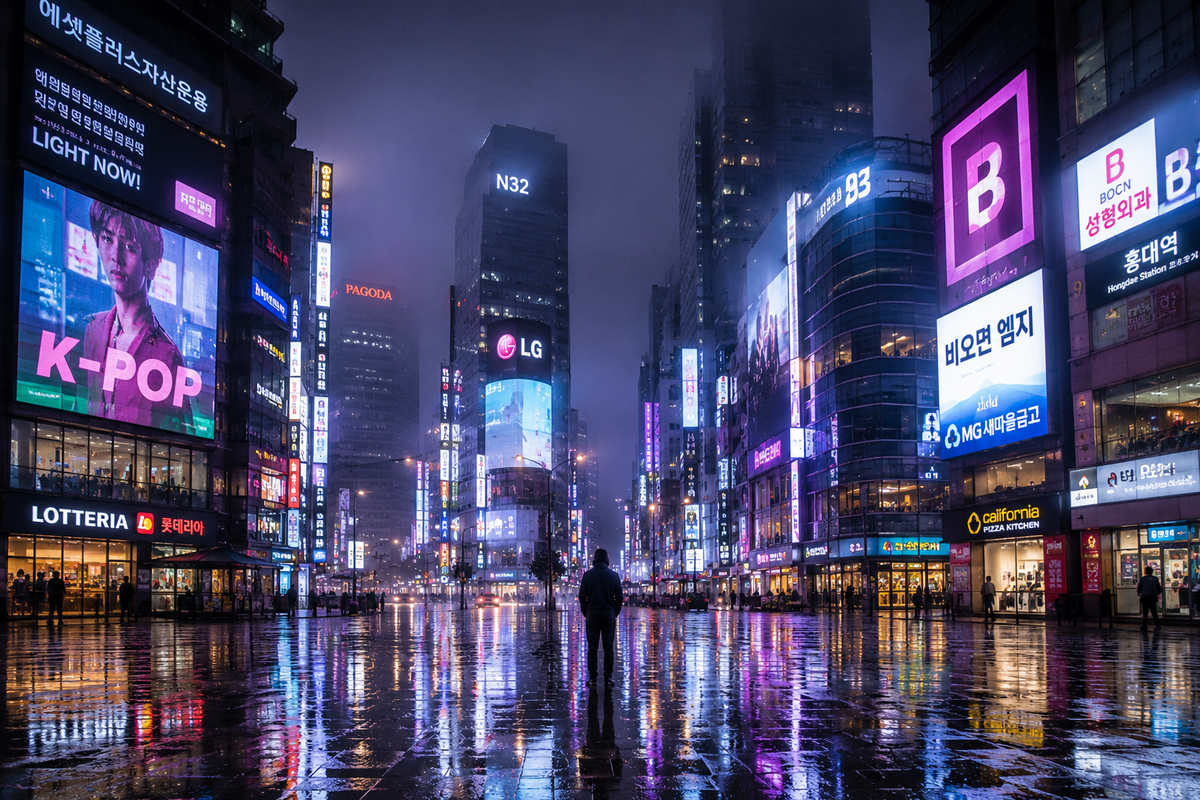
I have an image I took in Seoul that’s full of neon signs, towering buildings, and the usual visual clutter of a busy city. Yet there’s a single person standing at the bottom of the frame, and despite everything happening around them, the feeling of loneliness remains incredibly strong.
So how was that achieved?
It all comes down to subject placement. If I had placed the person in the very centre of the frame, they would have become the dominant subject. Instead, I tilted my camera upwards to capture the immense scale of the surrounding buildings. By placing the person in the bottom third, they’re dwarfed by everything around them, instantly making them feel more isolated and vulnerable.
So if you want to communicate scale, don’t be afraid to include multiple elements within your frame. Just remember that where you place your subject ultimately determines what your photograph is really about.
Elevate Your Photography with Our Advanced Software
Example 3: Leading Lines
My Seoul photograph is actually a combination of multiple examples because it also makes use of leading lines. The street naturally guides your eye towards the imposing building dominating the scene. There’s something incredibly satisfying about seeing a path placed centrally, drawing your attention all the way through the image.
You can recreate this effect with rivers, valleys, railway tracks, bridges, or anything else that naturally guides the viewer through the frame.
It’s especially effective if there’s a subject waiting somewhere along the path or at the very end of it. This gives the eye somewhere to settle after travelling through the composition. Think of a river leading directly towards a mountain or a bridge guiding you towards an interesting building.
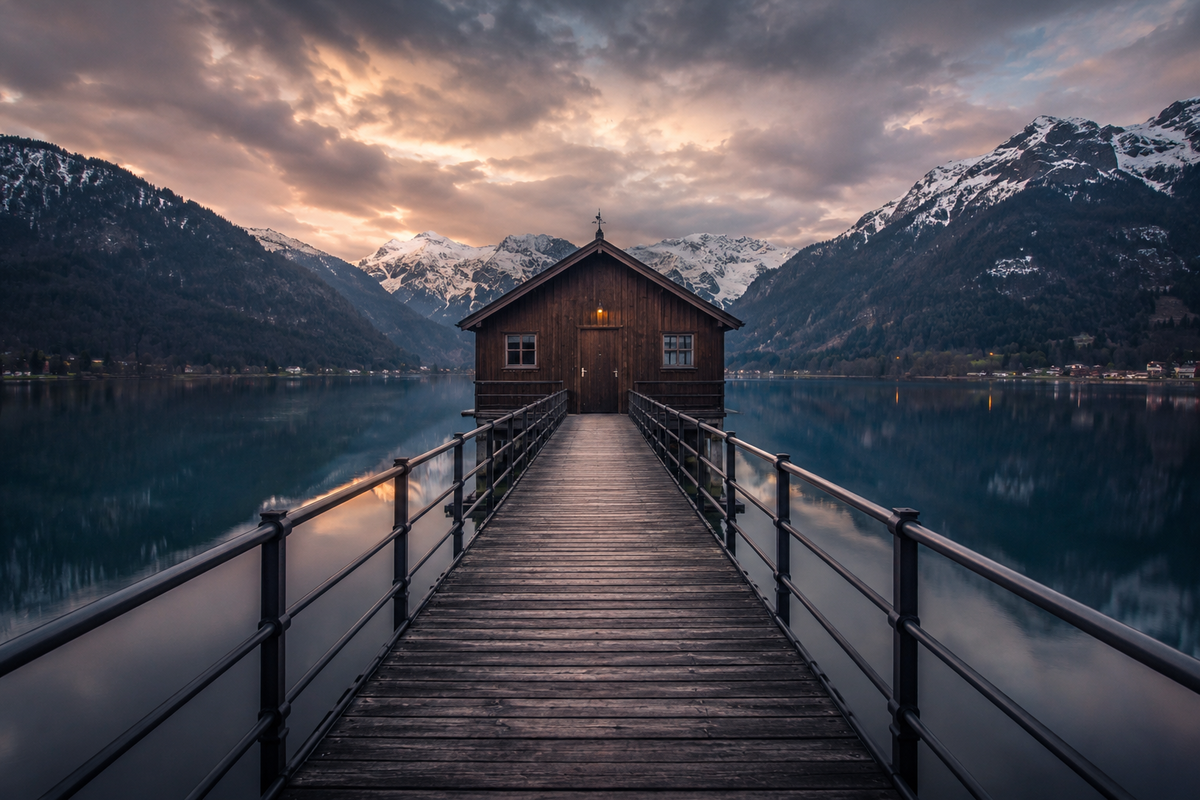
It’s such a simple but highly effective compositional technique, and it works beautifully alongside the previous examples.
Editing Your Central Composition in Luminar
There are a few useful tools inside Luminar that can help you get the most from your central compositions.
Crop AI: Start by making sure your composition is properly aligned. Using the Crop tool first allows you to visualise the finished image before making any edits. You can also reposition your subject, whether you want them perfectly centred or placed in the bottom third to help communicate scale and isolation.
Vignette: One of the simplest ways to draw attention towards your subject is with a subtle vignette. Darkening the corners naturally keeps the viewer’s attention in the centre of the frame, making it particularly effective for reflections and centrally placed subjects. A little goes a long way here.
Dodge and Burn: Another effective technique is using Dodge and Burn. I often darken the foreground slightly using the Burn tool to encourage the eye to travel deeper into the scene. I then use Dodge sparingly to brighten my subject, helping direct attention exactly where I want it.
Light Depth: Another excellent option is Light Depth. This tool allows you to relight your scene naturally by working with a 3D map of your image. You can guide the light precisely towards your subject while independently brightening or darkening the foreground and background. In many situations, this can replace the Burn tool altogether by subtly darkening the foreground and naturally leading the viewer’s eye through the photograph.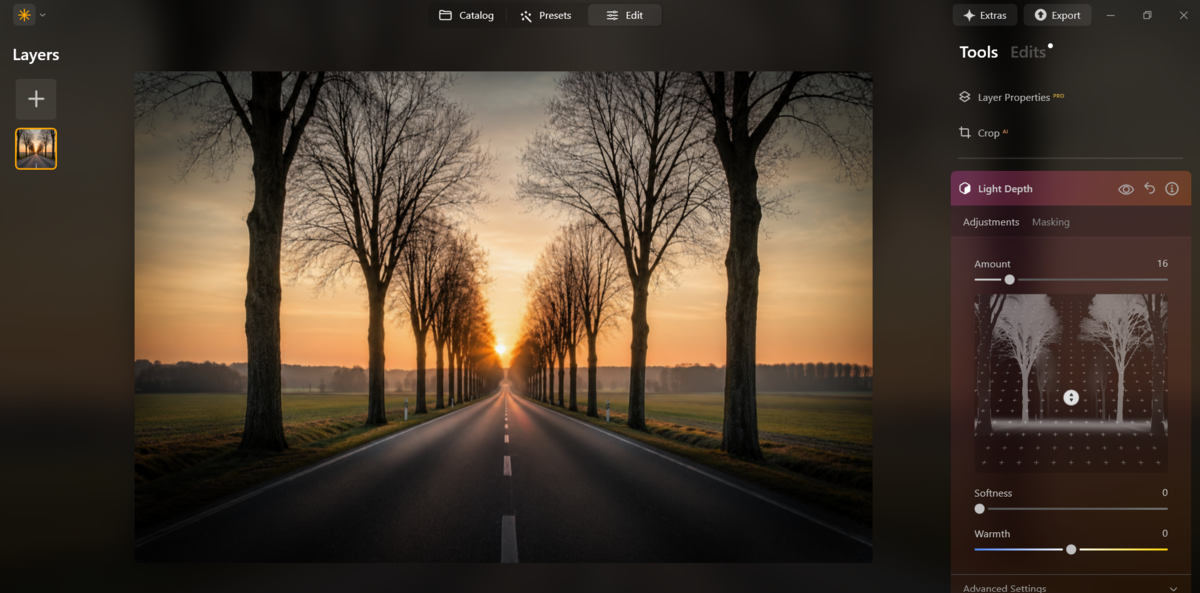
Your AI-Powered Photo Editor for MacOS and Windows
The Bottom Line
Central compositions don’t have to be boring. They can be impactful, simple, and incredibly effective at strengthening both your storytelling and the overall mood of your photographs.
Try experimenting with reflections, lone subjects, and leading lines, or even combine all three to create images that immediately draw attention to your subject.
Have fun!