Discover how proof prints are transforming workflows by providing a quick and clear overview of multiple images in a single, easy-to-view format. The introduction of roll film in 1884 changed photography forever, making it accessible to everyone. Now it was possible to grab a small camera, take a few snapshots, and then take them to […]
Discover how proof prints are transforming workflows by providing a quick and clear overview of multiple images in a single, easy-to-view format.
The introduction of roll film in 1884 changed photography forever, making it accessible to everyone. Now it was possible to grab a small camera, take a few snapshots, and then take them to a photo lab. It took only a few hours from the click of the shutter to the finished print. But how did photographers of that era know if a shot had turned out well?
Before the advent of the contact sheet, they simply hoped for a miracle. The grid of miniatures didn’t appear until 1920 and became one of the most significant milestones in the history of photography, one that can still be seen today.
Don’t feel like reading the whole breakdown right now? Here’s a tighter, more practical summary of what actually changed.
Key Takeaways
- Contact sheets simplify photo selection and organization. By displaying an entire shoot as a grid of thumbnails, photographers can quickly review composition, sharpness, and exposure without opening every image individually.
- Created for film photography, contact sheets remain useful today. Modern digital galleries follow the same principle, helping photographers sort, compare, and manage large image collections more efficiently.
- Grid layouts help preserve the narrative of a photo series. Viewing images together makes it easier to spot visual patterns, maintain consistency, and arrange shots into a stronger sequence.
- Traditional darkroom contact sheets required precise manual work. Film negatives were placed directly onto photographic paper, exposed to light, and chemically processed to create a full-sheet preview.
- Modern editing software automates the entire process. Programs like Photoshop, Lightroom, and Luminar Neo can generate digital contact sheets within minutes using built-in layout tools.
- Contact sheets remain a professional standard in photography. From commercial shoots to fashion editorials and archival work, they continue to help photographers stay organized while protecting previews from unauthorized use.
What is a Contact Sheet in Photography?

A contact print serves as the primary tool for visual sorting in traditional film photography. To create one, developed negatives are pressed firmly against photographic paper and briefly exposed to light. The resulting 8×10-inch overview sheet clearly brings together the frames from the entire roll, letting the photographer quickly assess the results of their work.
Using a magnifying lens, the photographer could comfortably examine the exposure and sharpness of each shot. Afterward, the photography contact sheet was treated as a working draft: using a marker, the frames were categorized as rejected, successful, or requiring further work.
Modern galleries on your iPhone basically perform the same function. They have retained the same display format, but now, to weed out failed shots, you don’t have to spend 20-30 minutes preparing a contact sheet. It’s enough to simply swipe a failed shot into the trash with a single finger swipe, instantly freeing up space for new shots.
Perfect Your Images with the Photo Correction Tool
Using Contact Sheets

Contact sheets haven’t gone anywhere in the modern era. They’re just now created on computers as digital grids of previews. Grid layouts of frames are widely used by photographers on commercial shoots, by picture editors at magazines, and by directors during storyboarding.
Owners of the latest cameras from Sony, Canon, Panasonic, and other mirrorless cameras use contact sheets to save time and maintain creative discipline. A single photo shoot can yield over a thousand different images. Viewing them one by one is practically torture for the eyes. A contact sheet, however, lets you see the entire photo session at a glance on a single screen and solves a whole range of problems.
- Overwhelming clients with large files. If you make a living as a photographer, sending a digital contact sheet makes life much easier for your clients. They don’t need to download gigabytes of raw or JPEG source images: they can simply select a few shots from the sheet.
- Loss of series context. When viewing photos one by one, it’s easy to miss the overall atmosphere. A grid view shows the entire story of the shoot, helping to establish the correct narrative sequence. This also helps group several shots with identical shooting conditions if you decide to use a batch photo editor in the future.
- Protection against unauthorized use. If you send a client full-size previews, there is a risk that they will take them without paying. The small size of the images on the contact sheet physically prevents them from being used elsewhere before the final version is approved.
Although contact paper may be a relic of the past, it is still widely used in various areas of photography. Analog photographers use it to create handmade art pieces, appreciating the unique texture and charming imperfections of hand-printed photos. Advertising and fashion shooters use it to make vintage mood boards and design physical portfolios. It’s a simple yet striking technique that can leave a lasting impression. But how to create a contact sheet?
Your AI-Powered Photo Editor for MacOS and Windows
Creating Contact Sheets Manually

To create a contact sheet by hand in a darkroom, the lights are turned off, leaving only a red lamp on. The developed roll is cut into short strips: narrow 35mm film is divided into sections of 5-6 frames, and medium-format film into sections of 3-4 frames. The strips are laid out with the matte side down on a sheet of 8×10-inch photographic paper.
To prevent the miniatures from blurring, the negatives are pressed firmly against the paper with a heavy glass plate or secured in a special frame. The enlarger lamp is adjusted in height so that the light beam completely covers the working area. The photographer selects the aperture value in advance to provide even and high-quality exposure across the entire surface.
For accuracy, a test exposure of fragments is first performed using cardboard. Once the ideal exposure time is determined, the final beam of light is passed through the entire series of films. The paper is then immersed in trays of chemicals to develop and fix the images. Finally, the finished print is thoroughly rinsed with water and dried.
Digital Methods for Contact Sheets
The modern process of creating contact sheets has gone entirely digital, allowing photographers to instantly generate a grid of thumbnails from RAW files using professional software. Below is a step-by-step guide on how to make a contact sheet using Lightroom, Photoshop, or other advanced editing software.
Using Photoshop for Contact Sheets
Adobe products, particularly Photoshop, include built-in tools that help simulate film effects. These can include special photo filters, a gradient that creates a fade effect, or the “Contact Sheet” tool when working with contact sheets.
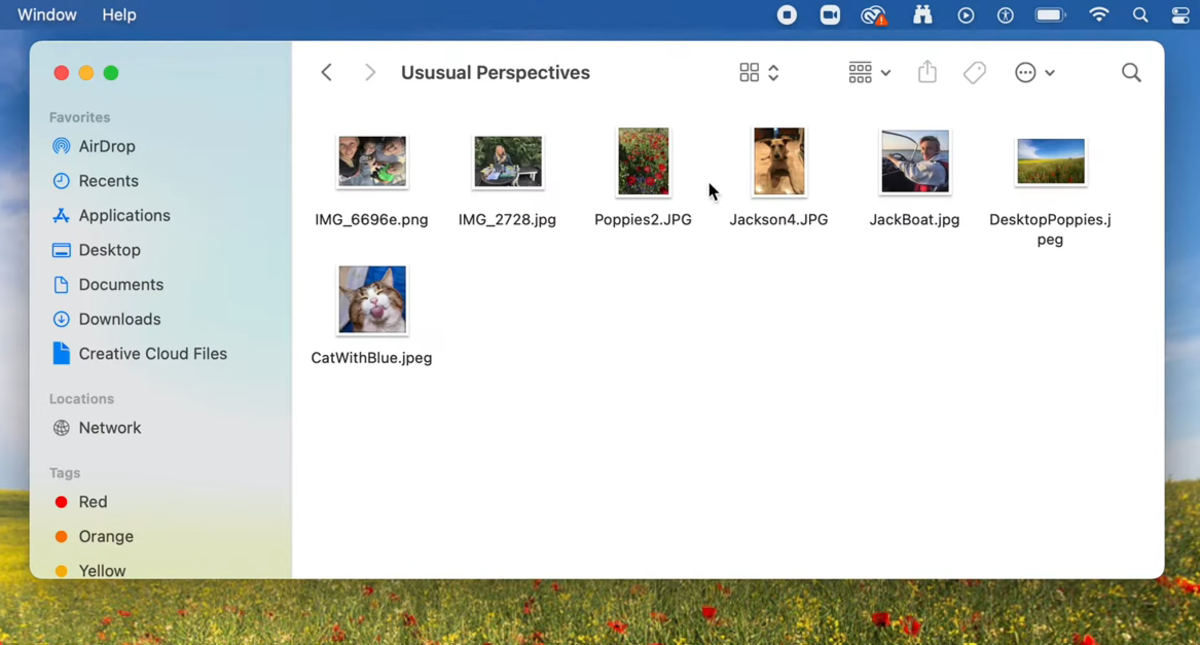
- Select your photos. Choose a few well-lit, high-quality shots and place them in a separate folder.
- Quick processing. In the “File” menu, locate the “Automations” option. The feature that simulates a contact sheet is located here.
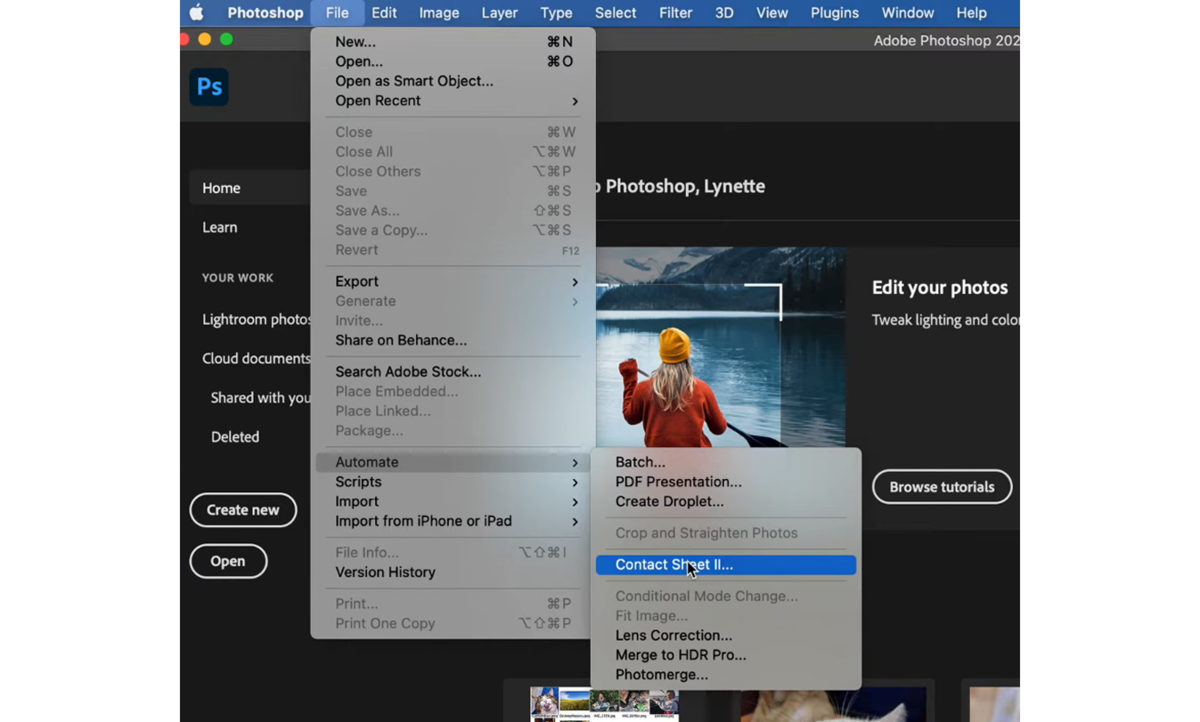
- Selecting the workspace. The menu that appears will contain various options, but at this stage, you only need the “Source Images” section. Click the “Browse” button, then select the photos you chose earlier.
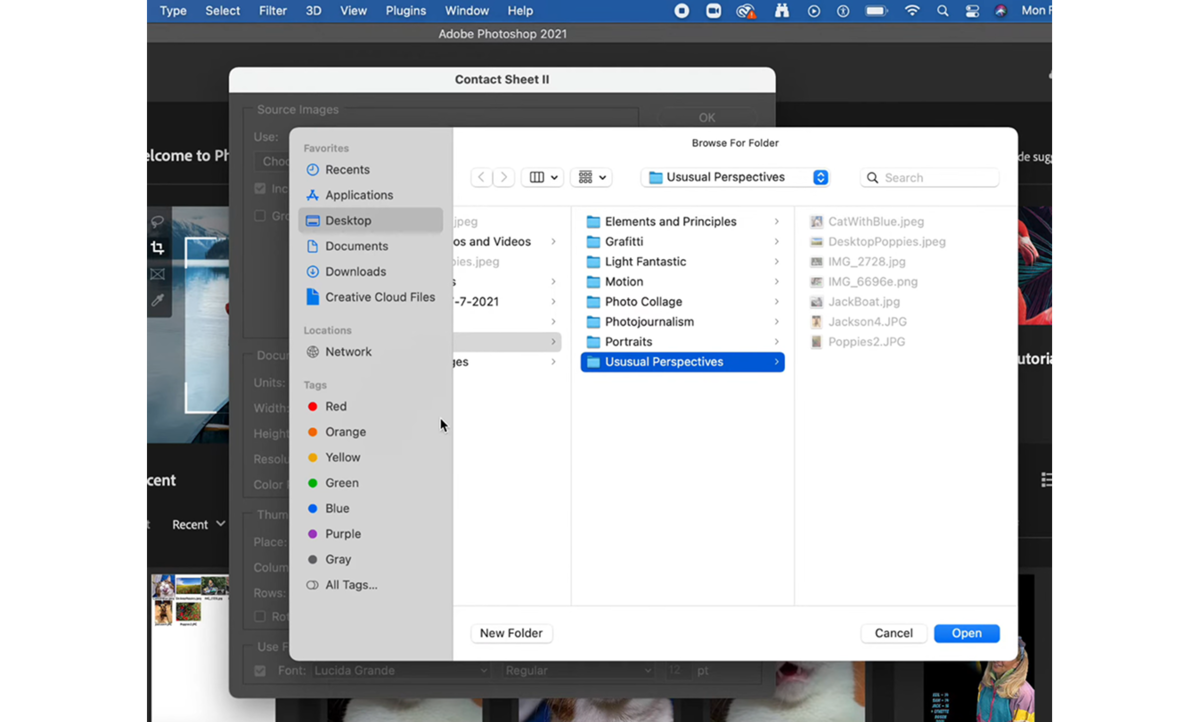
- Document settings. The section of the same name contains settings for size and color data. You can set an automatic interval or disable automatic rotation so that the images don’t change position without your permission.
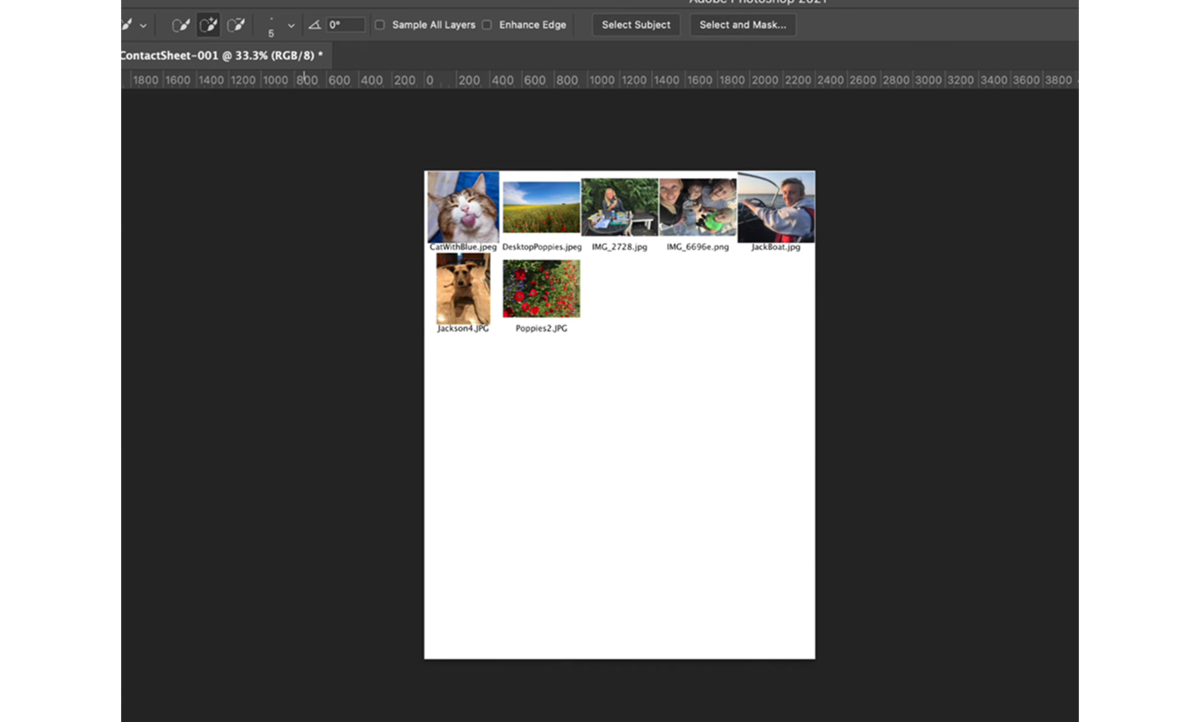
- Finishing. Confirm your actions and wait while Photoshop creates the contact sheet. The software can create multiple pages at once if required.


Since there is a dedicated tool for creating a thumbnail grid, it takes no more than a few minutes to generate one.
Utilizing Lightroom for Contact Sheets
In this case, there is no separate function for generating a contact list. However, when printing, you can select the appropriate layout style. To do this:
- Select your photos in advance. Just as with Photoshop, you should make sure to select high-quality photos beforehand.
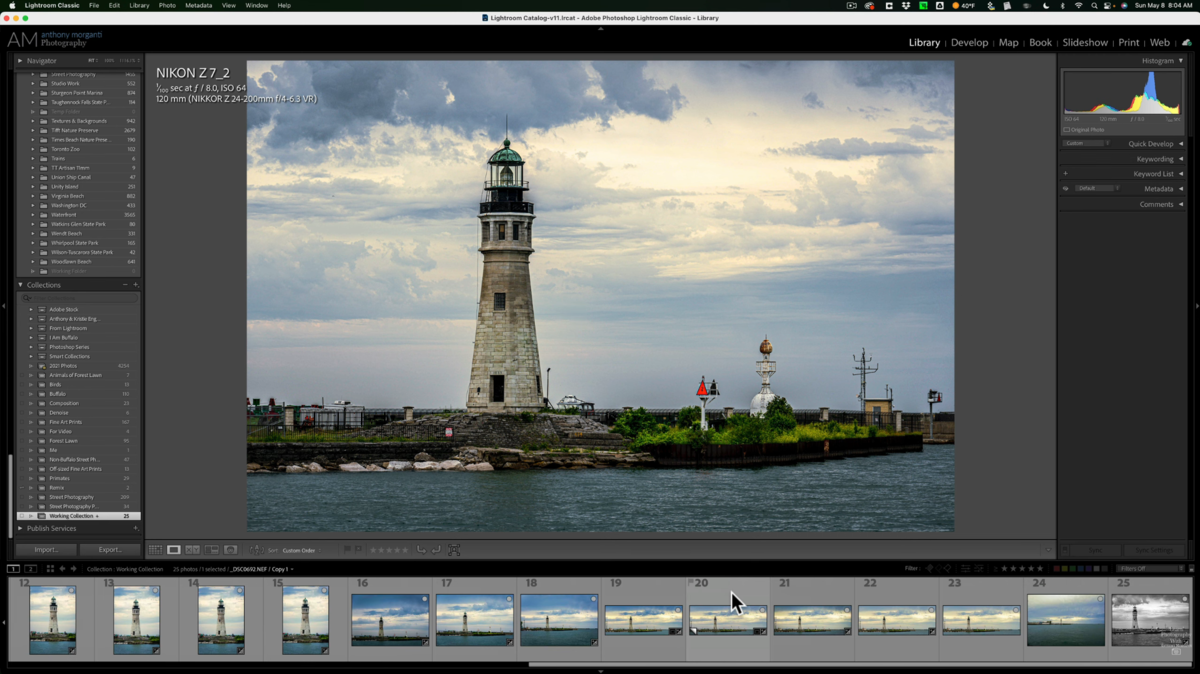
- Switch to Print Mode. Select the Print Mode option in the upper-right corner. It may be hidden by default, so you’ll need to click the triangle to expand it.
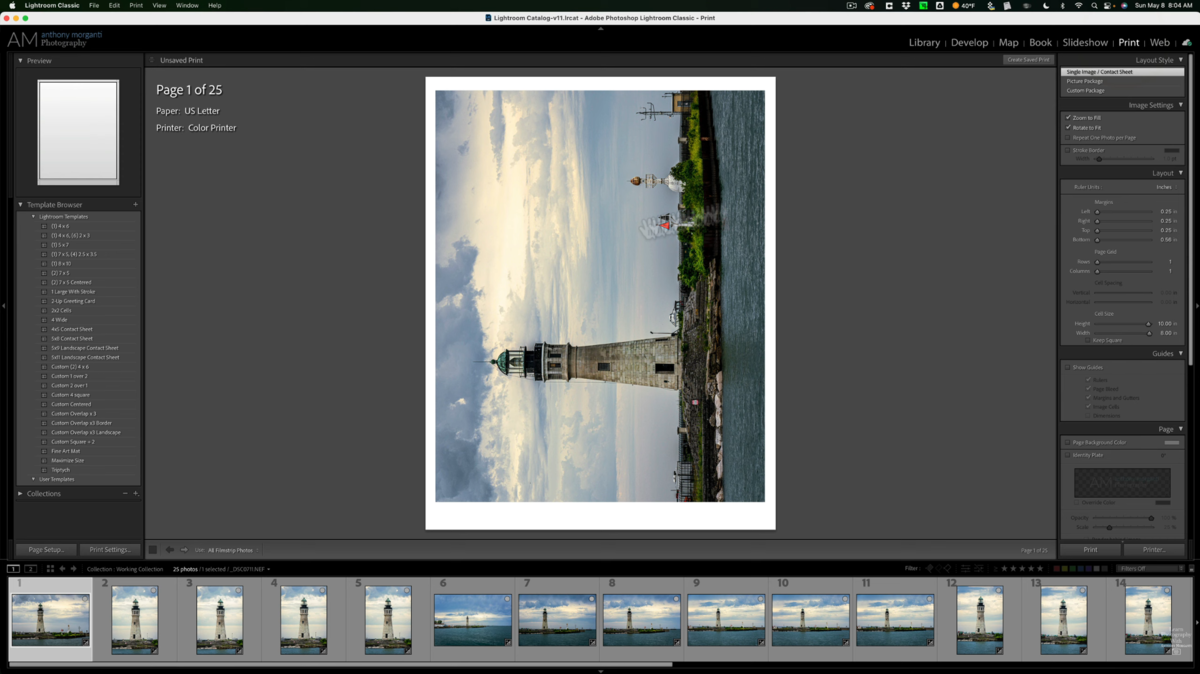
- Select a layout. In the “Layout Style” tab, select the “Contact Sheet” option. In some versions of Lightroom, you might see “Single Image” next to it—don’t panic, that’s exactly what you need.
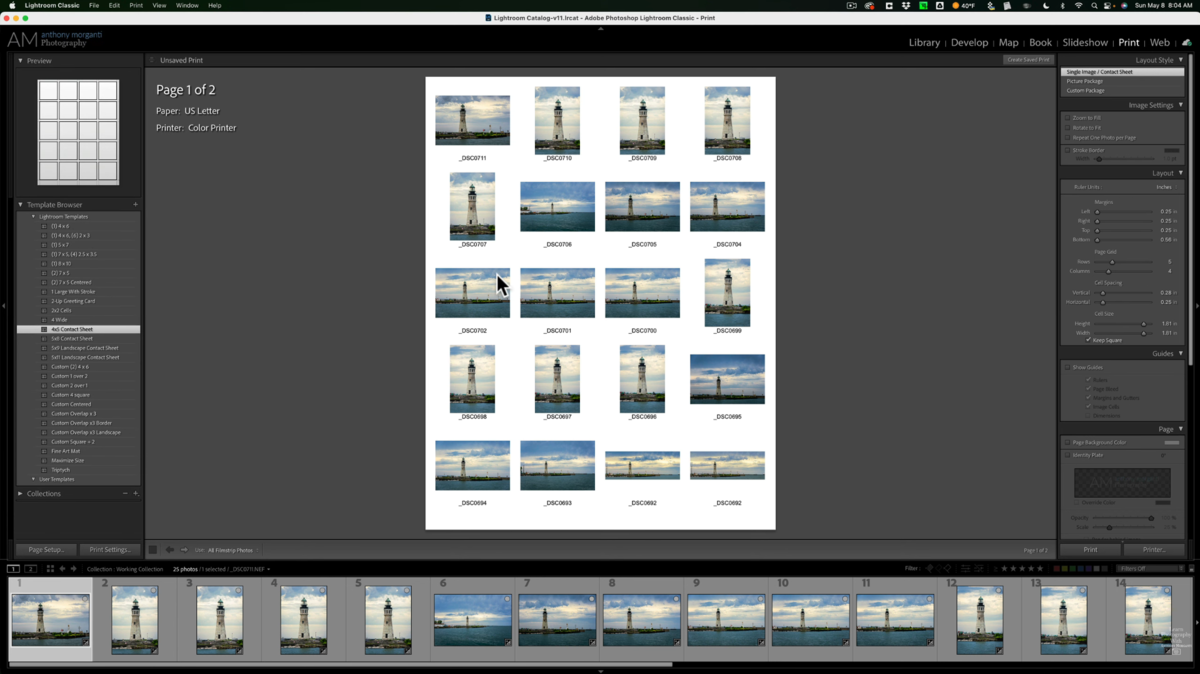
- Configure print settings. In the page settings, you can adjust the orientation of the contact sheet. However, to select the input type, resolution, and other details, you’ll need to go to Windows settings.
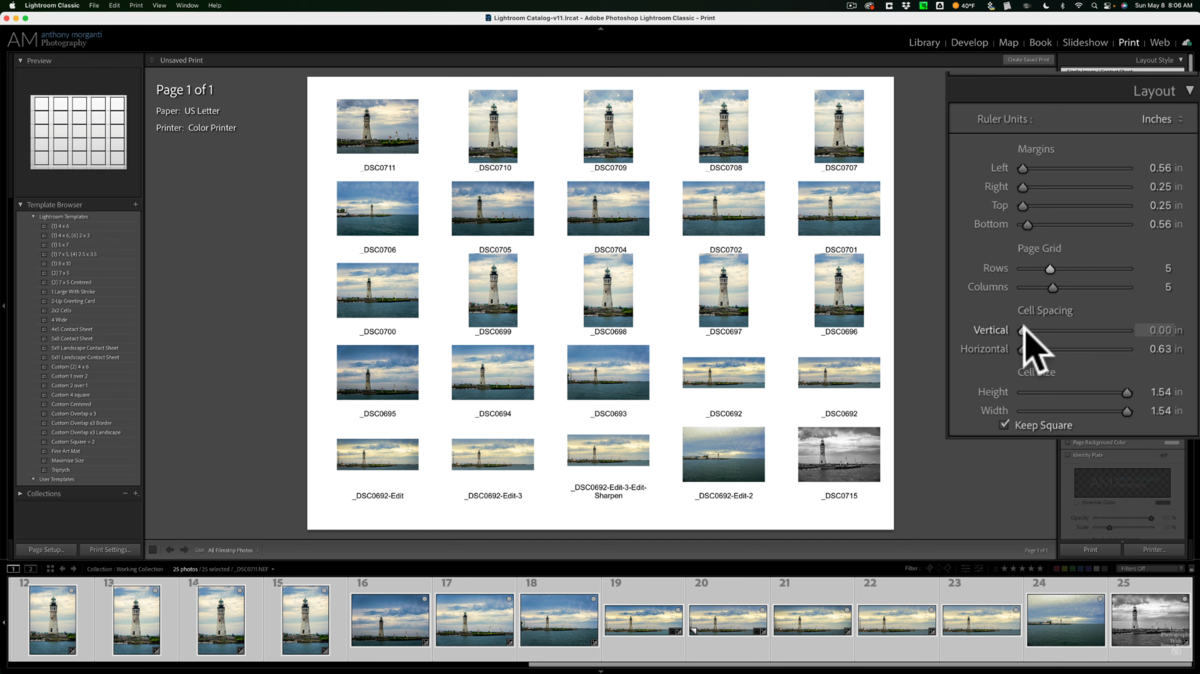
- Additional information. Add filenames or other information in the “Page” section. This is optional, but if you’re processing a lot of images, it will make it easier to navigate the catalog.
- Last touches. If you click the “Select All” button, the editor will automatically add every image from your collection. If there isn’t enough space on a single sheet, multiple sheets will be created.
- Finishing up. Go to the “Save As” section and select one of the formats. You can send the generated sheet to print from this same section by selecting the appropriate sub-item.


Creating contact sheets in Lightroom takes a little longer. However, unlike Photoshop, Capture One, Luminar, or other photo editors, the range of file formats available when saving will be limited. Even in the latest versions of Adobe Lightroom, only basic file formats such as JPEG, TIFF, PNG, DNG, and a few others are available.
Alternative Software Options
Creating a contact sheet couldn’t be easier, no matter which tool you use. If Adobe’s options don’t suit you, you can use Luminar Neo, where creating a thumbnail grid takes just three steps. Simply add photos to the library, press “Ctrl + P,” and select “Contact Sheet.” The settings can be adjusted immediately after the software arranges the selected photos.
Summary and Final Thoughts
What is a contact sheet in photography? It’s a tool that has been helping photographers around the world for over a century. Whether in analog or digital format, it frees the photographer from disorder, protects intellectual property, and elevates client communication to a professional level. It is an indispensable standard for those who are accustomed to thinking in sequences rather than individual shots.