Discover the simplest steps for taking stunning panoramic photos on your iPhone, transforming everyday scenes into breathtaking wide-angle memories with ease.
In 2026, wide-angle shots are used everywhere. These can be found when searching for rental properties, on hotel and restaurant websites, and on news sites. But what makes them special, and how can you take similar photos with an iPhone? Let’s take a closer look.
Don’t feel like reading the whole breakdown? We’ve pulled together a quick summary below.
Key Takeaways
- Process mechanics. iPhone panorama mode captures a continuous video sequence and stitches it into a single frame in real time, with the processor automatically correcting lighting and geometry to provide a seamless result.
- Preparation steps. Clean your lens thoroughly to avoid streaks, lock focus and exposure to maintain consistent tones across the scene, and hold the phone steadily at chest or eye level.
- Technique for quality. Rotate your body rather than just your hands to prevent distortion. For tall subjects like skyscrapers or mountains, shoot in portrait orientation, panning from the bottom up.
- Managing limitations. Note that standard iPhone panoramas are limited to 240 degrees and are not captured in RAW. To achieve a 360-degree shot or higher-quality RAW panoramas, use third-party applications or desktop stitching tools.
- Post-processing for impact. Since panoramic shots can suffer from warping or exposure imbalances, use AI-powered editors to correct horizons, remove unwanted moving objects, and enhance microcontrast and landscape depth.
Panoramic Photography on iPhone

First, what is a panorama in a camera? Even though this feature was introduced back in 2012, many iPhone users still don’t fully get how it works. When you switch your smartphone to “panorama” mode and smoothly pan from left to right, the camera doesn’t take a single photo. It continuously records high-quality video, which it then uses to create a large-format image.
As you rotate your phone around its axis, the edges of the image begin to curve. Apple’s processor “straightens” each video strip in real time so that they can be stitched together later. The lighting in the frame is also adjusted, of course, because without this, noticeable color spots could form at the seams. The smooth transition in the micro-frames’ shapes creates the “seamless” effect.
Professional Editing. Now in Your Pocket.
Download Luminar on your Mobile Device
Preparing Your iPhone for Panoramic Shots

Taking a photo in “panorama” mode requires almost the same preparatory steps as taking a regular photo. Just do the following:
- Wipe the lens. When taking a photo, any grease or debris will appear as an elongated line. It’s best to use a microfiber cloth for cleaning, but if you don’t have one, the hem of a T-shirt will do in a pinch.
- AE/AF lock. If you do not set a fixed value for focus and exposure, different parts of the frame may have different tones. Point the camera at a subject with average lighting. Tap and hold the screen until “AE/AF Lock” appears at the top.
- Change the direction of movement. Everyone knows how to take a panoramic photo. Move smoothly from left to right. To reverse the direction, tap the white arrow on the screen or change it in settings.
All that’s left is to get yourself ready. Find a position where you can hold the phone steadily. It’s best to press your elbows against your body and hold the phone with both hands at chest or eye level.
Step-by-Step Guide to Taking Panoramic Photos
The steps required to create a panorama change from time to time. Below are instructions for the latest version of iOS, version 26.
- Open the camera. Use the built-in “Camera” app on your iPhone. If you’re using a third-party app, the steps may vary.
- Switch to the desired mode. Swipe left on the mode selection bar until you switch to “Panorama” (or PANO).
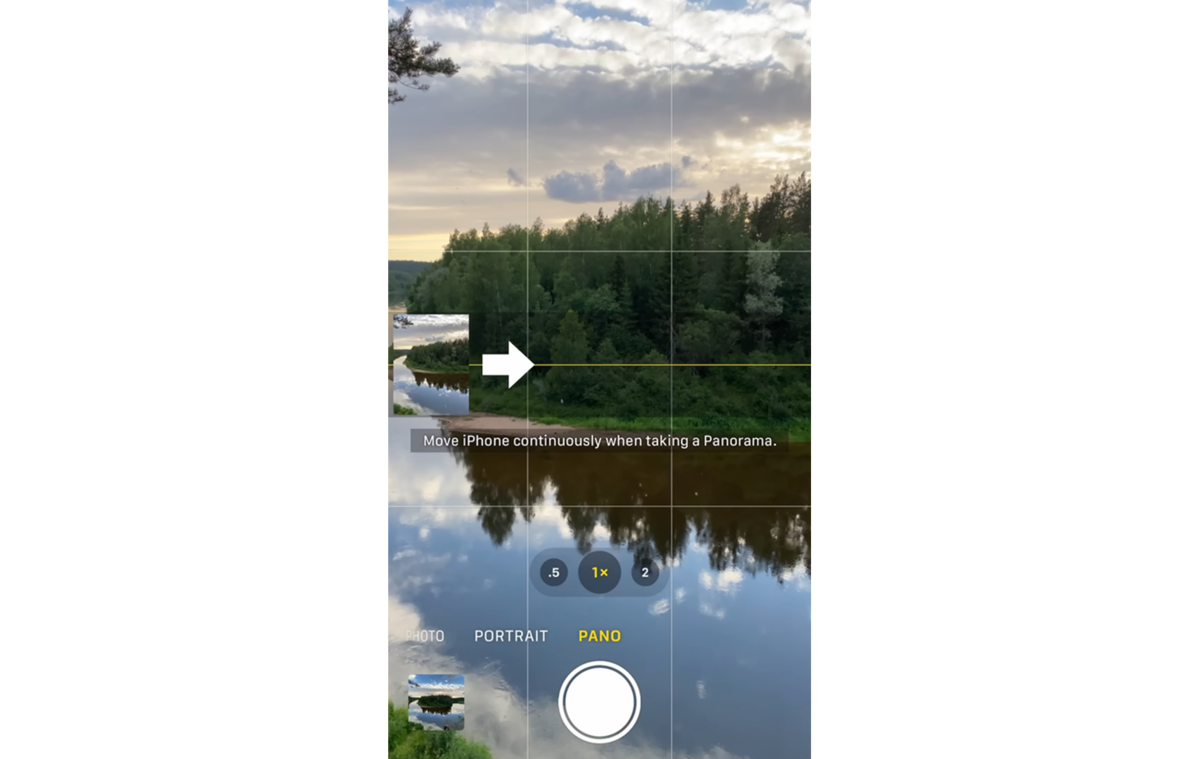
- Start taking pictures. Point the lens at the starting point of the scene, then press the shutter button or use the “Camera Control” button, if available on your iPhone model.
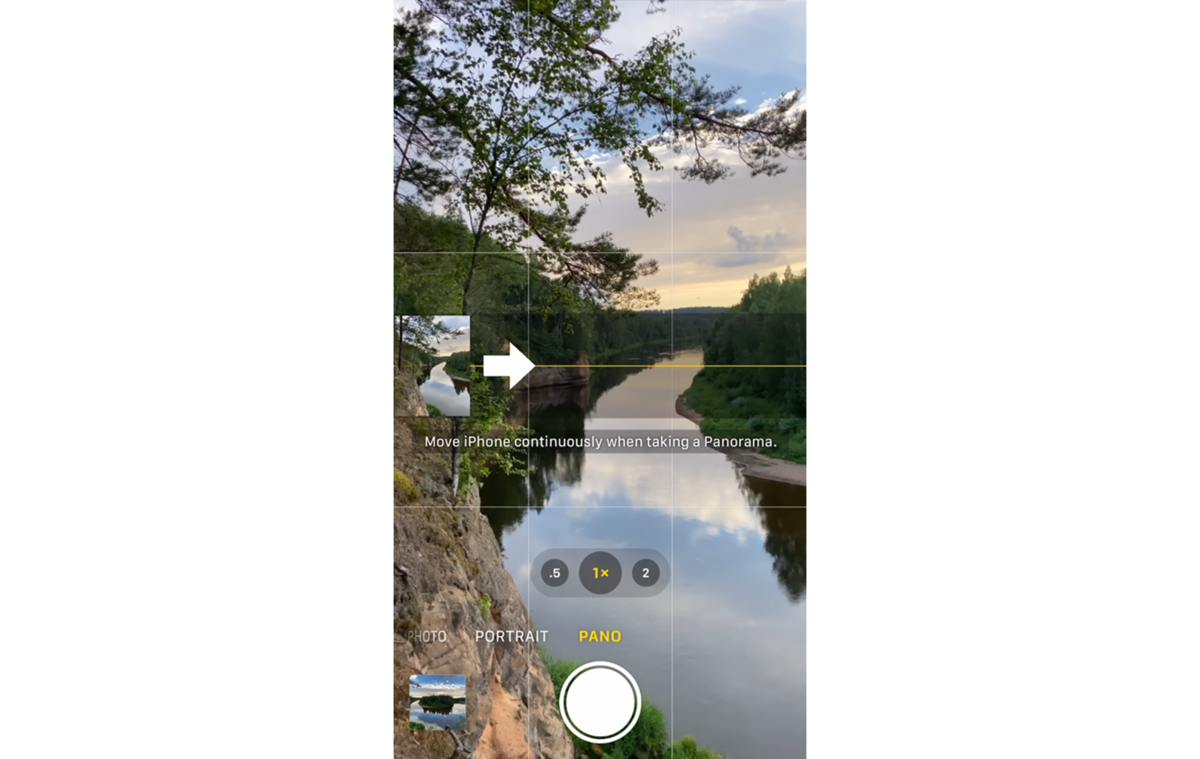
- The shooting process. Slowly and smoothly move your iPhone in the direction of the arrow. The core is to keep the tip of the arrow strictly on the central yellow line.
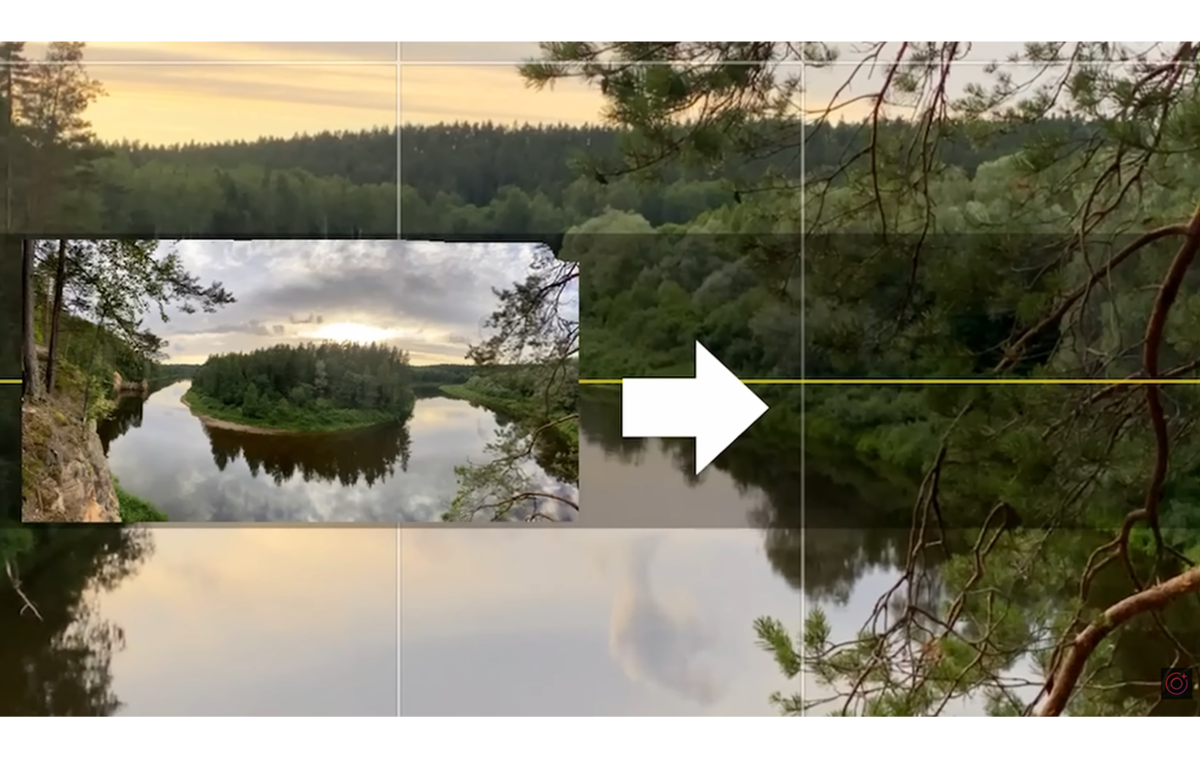
- Finish the shot. Press the shutter or “Camera Control” button again to stop. Recording also ends automatically at the boundary strip’s edge.
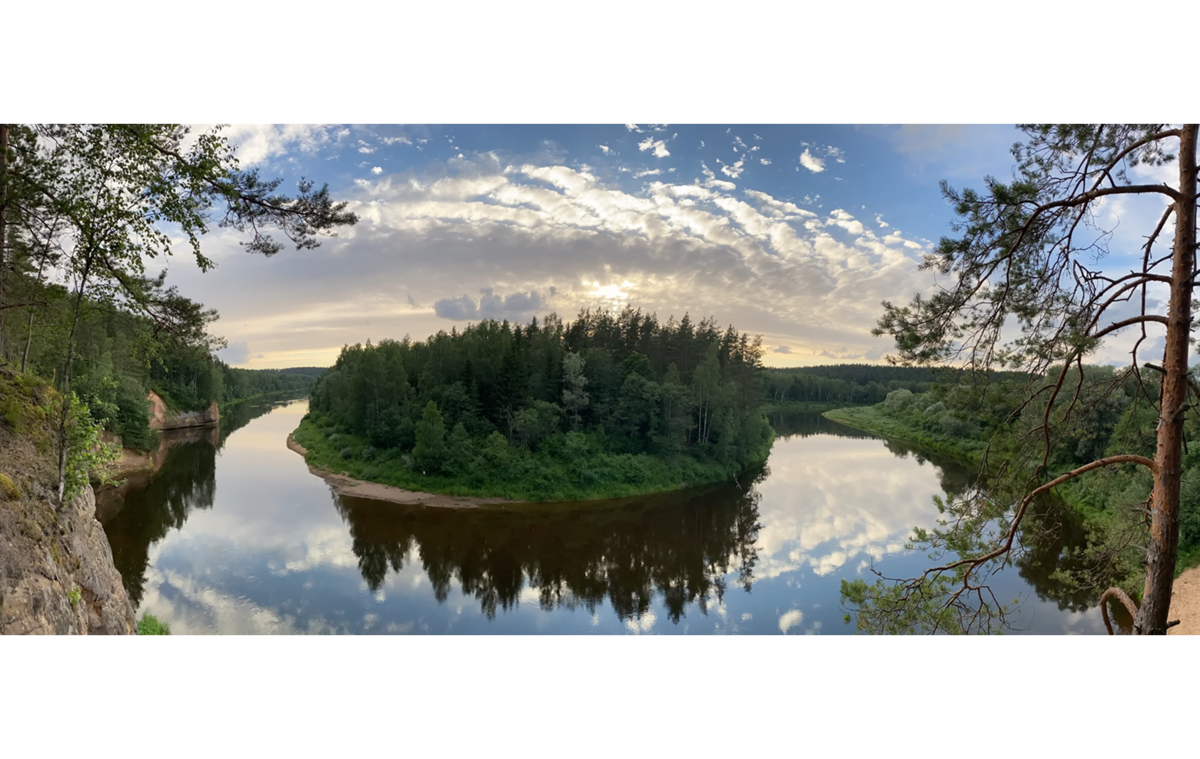


When taking photos, try to rotate the body of the phone rather than your hands holding it. This will help prevent distortion and blurring at the edges.
Tips for Capturing Better Panoramas

To make panoramic shots look their best, a photographer needs to skillfully navigate the limitations of the mode.
- Photographing tall subjects. In panorama mode, frame height remains unchanged. To capture tall objects like mountains or skyscrapers, rotate your phone horizontally and shoot from the bottom up.
- Rotary shooting. Many people wonder how to take a 360 photo on an iPhone, because standard panning won’t let you complete the full circle. The standard Camera app limits panoramas to 240 degrees. To capture a full 360-degree photo, download the free “Panorama 360” app.
- Forced cropping. To shoot a shorter panorama, move the camera smoothly to the left. This prevents zigzag lines from accidental shaking before the shot finishes.
If you have an Instagram account, you can split your panorama into three parts. Upload them as separate posts one by one, starting with the one on the far left. The result will be a unique carousel that can improve your profile.
Common Issues and How to Fix Them
Problems with panoramic photos occur regardless of the smartphone you choose. As a rule, these are specific technical issues related to the stitching algorithm or to mistakes made while operating the camera.
| Issue | Cause | How to Fix |
| Warped horizons and lines | Tilting the phone up or down, or objects being too close to the lens | Keep the arrow strictly on the center line. Step further back from foreground objects |
| Choppy stitching and jagged edges | Panning too fast or shifting your speed abruptly | Move the camera slowly and evenly. Use a tripod for perfect results |
| Extremely narrow, stretched image | Panning for too long (the camera reduces frame height relative to total length) | Stop shooting earlier. Aim for a width equal to two or three standard photos |
| Blurry or out-of-focus areas | Camera shake, a dirty lens, or the camera refocusing mid-shot | Wipe the lens. Tap and hold the screen before shooting to lock focus and exposure |
As the descriptions make clear, to fix these issues, you’ll need to retake the photo—or… you can use an advanced photo editor like Luminar Mobile. If a moving person is in the frame, their body will be severely distorted. Using the “Erase AI” tool, you can remove them without affecting the rest of the image.
The “Details” slider and the “Structure AI” module will help restore microcontrast and sharpness in areas where slight blurring has occurred due to camera shake. These can also be removed by cropping if the affected area is at the edge of the image. Using “Crop,” you can also straighten a tilted horizon in just a few clicks.
Editing and Enhancing Panoramic Images on iPhone
Every photographer knows that RAW files are best for editing. The only problem is that when using the standard “panorama” mode, you can’t save the files in their uncompressed format. The only way for owners of models with the “Pro” designation to get a wide-angle photo in RAW format is to take a series of small frames and then stitch them together using a third-party tool.
If you have a computer, you can use the full version of Luminar Neo. It includes the “Panorama Stitching” feature, which stitches together a series of photos, corrects distortions, and preserves maximum resolution all at once. For those who edit photos exclusively on their phones, you’ll have to make do with Bimostitch, Autostitch, or PanoStitcher.
They’ll do the job well, but they won’t be as flexible in terms of customization as a full-fledged desktop editor. Once you’ve finished preparing the source file and are ready to get creative, it’s time to export the frame using other features in the Luminar editor.
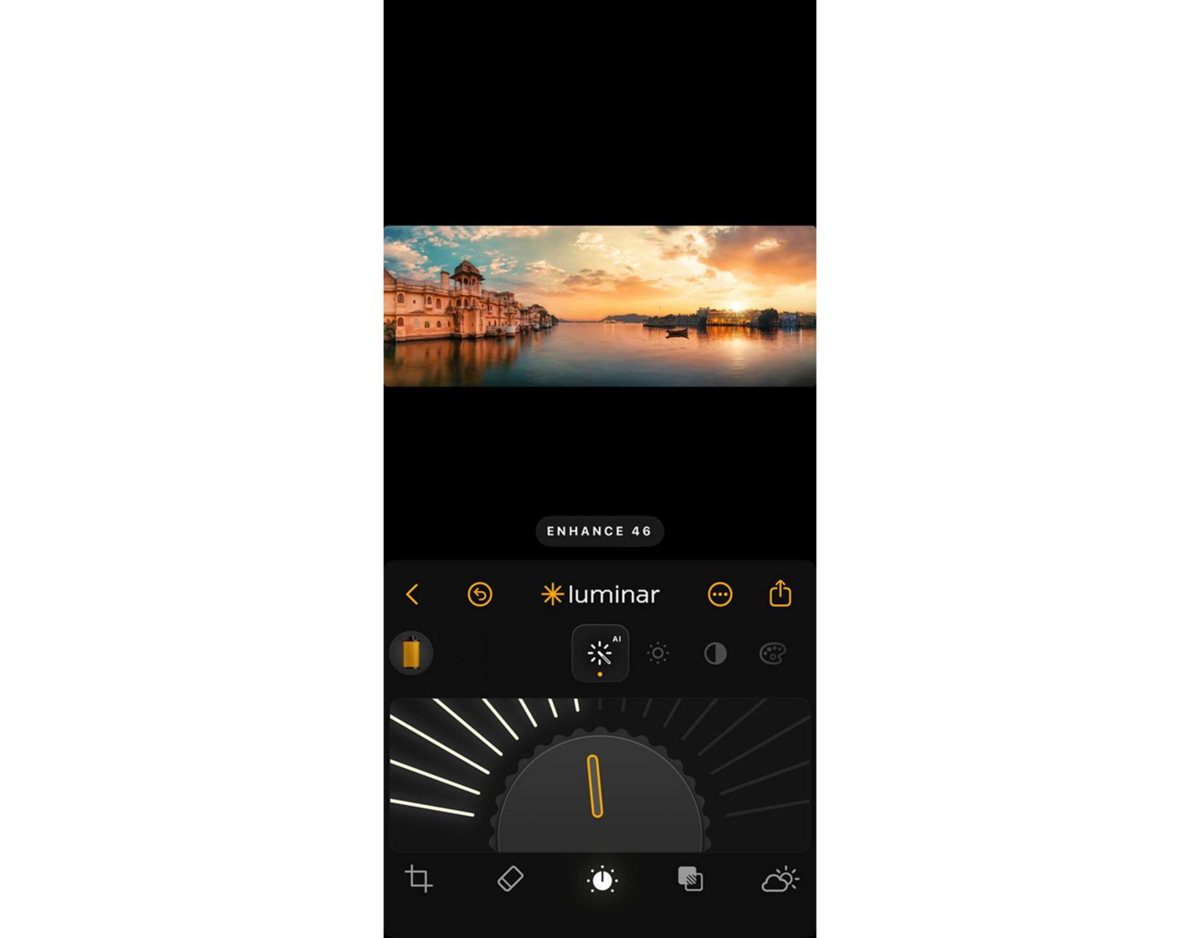
- Exposure Balancing. The “Enhance AI” tool analyzes the ultra-wide-angle shot, identifying areas that are overexposed or underexposed. It brings out details, resulting in softer tones and more natural contrast.
- Separating Planes. Use “Relight AI” to artificially adjust the lighting in the foreground and background. Make the foreground slightly warmer and brighter, and the background cooler. This will visually separate the layers of the landscape.
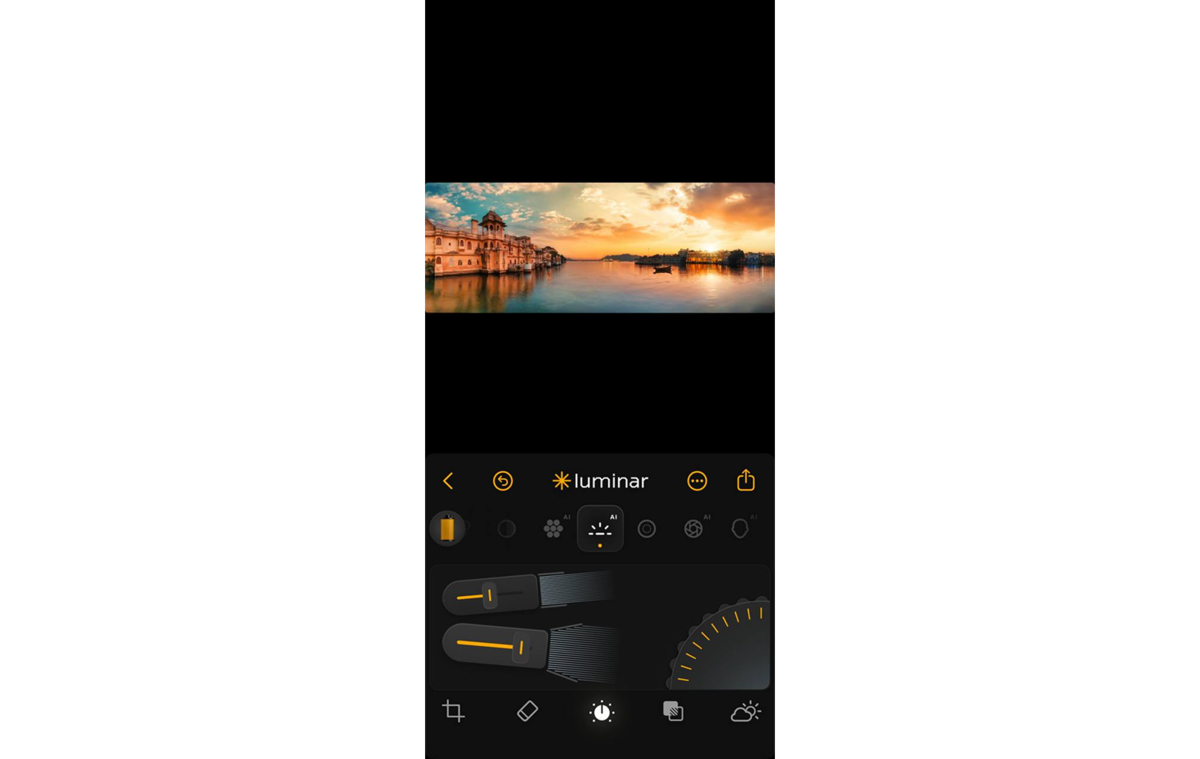
- Vignetting. Panoramas can contain a great deal of detail, making it difficult to draw the viewer’s attention to a specific area. Using vignetting or bokeh, you can soften the edges, making the composition more focused.
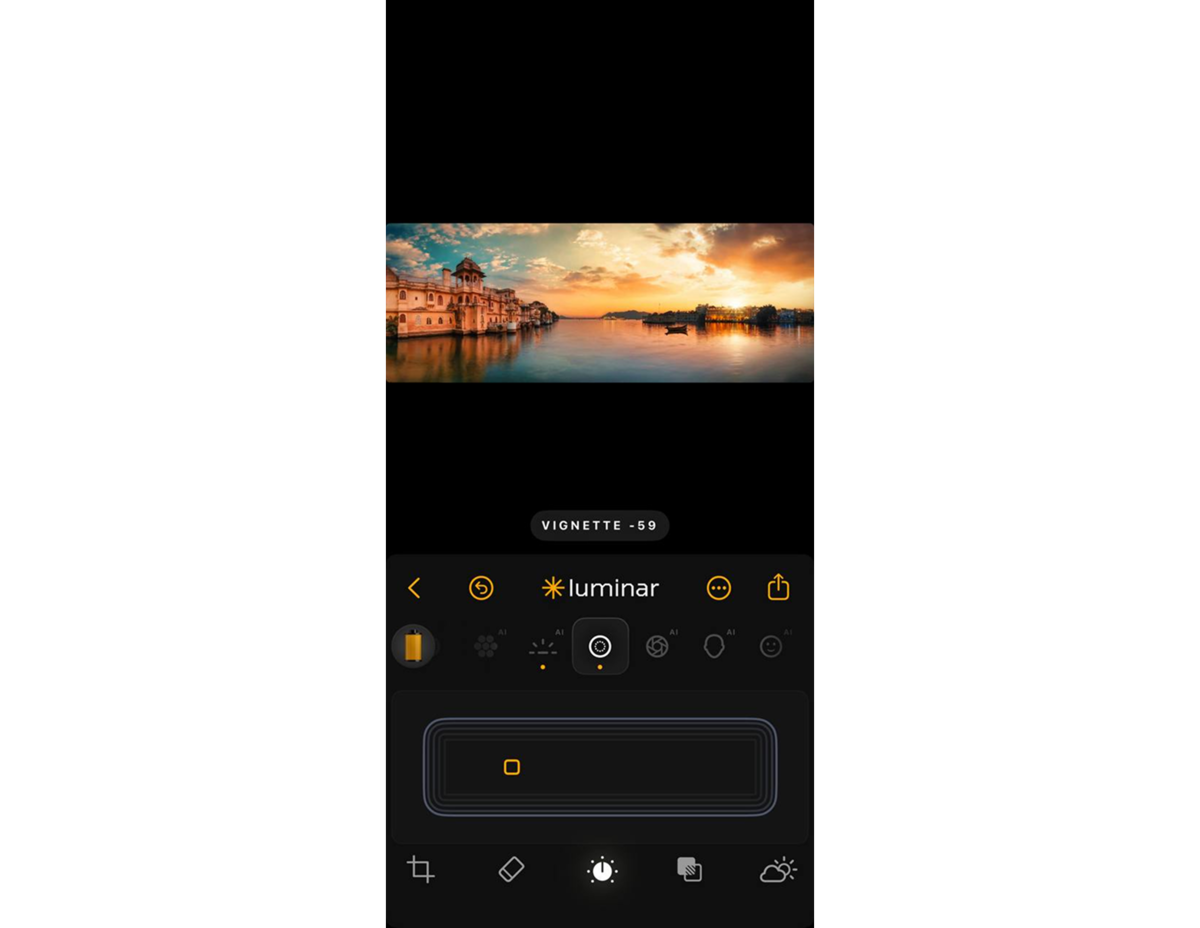


Of course, you can adjust the saturation, white balance, and exposure triangle to your liking. Thanks to the AI built into most of the available features, editing in Luminar Mobile remains fast and convenient.
Sharing and Saving Your Panoramic Photos
Photos taken using “Panorama” mode are saved to a special album of the same name within the “Photos” app. To share a photo, simply save it as a file from the “Share” menu, then send it via any messaging app. Or use AirDrop or send a link to iCloud from the same menu.
To share photos you’ve already edited, tap “Export” in Luminar Mobile, select a format, and choose “Save to Photos.” Alternatively, you can tap the “Share” button within the editor to open the iOS “Share” menu and send the photo to another app.
Additional Resources and Support for iPhone Photography
Panoramas are just one of the tools a good photographer needs to master. To improve the quality of your photos, you need to constantly study the theory and put it into practice. If you found this guide insufficient, you can always find useful information about taking photos with an iPhone on Apple’s support website or the Skylum blog.