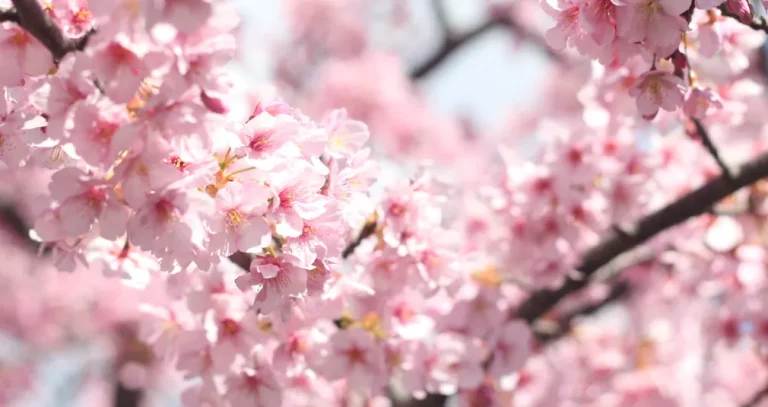
Learning about different types of highlights can help transform your photos by adding unique lighting effects that enhance the depth and mood of each shot.
What is lens flare—a random defect or a deliberate artistic technique? This phenomenon occurs when a bright beam of light strikes the camera’s optical system directly. In most cases, these reflections irrevocably ruin the shot, reducing contrast or obscuring the model’s face. Some photographers deliberately seek to achieve this effect to create a warm, cinematic atmosphere. Below, we’ll explore practical ways to create lens flare, its classification, and offer a few ideas on how to integrate it into existing photos.
Don’t feel like reading the whole breakdown right now? Here’s a tighter, more practical summary of what actually changed.
Exclusive Tools of Endless Possibilities in One Editor
Key Takeaways
Understanding Lens Flare in Photography

Using lens flares is one of the simplest ways to create a warm atmosphere in a shot. The beam of light entering the lens reduces the overall sharpness, visually softening the image. This technique works great for romantic scenes or travel photography. Here, captured sun glare makes the scene feel more natural and inviting to the viewer.
Successful lens flare examples can also be found in lifestyle photography, where a slight sense of casualness instantly draws the eye, making the shot feel more natural. However, there are genres where using lens flares is not recommended—namely, those requiring maximum detail. The appearance of light spots in architectural or product photography disrupts strict geometric lines and alters the actual colors of the product.
Common Causes Behind Lens Flare

It is enough to sort out what causes lens flare to fully take control of this visual storytelling technique. The main cause is always a powerful light source aimed directly into the camera lens. The midday sun, a streetlight, or a bright studio flash sends a dense stream of rays through the front element. The optical system is physically unable to absorb all of that light. Part of it starts bouncing chaotically between the inner glass elements, forming the familiar glowing spots.
Using cheap protective filters is not recommended because the added surfaces make light reflections harder to predict. Dust left on the glass, microscopic scratches, or accidental fingerprints further scatter the passing light, which makes the hazy effect even stronger.
The intensity of flares can be adjusted with a few simple steps. Keep the front element clean and wipe it regularly with a special microfiber cloth. If bright sunlight is shining directly into the lens, try slightly changing the shooting angle or creating artificial shade by covering the top edge of the optics with your hand. Adding flares during post-processing removes these inconveniences and makes it possible to change the settings by dragging a single slider.
Enhance Your Images with Light Flare Effects
Different Styles of Lens Flare Effects
Once light enters the lens, lens flare definition takes on a distinct visual appearance shaped by the camera’s design features. Strongly narrowed aperture blades can turn an ordinary streetlight at night into a sharp star with multiple rays. Reflections bouncing between flat glass elements can form a long chain of ghostly geometric shapes.
Using more sophisticated editors to create flares is a much more practical option. Because this type of software includes special presets in its libraries, adding a glowing spot to a finished image takes only a few minutes. Artificially generating the effect gives the photographer complete control over its appearance. The author can adjust the brightness, choose the desired tint, and set the exact position of each glowing spot.
Starburst and Its Creative Impact

Glare in the form of diverging rays occurs when light from a point source passes through a closed aperture. The metal blades of the lens form a narrow aperture, forcing the light to bend around these edges, resulting in a geometric star-shaped spot appearing in the image. This technique makes nightscapes visually richer, transforming ordinary streetlights into striking, sparkling details.
Ghosting and Other Flare Patterns

Ghostly circles appear as a result of repeated reflections of light inside the lens. Directed light passes through multilayered optics, creating a chain of translucent colored shapes across the entire frame. The outlines of these glowing spots always precisely match the shape of the aperture opening. Photographers use the lens flare effect to give an image a subtle vintage mood, since overexposure closely recreates the look of old film equipment.
Along with clearly defined geometric shapes, optics also regularly produces shapeless light distortions. One vivid example is the effect of fully veiling the frame. A powerful stream of directed rays literally floods the front lens element. The image becomes covered with a soft whitish haze. The overall contrast of the photo drops immediately. Inexpensive lenses without a reliable anti-reflective coating pick up stray side reflections. They form large, blurred patches near the edges of the image and take away some of its visual depth.
Using Anamorphic and Sensor Flare Creatively

Anamorphic lens flares appear as elongated horizontal lines. They are caused by the specific design of the lenses: inside the lens barrels are special cylindrical glass elements that enable the image to be compressed horizontally in a controlled manner. Cinematographers regularly use this expressive effect to create a cinematic atmosphere without using additional filters.
Lens flare typically occurs when using mirrorless cameras in bright, overhead lighting. Direct light passes through the lens, reflects off the shiny sensor, and then returns to the rear lens, creating a rich purple halo. In some cases, this flare may appear as a cluster of colored dots of varying intensity.
Proper camera positioning helps control the appearance of flares. Anamorphic horizontal streaks show up most strongly when the light source is placed near the very edge of the frame. Sensor reflections are much harder to manage. A simple change in the camera angle helps remove random red dots. Another way to solve the problem is to adjust the composition so the light source remains outside the frame.
Get rid of Curved Images with Lens Correction
Techniques to Intentionally Add Lens Flare

Adding an optical artifact to a photo comes down to two primary approaches. The photographer either captures a bright ray directly during the shoot or adds the glow effect later in post-processing. The most effective practical methods are outlined below.
- Using a layered composition. Position the sun behind the edge of a building, the foliage of a tree, or the model’s shoulder. Slowly move the lens until a bright halo appears around the obstruction. Lock the focus and take the shot.
- Side-lighting with an external light source. Turn on your smartphone’s flashlight, and position the device right next to the camera, outside the frame. Smoothly adjust the angle of the flash, directing the light into the lens until the desired colored spots appear.
- Reflection through a glass prism. Hold a transparent surface right up against the front lens. Slowly rotate the object in front of the glass, capturing random reflections from surrounding lights. Find a good pattern, then press the shutter button.
- Overlaying a ready-made digital texture. Add a layer on top of the photo containing an image of a glare on a completely black background. Change the blending mode to “Screen.” The dark areas will disappear completely, leaving only the glowing artifact.
- Software-generated effect. Create a new layer and apply the built-in optical flare rendering filter. Select the desired virtual lens type and specify the point of light. Adjust the layer’s overall opacity to achieve maximum realism.
- Simulating a warm haze with a radial gradient. Select the desired area with the Elliptical Marquee tool in the RAW converter. Increase the exposure significantly, raise the temperature, and lower the sharpness slider. The edges of the spot will become soft, realistically simulating sun flare.
The choice of a specific approach depends on the requirements of the task at hand. Physical methods produce a completely natural ray scattering pattern. Digital integration ensures complete control over the final image without the risk of compromising the original frame.
Create Enhanting Glows and Dramatic Light Effects
Lens Choices and Their Influence on Flare Appearance

Since zoom lenses contain many glass elements, the passing light beam is forced to refract multiple times inside the lens barrel. This refraction creates long chains of semi-transparent circles in the image. Prime lenses have a simpler construction, resulting in neat, single highlights. The older Helios series lenses lack an anti-reflective coating. Because of this, light reaches the sensor unimpeded, creating warm, golden hues.
Focal length directly affects the physical size of the illuminated areas. 14mm ultra-wide-angle lenses sharply focus the light rays, turning them into tiny, sharp points. 200mm telephoto lenses work oppositely due to the strong blurring of the light source’s edges. As a result, the frame is filled with huge, shapeless halos. Cinematic anamorphic lenses with a 2x factor are distinguished by the presence of cylindrical blocks, which make it possible to stretch the passing light strictly horizontally.
Turning Optical Distortions into a Powerful Creative Technique

The answer to the question of what is lens flare in photography lies in the physics of light refraction. By studying the characteristics of specific lenses, a photographer can accurately predict the appearance of these luminous artifacts. Skilled management of light sources, combined with digital editing, transforms this visual defect into a fully controllable artistic tool.