With so many great choices available in LuminarAI — especially with Templates — it can be tempting to use a cookie-cutter approach. But then you don’t have your own unique look. So how do you make your images stand out?
Starting with a Template in LuminarAI, and then tweaking a Template with Portrait and Creative tools in LuminarAI can help make your own unique Templates that can be used over and over again. These can also be tweaked with each image. It’s never been easier to make your own style shine through!
Here’s how
Step 1: Import your image into LuminarAI. Click on the + at the top (select as a single image or a folder) or open your Catalog and select an image.
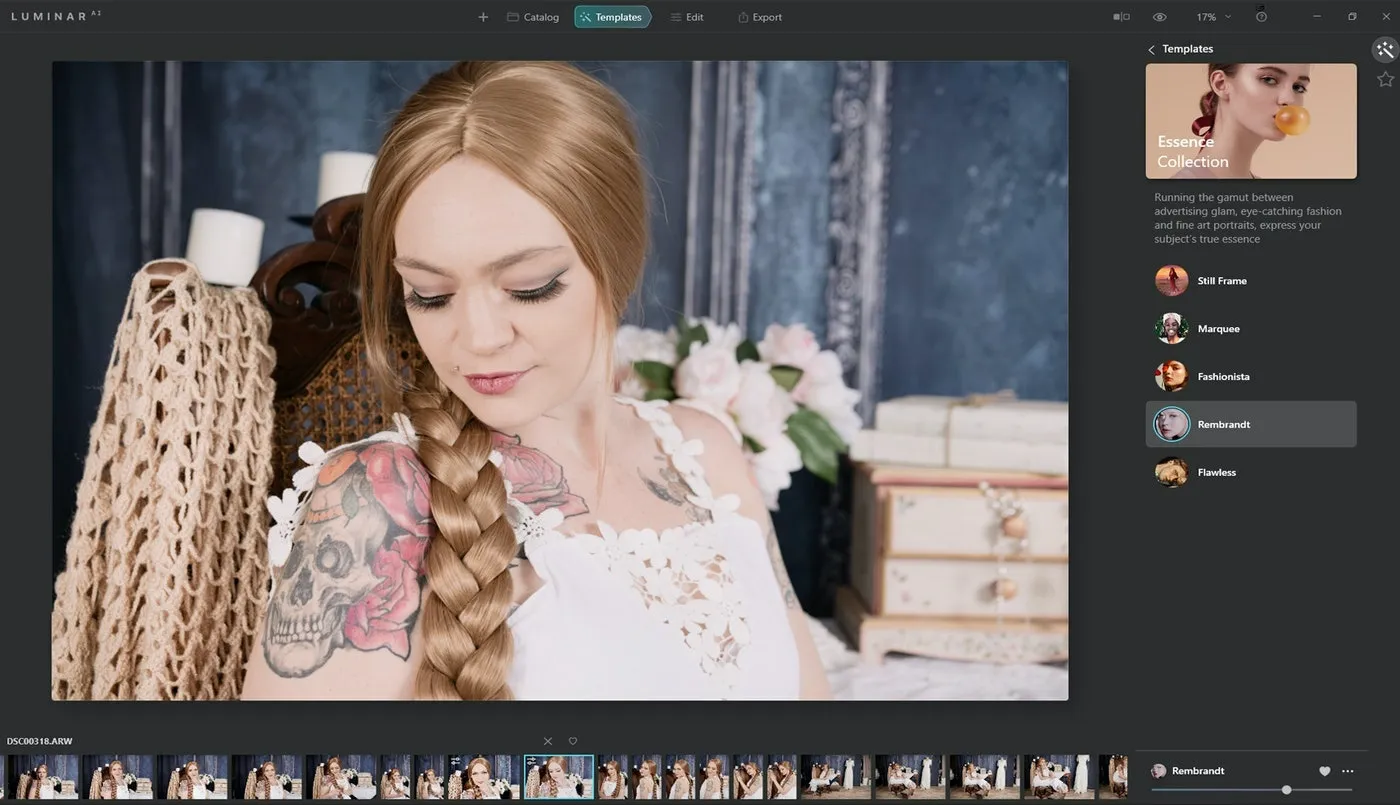
Step 2: Using the Templates section, find the Template that you feel best suits your image. Whether from For this Photo suggestions or from the selections provided, LuminarAI presents options based on what the built-in assistant thinks are suitable four your image and its contents.
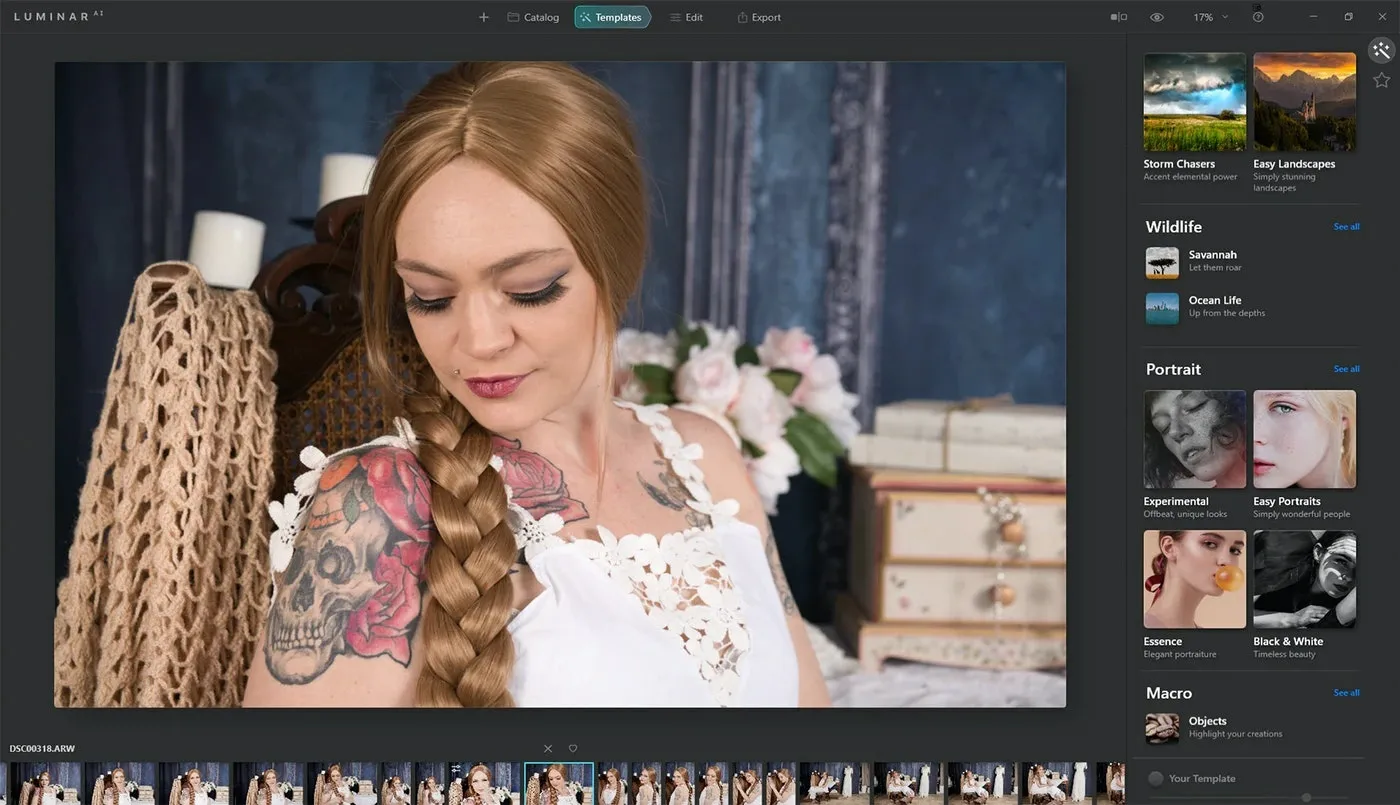
You can also scroll through the Template sections for Landscape, Portrait, etc. Each section has a number of predesigned Templates. Just click on the Template to try it. You can also drop the opacity of the Template provided if you feel it is too strong.
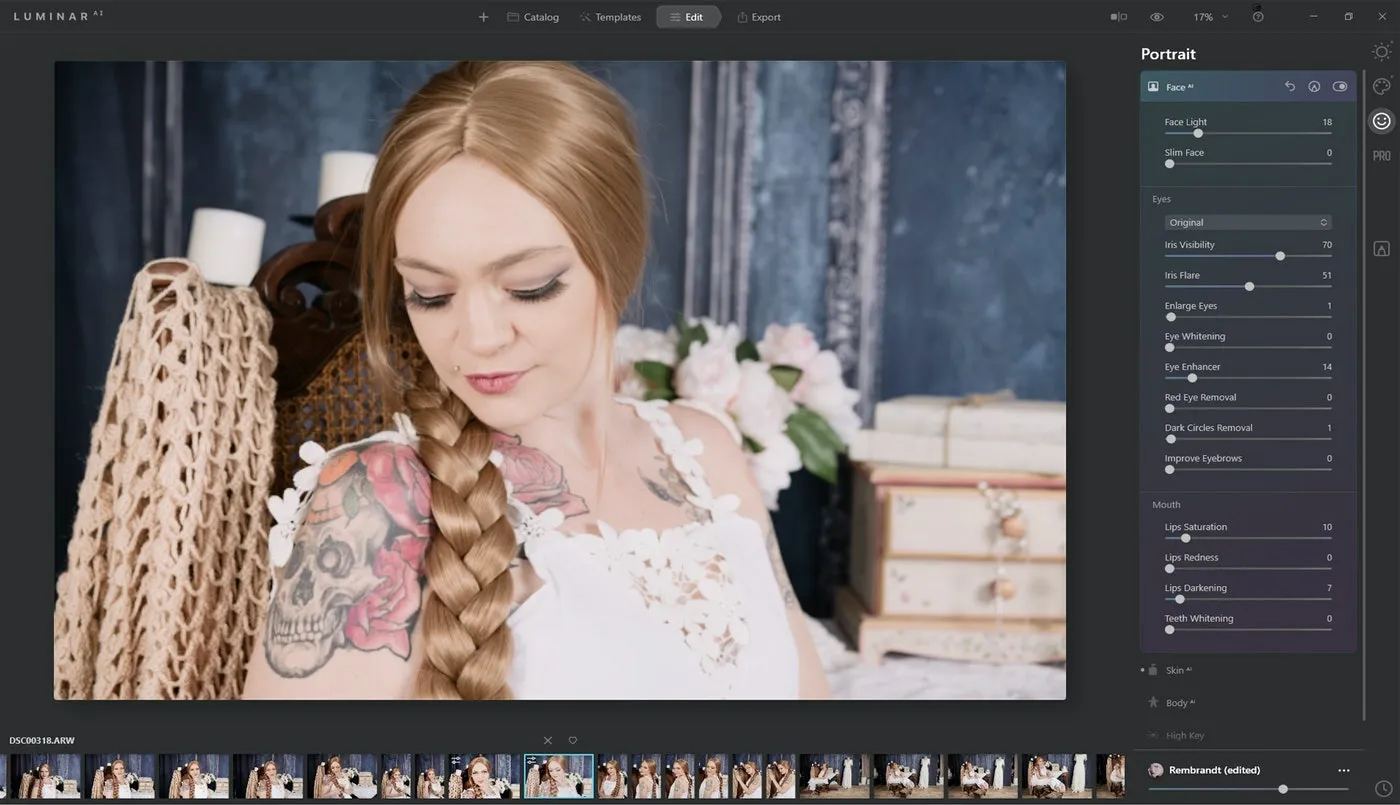
Step 3: Next, head to the Edit section. Here, click the Portrait tab and consider Face AI, Skin AI and others. Try subtle changes with Face Light, Eyes and Mouth. It doesn’t take too much to make a big difference.
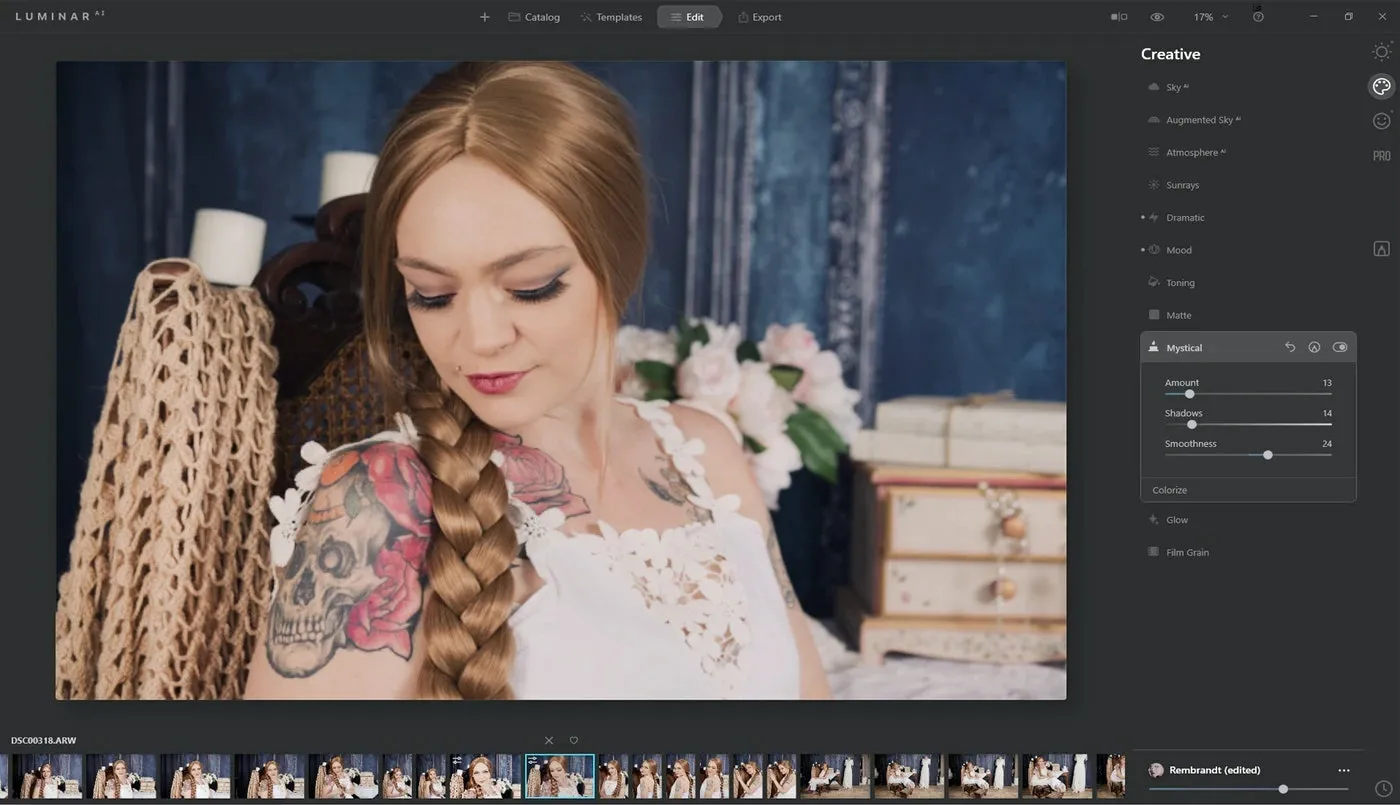
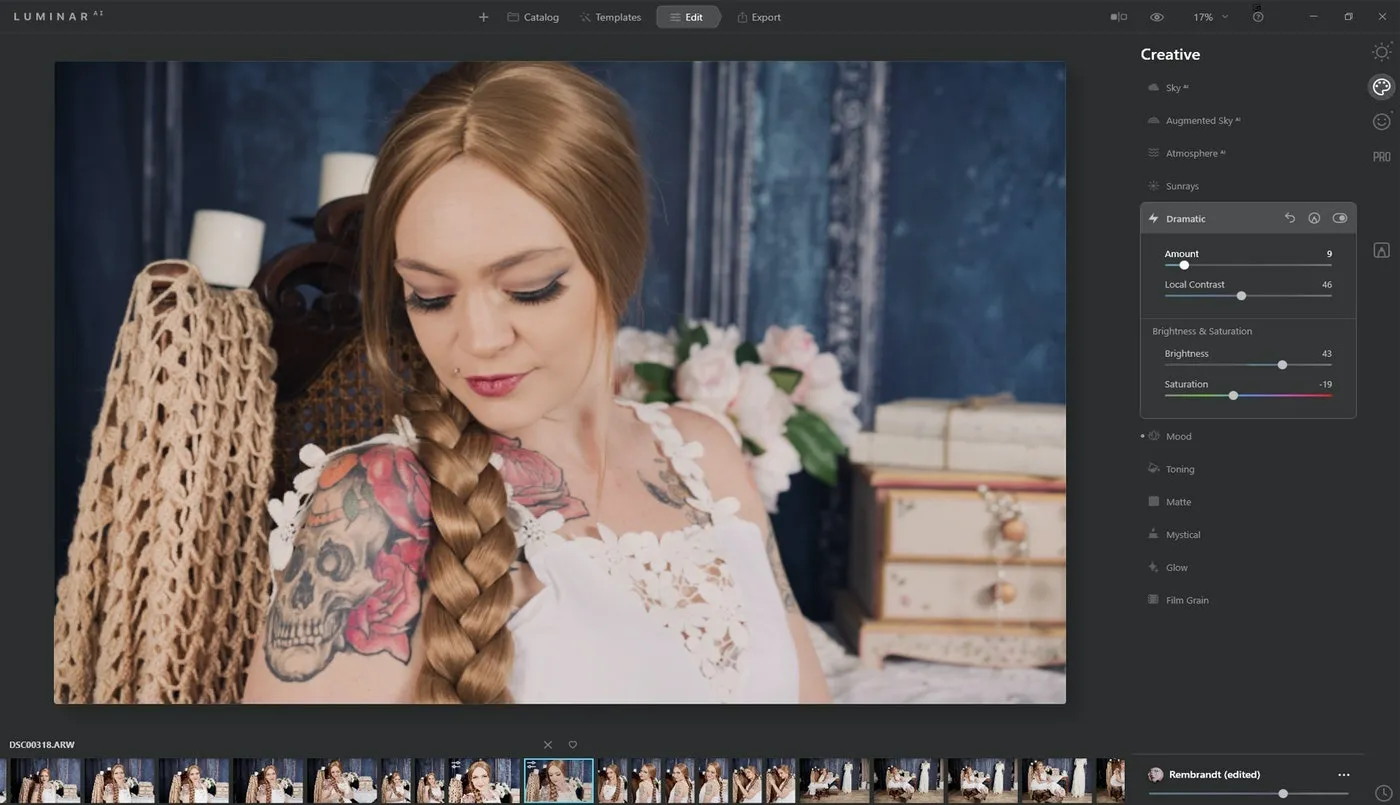
Step 4: Now visit the Creative tab and have a look at adding from the Dramatic, Mood and Mystical tools. In Mood, there are different sections for LUTs. You don’t have to use only the Portrait styles for portraits — play around and experiment.

 There are other tools to look at too, like Matte and Glow. Each will add a different element to your image, and not all are needed. Remember you can be as subtle as you like … it’s YOUR template.
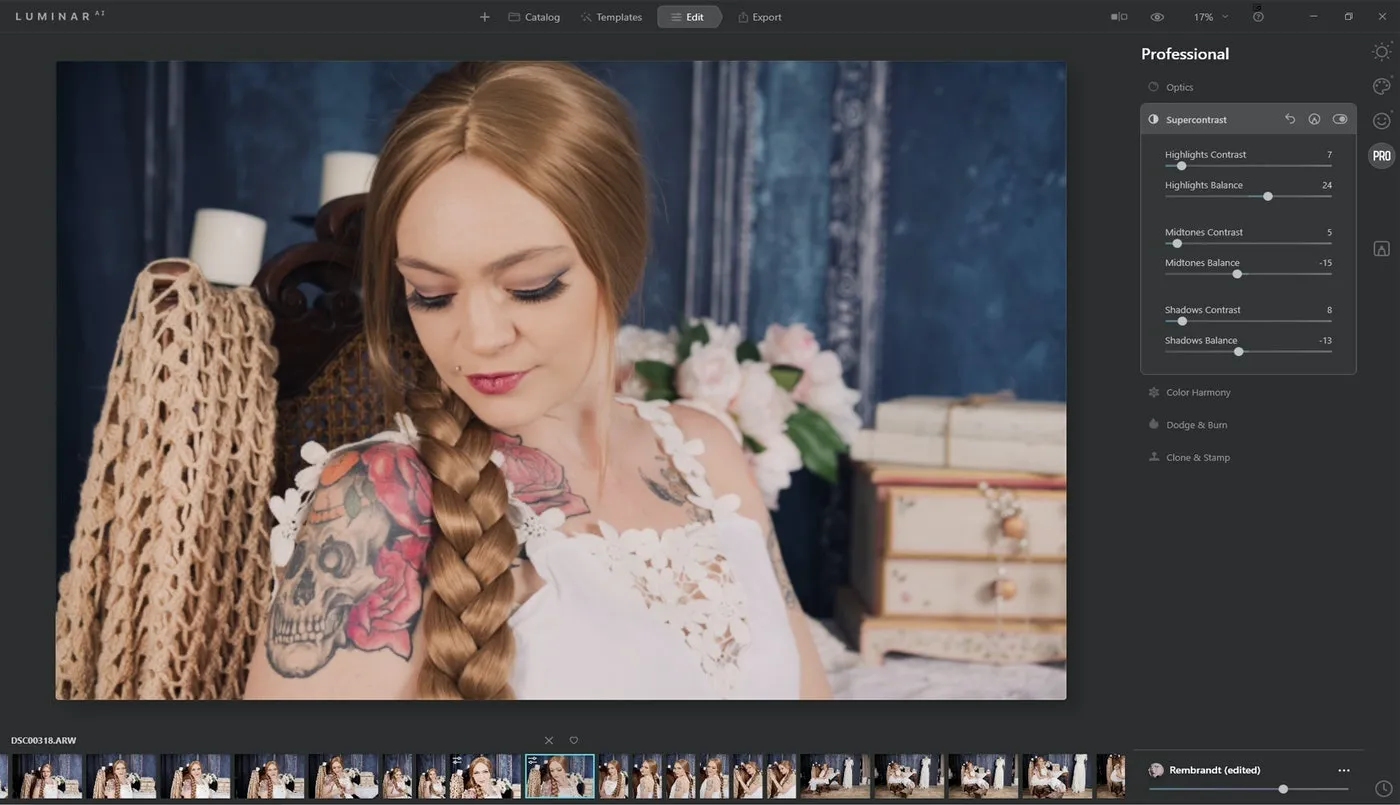
Step 5: Head over to the Pro tab and add a little pop of Supercontrast, which can work wonders! You can adjust contrast in the Highlights, Midtones and Shadows from here. You could also play with Color Harmonies here, as opposed to the Dodge & Burn and Clone & Stamp tools. These are better used in each image as required as opposed to a Template, as they can’t be used for batch processing.
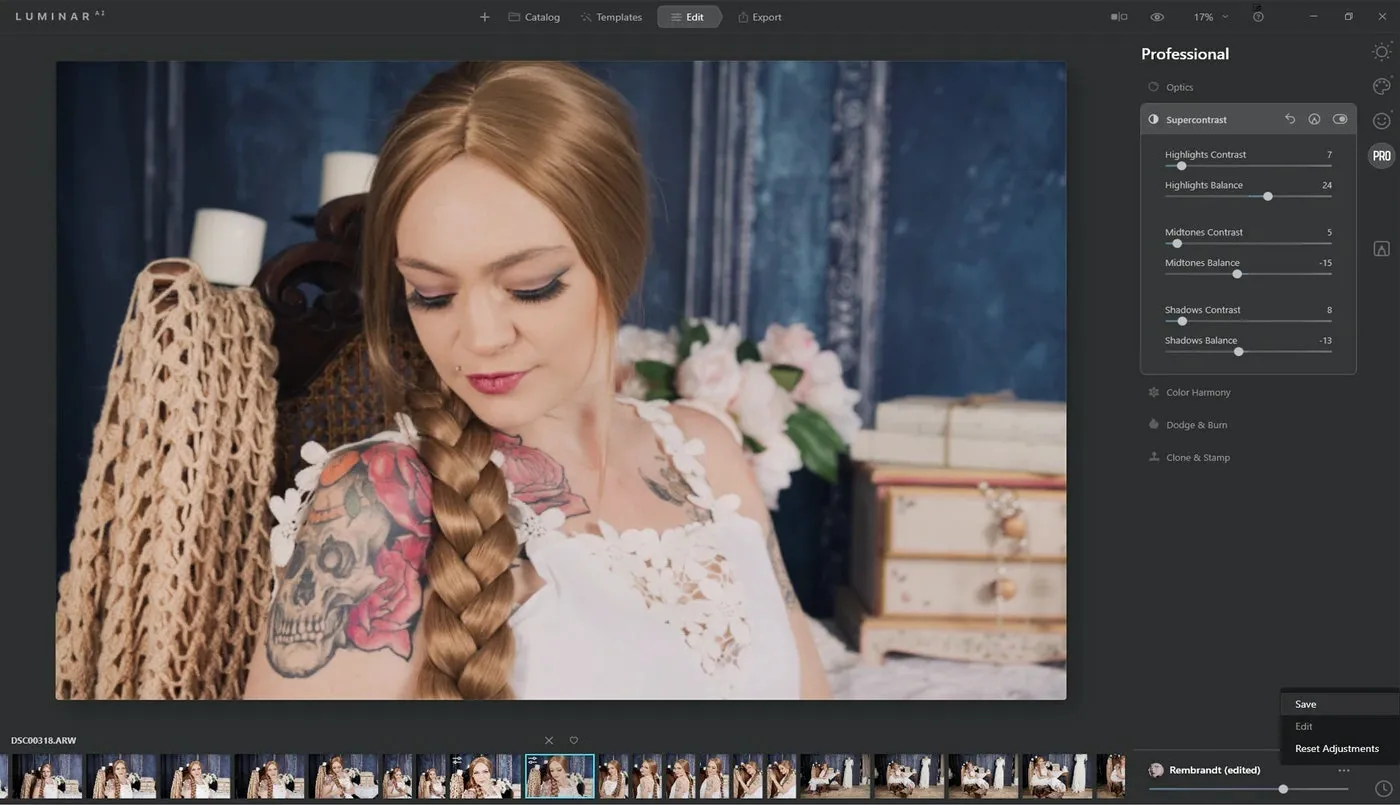
Step 6: Now you can save it from the 3-dot menu in the lower righthand corner, and you’re done! You have created your own unique Template you can use through the entire set of images or for all your images.
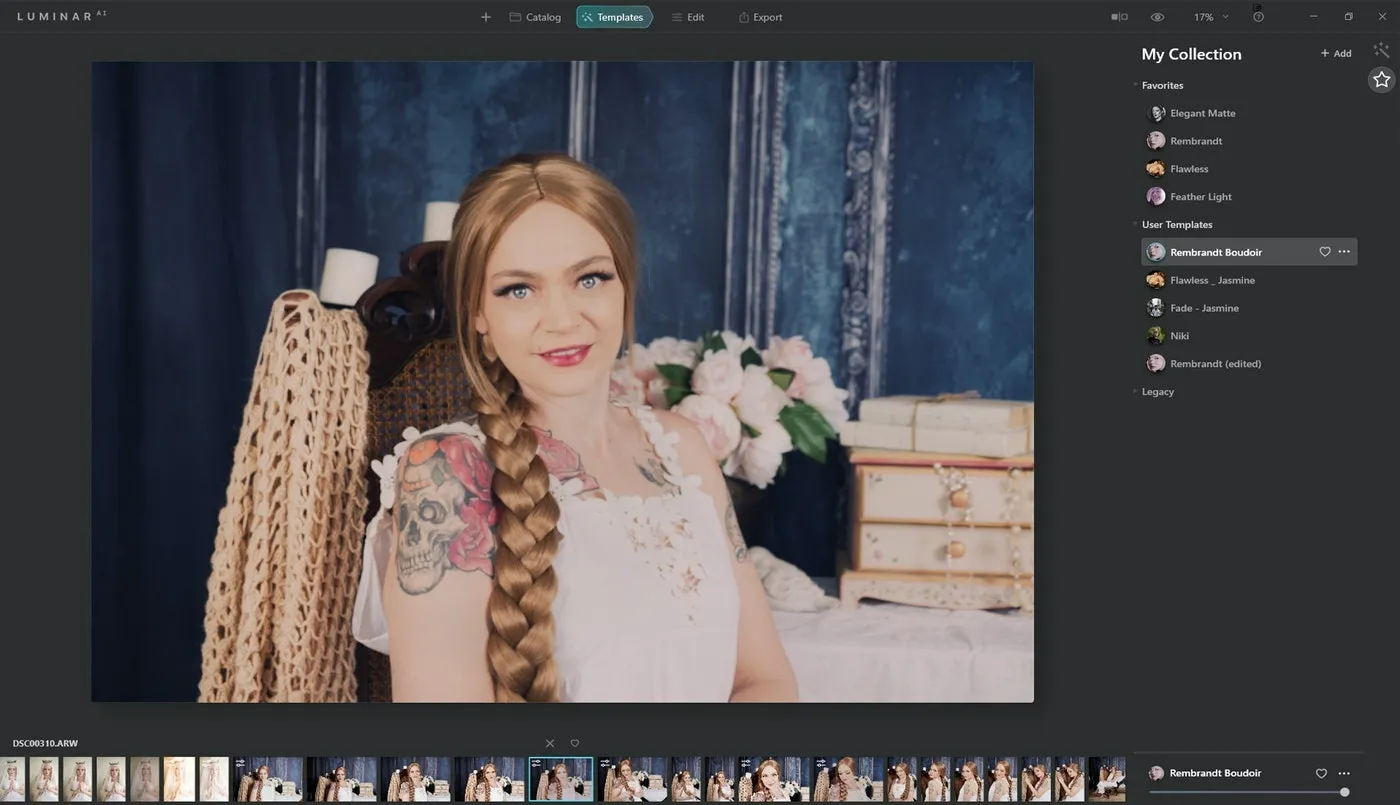
Step 7: Open a new image and to apply the same Template, which you’ll find under My Collection. Here, you can also find any Templates you’ve favorited, too. This is also where you can rename your created Templates. Simply select a Template to apply it to your image.
The options for setting and using Templates is limitless! What I have suggested is just the tip of the iceberg — feel free to play with other options. Explore and experiment.
I also recommend checking each Template on different images, and altering them as required through the Edit section. Now all of your images will be unique, with your own personal stamp and flair on them.