
Take amazing photos on any trip. All you need to do is master the basics, which will turn ordinary scenes into unforgettable photo stories.
When traveling through picturesque places, it’s only natural to think, “It’s so beautiful here—I wonder if I can capture this in a photo?” So, armed with your camera, you find a suitable spot and take a few shots. None of the photos will look like what you saw with your own eyes. Why do the results differ so much? You simply ignored the basic rules by not thinking through the details before you started.
Don’t feel like reading the whole breakdown right now? Here’s a tighter, more practical summary of what actually changed.
Key Takeaways
- Composition is the quickest upgrade: the guide leans on three repeatable tools—leading lines (roads, shorelines, columns), natural framing (arches, branches, caves), and the rule of thirds to keep the subject away from dead centre.
- Perspective makes the frame feel intentional, so pros shoot below eye level for reflections (even a puddle) or from higher points (like a fire escape) to show scale, then add depth by shooting through foliage or wrought-iron grating.
- Light is explained through real travel conditions: golden hour is framed as the most flattering, midday as the harshest (but useful for graphic geometry), overcast as a giant softbox with reflective wet surfaces, and blue hour as cinematic twilight that often needs a tripod.
- Settings are given as workable ranges. Examples include f/1.8–f/4 for portraits and f/8–f/11 for landscapes; ISO 100–200 for clean files, 400-800 for overcast conditions, and ISO 100 with 2-15s exposures for blue hour, plus a 2-5s timer.
- Gear recommendations remain practical: mirrorless bodies with a versatile zoom (Sony A7C II, Fujifilm X-S20) are recommended, and for phones, iPhone 15 Pro Max or Galaxy S24 Ultra with RAW support, plus a lightweight tripod, polariser, spare batteries, and high-capacity cards.
- Editing is positioned as the final workflow step: AI tools and batch processing are used to apply one set of adjustments to a whole RAW series quickly, which is the recommended way to handle large travel shoots
Essential Travel Photography Techniques for Stunning Shots

Trying to figure out how to take better travel photos? Most travel photos suffer from the same problem: a lack of a focal point around which the entire composition is built. This could be a person, a detail of a building’s facade, a boat, or even the sign of the coffee shop you visit every morning. The core is to give the scene a concept that can be conveyed through composition.
Don’t try to cram all the elements into a single frame in an attempt to add depth. Focusing on a single detail usually looks more professional and draws more attention. To make the shot more compelling, try photographing your chosen subject from different angles or find a leading line.
A list of tips for travel photography would be incomplete without mentioning patience. Stop, take a moment, and look around. In just a few seconds, dozens of small events unfold around you that you hadn’t even noticed until now. Perhaps a person walking by is exactly what your shot needed to appear dynamic.
Professional Editing. Now in Your Pocket.
Download Luminar on your Mobile Device
Mastering Light and Color in Travel Photography
When traveling, light is a physical tool for creating a sense of depth, but external factors can make it difficult to achieve ideal conditions for photographing landmarks. To avoid returning to the same spot later, be prepared to take photos even in bad weather or under harsh overhead lighting.
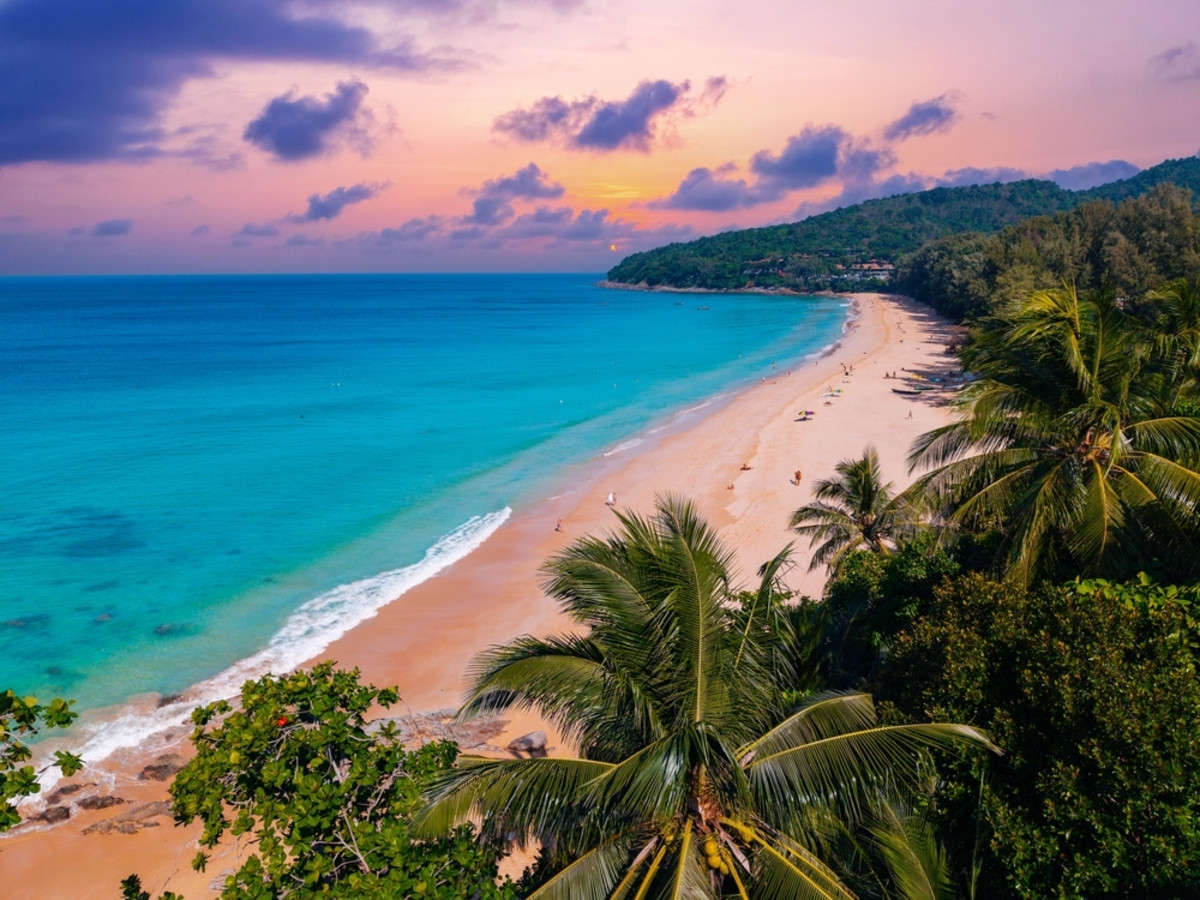
Golden Hour

Early morning or sunrise is considered one of the best times for photography: during this brief period, the sun is low on the horizon, and its rays pass through a dense layer of the atmosphere, diffusing the harsh blue light.
Professionals recommend switching to Av mode (aperture priority) or M mode (manual control) to adjust depth of field at any time. Depending on your subject, set the aperture to f/8-f/11 if you’re shooting landscapes. Keep the ISO at a minimum of 100-200 so that details in the shadows aren’t lost.
Daytime Photography

The midday sun creates the harshest lighting, with deep black shadows and blinding highlights. At this time of day, the light falls almost vertically, causing landscapes to lose their sense of depth and creating unflattering, high-contrast patches on people’s faces. Using “light depth” technology in post-processing can restore realistic lighting transitions and emphasize scene depth, especially when the original shot appears flat.
Elevate Your Photography with Our Advanced Software
Bad Weather

A cloudy sky transforms the landscape into a giant softbox, softening harsh shadows and revealing the true depth of colors. To increase the depth of field, open the aperture to f/1.8-f/4.0, compensating for the lack of light by raising the ISO to 400-800. If you’re shooting in the rain, be sure to use a lens hood: it will protect the front element from raindrops, preventing unwanted smudges or loss of contrast.
The Blue Hour

Shortly after sunset or just before dawn, there is a brief period of blue twilight, when the sun has already set below the horizon, but the sky has not yet turned completely black. For several minutes, the atmosphere is filled with a deep blue-violet glow, giving tourism photos of streets of New York or London the effect of Van Gogh’s “Starry Night”. Set the ISO and aperture to the same values as you would during the “golden hour.”
Composition Tips to Enhance Your Travel Photos
Improving photo quality requires consistent practice, thoughtful analysis of your own mistakes, and a genuine desire to capture the aesthetic of the moment. However, it is difficult to develop a refined personal style in a single trip, so it makes sense to shift your focus and rely on travel photography tips and tried-and-true professional solutions rather than building a concept from scratch.
- Finding leading lines. Direct the viewer’s gaze toward the main subject with clear lines already present in the scene—a road, a curved footpath, a row of columns, even the edge of the shoreline. Let these shapes enter the frame from a corner or along one side, then carry the eye naturally toward the focal point.
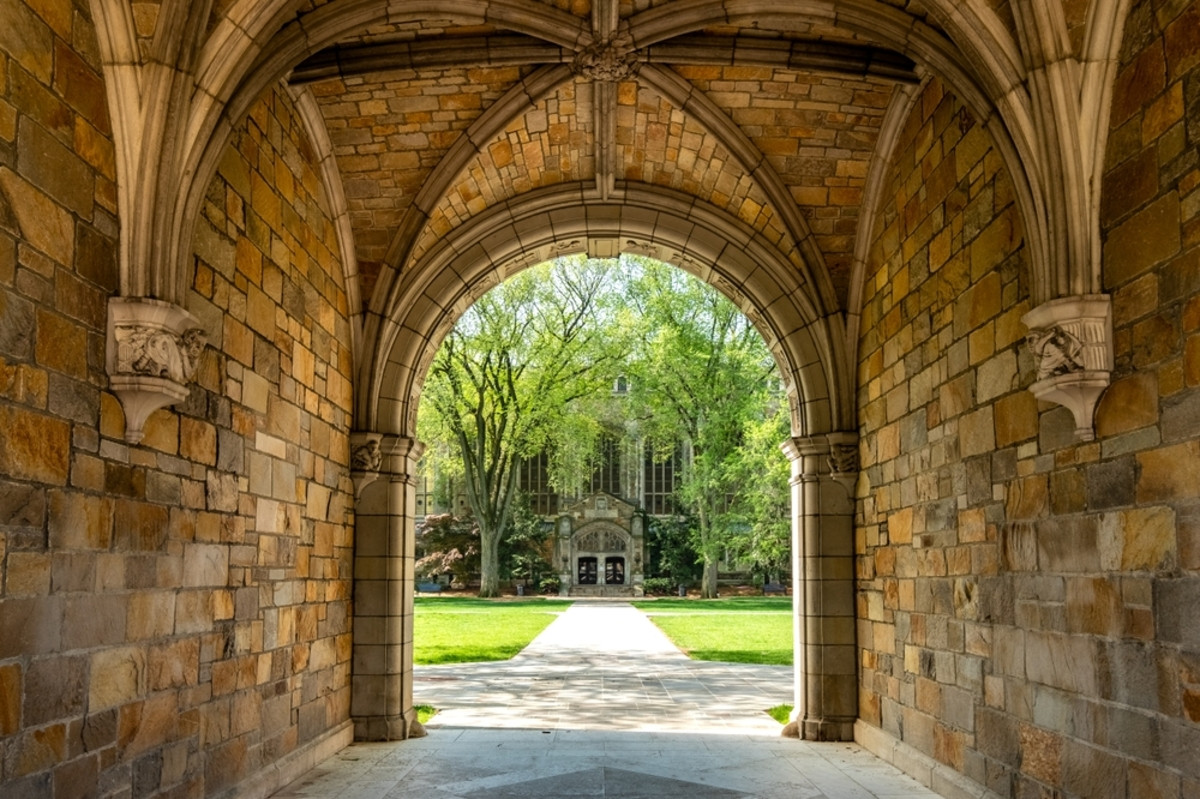
- Natural framing. Using arches, caves, or overhanging branches creates a frame within the image itself, drawing the viewer’s attention to the central subject. Framing helps eliminate extraneous details, and it’s easy to incorporate into a multi-layered composition—simply place the main subject a few meters further away.
- The rule of thirds. For a balanced composition, split the frame into nine equal parts with two horizontal and two vertical lines. Place the main subject near the intersections to move focus away from the center and add a natural sense of movement.


Professionals strongly recommend mastering composition before moving on to other aspects. Unlike adjusting light or color in a photo, mistakes made when working with structure are rarely fixable during post-processing due to technical limitations.
Your AI-Powered Photo Editor for MacOS and Windows
Choosing the Right Gear for Travel Photography
For travel, it’s best to choose a compact mirrorless camera with a full-frame or APS-C sensor. If you’re on a tight budget, professionals recommend considering the Sony Alpha A6400 or the Fujifilm X-T30 II as your primary camera.

Despite costing up to $1,000, these cameras can produce cinematic-quality footage when used skillfully.
People who take photos for a living may find these models’ features insufficient. In that case, consider the Sony Alpha A7C II or the Canon EOS R7, which have proven themselves for wildlife photography thanks to their burst shooting capabilities and high-quality autofocus.

Using a flagship smartphone from Apple or Samsung is acceptable, but you’ll need to accept a loss of image detail.
The camera’s battery may last long enough for short outings, but if you’re planning a serious trip, be sure to bring at least a few spare batteries and memory cards. A polarizing filter in your bag will help you take photos when the sun is directly overhead, and a small tripod will keep the camera steady when shooting long exposures.
Capturing Unique Perspectives and Angles

Those who stop viewing the world from their own eye level are the ones who get the most out of a location: professionals set aside their usual standing position, choosing instead to press their lens against the surface of a puddle for a mirror-like reflection or to climb a fire escape for a bird’s-eye view.
Experiments with body position are complemented by creating layers through physical barriers in front of the lens. Instead of capturing the entire subject, professionals recommend looking for angles where architectural elements overlap, creating new forms. If trash or passersby end up in the frame, erase object from the photo using a photo editor. The algorithms will automatically select the object, after which it can be removed and the resulting void filled based on context.
Practical Advice for Editing and Managing Your Photos

Among travel photography tips for beginners, preparation tips deserve special attention. Professionals strongly recommend choosing the RAW format over JPEG or HEIC. This helps preserve most fine details that would otherwise be compressed and appear as a blurry smudge in post-processing.
Take multiple shots under the same conditions right away so you can choose the best one during editing. Sticking to the “a few photos per location” policy simply doesn’t make sense, given that any modern editor has a batch processing feature. Its principle of operation is to apply changes: perfect a single photo, then select several files with the same source data from the folder to apply those changes to them.
Cultural Awareness and Ethical Considerations in Travel Photography

When following travel photography tips and tricks, remember to respect other people’s personal boundaries. In religious sites, markets, and residential areas, be extremely careful not to provoke conflict with your actions.
Contact the location managers to obtain written permission to take photos. Spending 20-30 minutes on preparation guarantees that, after completing your work, you won’t face administrative or legal consequences.
Creative Tips to Inspire and Improve Your Travel Photography Skills

Compelling travel photographs are born from the ability to master composition and light, transforming an ordinary scene into a multi-layered visual story. Leading lines and natural frames effectively guide the viewer’s gaze, especially when shooting in soft golden light or deep twilight. Using a tripod with the RAW format delivers flawless detail, making every shot from your trip technically perfect and memorable.


