AI can create a quick cutout, while manual editing gives you control over difficult edges. Learn which approach fits your image and how to combine both in Luminar.
An AI background remover is a useful starting point when you need to isolate a subject quickly. Manual background removal gives you more control over the boundary, especially when the image contains fine hair, transparent materials, or overlapping objects.
For many photographs, the practical choice is to combine them: generate a selection automatically, then correct the areas that need attention. The final result depends on the source image, the available tools, and how carefully you inspect the edges.
Don’t feel like reading the whole breakdown? We’ve pulled together a quick summary below.
Key Takeaways
- AI background removal creates an automatic subject selection; it does not guarantee a finished cutout.
- Manual editing helps correct missed details, unwanted background fragments, and inaccurate boundaries.
- Hair, fur, glass, motion blur, and similar subject/background colors can require extra work.
- A mask controls which parts of an image remain visible, allowing you to revise the cutout without permanently deleting pixels.
- In Luminar for desktop, Background Removal AI is accessed through Layer Properties → Masking.
- Luminar’s Refinement Brush provides Object, Background, and Transition options.
- Export a transparent cutout as PNG. Use JPEG only when you no longer need transparency.
AI vs. Manual Background Removal at a Glance
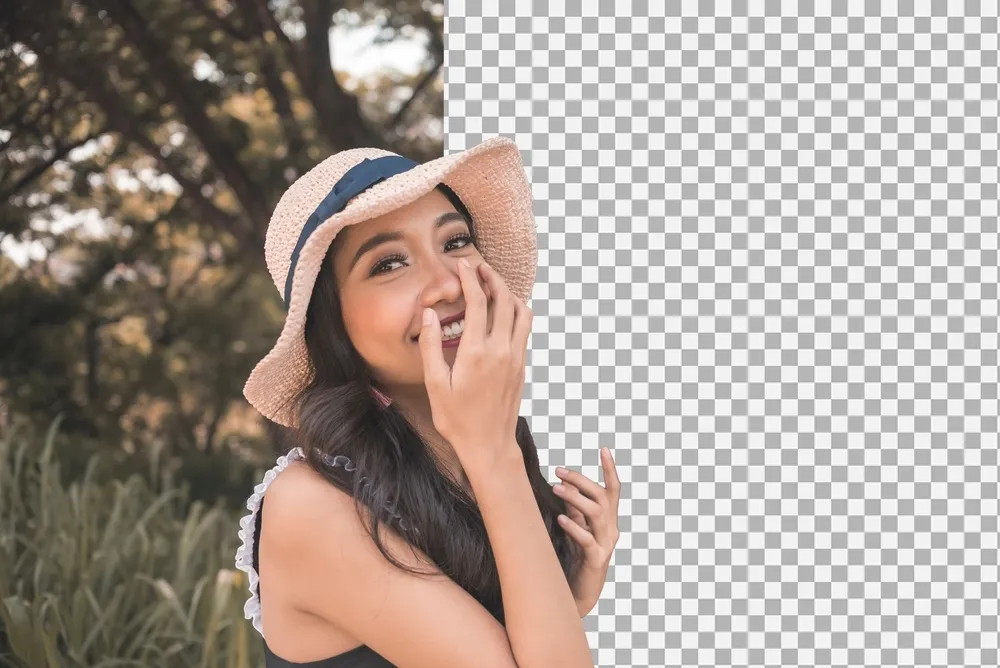
Choose the method according to the image’s complexity and the intended output.
| Factor | AI background removal | Manual background removal |
| Starting process | Automatically identifies a subject or foreground | You define the selection or mask |
| Main advantage | Reduces the work needed for an initial cutout | Gives direct control over what stays visible |
| Difficult edges | May need correction around hair, blur, or transparency | Can be refined locally, but requires skill and time |
| Multiple images | Can accelerate initial selections | Each image still needs individual attention |
| Creative control | Depends on the available refinement tools | Depends on the editor’s selection and masking tools |
| Payment model | May be free, subscription-based, or credit-based | May be free, subscription-based, or a one-time purchase |
AI and manual editing are not mutually exclusive categories of software. Many editors offer both automatic selections and hands-on refinement.
Your AI-Powered Photo Editor for MacOS and Windows
How Background Removal Works
Background removal separates the subject from its surroundings, usually through a selection or mask.
A selection identifies an area for editing. A mask controls visibility: some parts remain visible, others are hidden, and partially visible areas can preserve soft edges.
This distinction matters because removing a background does not always mean deleting pixels. With a mask, you can restore a detail or adjust an edge later. Tools for photo masking support this more flexible approach.
Background removal also differs from generative replacement. Isolating an existing subject preserves its visible image content; generating a new background introduces content that was not in the original photograph.
When an AI Background Remover Makes Sense

Start with AI when the subject is recognizable and you want an initial cutout with less manual selection work.
Typical uses include:
- Isolating a person for a presentation or creative portrait.
- Preparing a product image for a different background.
- Creating cutouts for collages and social graphics.
- Producing initial selections across a group of similar photographs.
Speed is most useful when the tool also lets you correct the result. A quick automatic selection that cannot be refined may be unsuitable for your final output.
| Pros | Cons |
| Reduces the effort needed for an initial selection | Can remove subject details or retain unwanted background |
| Makes subject isolation accessible to less experienced editors | Difficult boundaries may still require substantial refinement |
| Can speed up repetitive preparation work | Results vary with image quality and subject complexity |
When Manual Background Removal Is Worth the Effort
Use manual editing when the automatic selection misses important details or when you need to define the boundary yourself.
Hard-edged objects can suit precise selections, while hair and soft fabric require a different treatment. The best manual technique depends on the editor: brushes, paths, color-based selections, and edge-refinement controls serve different purposes.
Work with a mask where possible. Permanently erasing pixels makes later corrections more difficult.
| Pros | Cons |
| Gives direct control over the boundary | Can take longer, particularly around intricate subjects |
| Lets you restore or exclude specific details | Requires familiarity with selection and masking tools |
| Supports deliberate treatment of hard and soft edges | Manual work can still produce halos, jagged outlines, or missing detail |
Manual editing is not automatically more natural or accurate. The quality comes from how the tools are used.
Which Images Need Extra Refinement?
Expect additional work when the boundary is unclear or the background affects the subject’s appearance.
| Image characteristic | Common problem | Practical response |
| Fine hair or fur | Lost strands or background between strands | Refine the transition rather than forcing a hard outline |
| Similar foreground and background colors | Incorrect subject boundary | Restore missing subject areas and remove leftovers locally |
| Glass or translucent fabric | Old background remains visible through the object | Treat transparency separately; a simple cutout may be insufficient |
| Motion blur or shallow focus | Artificially sharp edge after removal | Preserve a suitable soft transition |
| Gaps between fingers or object parts | Background fragments remain inside the subject | Inspect enclosed spaces as well as the outer edge |
| Colored background reflections | A colored rim remains after masking | Consider targeted color correction after refining the mask |
If the source photograph lacks detail, a mask cannot recover information that was never captured. A new photograph may be more effective than prolonged cleanup.
How to Remove a Background in Luminar
Use Background Removal AI to create the cutout, then refine it before exporting.
The following workflow applies to Luminar for desktop. Interface details can vary between versions.
1. Open the Image and Select Its Layer
Open the photograph in Edit view and select the image layer you want to isolate.

Elevate Your Photography with Our Advanced Software
2. Run Background Removal AI
Open Layer Properties → Masking → Background Removal AI.
Allow the analysis to finish, choose the detected subject or elements to retain, and click Remove.

3. Refine the Mask
Open Refinement Brush and use the appropriate option:
| Option | Purpose |
| Object | Identify areas that should remain visible |
| Background | Identify areas that should become transparent |
| Transition | Refine boundaries and fine details between the two |
Choose a brush size suited to the area. Inspect the outer edge and any gaps within the subject.

4. Check the Cutout
Review the result at 100% and at its intended display size. Look for clipped fingers, missing accessories, leftover background, and uneven edges.
Our guide to improving photo backgrounds explains related masking and replacement workflows.

5. Keep Transparency or Add a Background
For a reusable cutout, leave the background transparent.
To add a new background, add the image as another layer and place it beneath the subject. Adjust its position and size to suit the composition.
Check lighting direction, perspective, scale, and edge color. A clean selection alone does not make a replacement scene convincing.

6. Export the Finished Image
Open Export and choose PNG to preserve transparent areas.
Choose JPEG when the subject has been placed against a finished background and transparency is unnecessary. Reopen the exported file to confirm the result.

How to Choose the Right Background Removal Tool
Test the tool on photographs similar to those you actually edit.
Check whether it provides:
- Manual refinement after the automatic selection.
- Transparent export at the dimensions you need.
- Support for your device and file formats.
- Clear limits on exports, credits, or paid features.
- Suitable handling of uploaded images if processing occurs online.
For multiple photographs, compare the total time needed to finish acceptable cutouts, including cleanup. Automatic processing time alone does not tell you how much work remains.
For documentary images, removing or replacing the background substantially changes the scene. Keep the original and describe the alteration when accurate representation matters.
Exclusive Tools of Endless Possibilities in One Editor
Conclusion
Start with AI when it provides a useful selection, then refine the areas that affect the final result. Choose manual work from the outset when the image demands precise control.
In Luminar, combine Background Removal AI with the Refinement Brush, inspect the cutout, and export as PNG when transparency is needed.
Frequently Asked Questions
It is often a convenient starting point, but neither method is better for every image. AI can reduce selection work, while manual refinement helps resolve mistakes and difficult boundaries.
It can create a useful selection, but fine strands and blurred edges may need refinement. Strong subject/background separation helps, although it does not guarantee an accurate result.
The mask may include pixels from the original background, or the subject may carry reflected background color.
Check the boundary against light and dark backgrounds before deciding whether to refine the mask or adjust the edge color.
PNG is a practical choice for transparent photographic cutouts. JPEG does not support transparency, so it cannot preserve an isolated subject without a background.
No. If you only want to reduce distractions, cropping, darkening, or blurring the background may preserve the scene more effectively than removing it.