This October 31, skip the predictable costume snapshot and build a photo that actually tells a story.
A good Halloween portrait is more than a costume against a decorated wall. The strongest images have a clear story, purposeful lighting, and details that make the character feel part of the scene. That is what makes spooky photoshoot ideas feel memorable rather than staged. You can create this look anywhere, from a studio or apartment to a street or parking garage, using the gear you already have.
Key Takeaways
- Build the shoot around the story or character before choosing the costume, location, and props.
- Use one dominant light source and control the background instead of trying to illuminate everything.
- In low light, keep the shutter fast enough for your subject and raise ISO when necessary to avoid motion blur.
- Choose props that explain the scene or character rather than filling the frame with generic Halloween decorations.
- Edit the atmosphere through exposure, contrast, color, and selective portrait adjustments instead of relying on an aggressive preset.
1. Start With a Halloween Concept
Before choosing a location or opening your camera app, decide what the viewer should understand from the photograph. A good idea will make all other decisions meaningful.
Turn a Costume Into a Story
Put your character in a scene, not just in a costume. For example, the vampire sits alone at a table, while the witch prepares something in the kitchen on a countertop. And a ghost can stand motionless at the end of the bedroom. Even a DIY Halloween photoshoot feels more convincing when these small details suggest a story.

Keep the Look Cinematic
Avoid the busy Halloween atmosphere and go for lighting instead. Position your model at the end of a hallway with one half of their face illuminated, or photograph them through an open doorway, with one half of the subject in darkness. This can be done with a limited color scheme and a single light source.
Exclusive Tools of Endless Possibilities in One Editor
2. Build the Scene Around the Location
Once you understand the tale, pick the right spot for it. You rarely have to buy a fancy Halloween set when the building does everything you want.

Choose a Background With Visual Depth
Consider backgrounds that have some depth or texture, like a hallway, a set of stairs, a brick wall, a door, a mirror, or even a street that is lit up by just a couple of spotlights. After removing everything from the frame that is distracting, place the required props. In many cases, a plain wall with deep shadows looks more impressive than a cluttered backdrop covered in too many Halloween ornaments. In case the crop turns out to be too tight, AI outpainting could come in very handy.
Use Blue Hour for Outdoor Portraits
The blue hour is ideal for Halloween photography, since the sky still retains its color, and streetlights and windows come on. The background is still lit up, so all that needs to be added is a light source for the face.
3. Make Costume and Makeup Work for the Camera
A costume that looks impressive in person can photograph poorly if its materials, colors, or details do not respond well to the lighting.

Choose Materials That Show Texture
Velvet, lace, leather, wool, and distressed cotton fabrics will reflect light and add more detail to the dark costumes. For an all-black costume, avoid placing it against a black backdrop or use some light behind the model to distinguish her silhouette from the rest. In makeup, focus on the eyes, cheekbones, and one specific area. Dark eye sockets or smudges look better on camera than extra products.
Be Careful With Decorative Contact Lenses
While Halloween contacts may totally alter one’s appearance, they are far from being safe decorative items. The FDA stresses that the improper use of decorative lenses is associated with many potential problems, including eye injuries, and advises consumers to buy contacts from a healthcare provider.
4. Use Lighting to Create the Mood
Lighting is usually more important than the amount of decoration in the scene. Dramatic portraits often need less light, not more.

Try Three Simple Halloween Lighting Setups
A few simple lighting changes can completely shift the mood of the same costume.
- Under-lighting: Put the flashlight or small LED under the face and shine it upwards. The result will be unusual shadows because the light source is at an angle not usually associated with daylight. Adobe clearly states that this upward flashlight trick is one way to make a ghost story.
- Side lighting: Put one light approximately 45 degrees to the side of the subject. One side of the face remains illuminated while the other falls into shadow, producing a more cinematic portrait.
- Backlighting: Put the light behind the subject and expose for the brighter background. The result can be a silhouette, glowing hair, or a partially obscured figure.
Set a Practical Starting Exposure
Use these as starting points, then adjust for your light and subject:
- Portrait: 1/125 sec, f/1.8 to f/2.8, ISO 800 to 1600.
- Moving subject: keep the shutter speed fast enough to freeze movement, and raise ISO rather than slowing the shutter too much.
- Stationary props: use a slower shutter speed to capture candle or pumpkin light. A tripod helps prevent camera shake.
- Very dark scene: open the aperture or increase ISO before resorting to an extremely slow handheld shutter speed
5. Add Props, Posing, and Movement
The props have to give information about the character or situation. An interesting prop is worth more to a picture than ten meaningless decorations.

Choose Props That Tell the Story
For bloody photoshoot ideas, do not cover everything in fake blood. A blood-stained cuff, fingertips, collar, kitchen knife placed safely out of reach, or a single mark on the face can suggest what happened without overwhelming the composition.
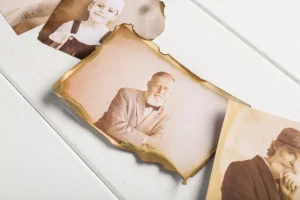
Other useful props include old photographs, handwritten letters, mirrors, books, flowers, keys, lanterns, veils, clocks, and empty chairs. Keep candles away from loose clothing, hair, curtains, and crowded shooting areas. Battery-powered candles are often a safer alternative when you need several practical lights.
Direct the Pose Instead of Asking for a “Scary Face”
A static stare quickly becomes repetitive. Give the subject an action: slowly turn toward the camera, look behind them, open a door, hold a letter, adjust a veil, or walk toward the lens. For portraits, a 50 mm to 200 mm equivalent focal range can help avoid the facial distortion associated with very wide lenses. Nikon also recommends keeping the eyes as the sharpest part of a portrait.
For creepy Halloween photography ideas, try hiding part of the face behind hair, a doorframe, fabric, or a shadow. Showing less can make the image more unsettling.
Bring Emotional Depth to Your Portraits with Bokeh Effect
6. Photograph Couples and Groups as a Scene
Group portraits become much more interesting when every person has a role in the composition.

Create Relationships Between the Subjects
For Halloween photoshoot ideas for friends, avoid putting everyone shoulder to shoulder. Instead, create different levels and distances. One person can sit at a table, another can stand behind them, while a third appears in the background near a doorway. Give everyone an action or direction to look toward. This creates visual hierarchy and prevents the image from feeling like a standard party photograph.
Build a Couple’s Story
There are a variety of roles that couples can take on, including competitors, partners, victims, detectives, or even supernatural beings. You could try a scene with a romantic candlelit dinner, one person looking at the camera and the other at an empty chair.
Your AI-Powered Photo Editor for MacOS and Windows
7. Finish the Look in Editing
Editing should reinforce the atmosphere created during the shoot rather than attempt to invent it afterward.
Adjust Light Before Applying Effects
Begin by adjusting exposure, highlights, shadows, white balance, and contrast. If the intention is to create a chilling atmosphere with supernatural elements, cool down the entire scene while ensuring that the skin looks somewhat realistic. If vintage-style horror is what you’re aiming for, desaturate the colors a bit, enhance the black levels, and keep a little warmth coming from candlelight or lamps.

Retouch Portraits Selectively
Horror photoshoot ideas do not need perfectly smooth skin. Makeup texture, freckles, wrinkles, scars, and small imperfections can make the character more believable. Luminar’s AI portrait enhancer tool can help with selective adjustments to portraits, including skin, facial features, eyes, and lighting. Be sure to use the adjustments carefully to avoid an unnatural appearance for your character.
From Costume to Final Shot
An impressive Halloween image does not necessarily require a complicated setting or costly equipment. All that is required is a simple narrative, lighting to build the right atmosphere, and a few choice props to help define your subject. Whether your location is a bedroom, the streets at night, or a candlelit dinner table, all you need to do is pay attention to the little details that help sell the image.