Turn your photos into nostalgic masterpieces: simple editing tips for achieving a film-like look on your smartphone.
Smartphone cameras are a universal solution that has replaced portable cameras with limited functionality. Modern devices can automatically adjust settings to create flawlessly refined images, and if something goes wrong, the built-in editor will help correct the defect in just a few clicks. But can the feeling of a digital visual style really compare to the charm of moments captured on film?
The warm feeling created by the combination of grain, softened edges, and a limited color palette is difficult to describe in words. That is exactly why photographers still return to this atmosphere even in 2026, trying in different ways to recreate a film effect in their photos. Some even decide to buy a dedicated film camera, which takes a huge amount of time to learn. It is far more practical to use the modern technology already right at hand.
Don’t feel like reading the whole breakdown right now? Here’s a tighter, more practical summary of what actually changed.
Key Takeaways
- Use a dedicated editor instead of the built-in camera app: Luminar is positioned as the most flexible option for depth and texture tools, while Photoshop or Premiere Rush can work as alternatives, and RNI Films is useful for film presets but may need a second editor for fine-tuning.
- Start with the right source file, ideally RAW. The text warns that JPEG and other compressed formats lose detail fast once you begin pushing grain, curves, and color.
- Avoid the one-click “Film” preset. The guide recommends using a different vintage-style base and then adjusting manually to get a deeper, more believable color.
- Grain needs controlled numbers: keep intensity around 15–20%, and set particle size roughly double at 30-40% to avoid grain turning into ugly digital noise.
- Build the analog feel with imperfections, including vignetting, chromatic aberration, light flares, and optical distortions that are hard to control in-camera and are typically added in post.
- Use curves to mimic film tone response. Lift the black point by about 10–15% and pull highlights down by roughly 5% so shadows go matte and whites soften like real film.
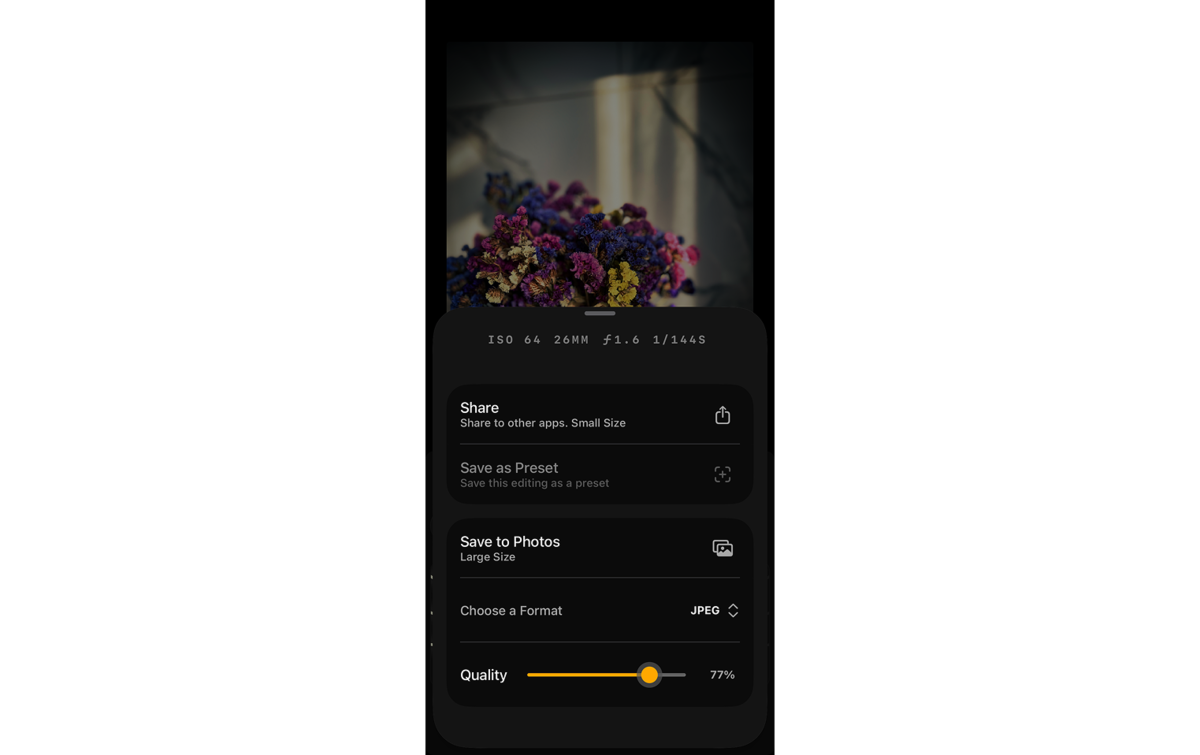
- Export is part of the “film” result. The text recommends JPEG at 95–100% quality or uncompressed TIFF, and warns that messengers and free sharing services can ruin detail through aggressive compression.
Choosing the Right App for Film-Style Editing

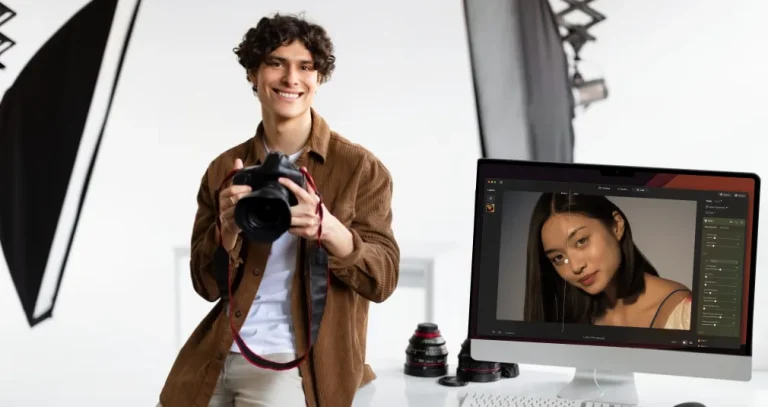
To create a film effect, it is better to use a separate app rather than the editor built into the camera. The basic features of Android or iOS phones will suffice for initial image editing. When complex edits or color adjustments are required, however, these features may not be enough.
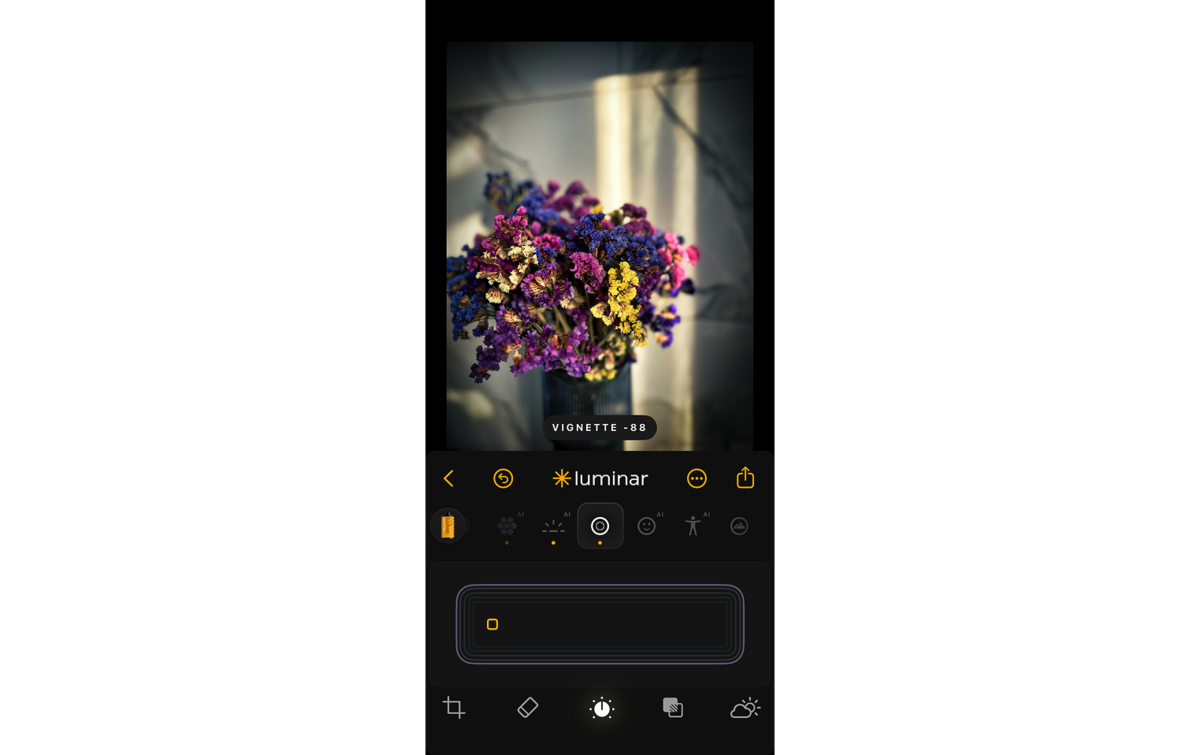
Try using Luminar for this task. The editor runs reliably across devices and offers advanced tools for creating depth. In the “Textures” section, you can choose the “Film Burn” or “Film Grain” effect. They help establish a solid base for achieving a nostalgic image. If you are unsure which option to choose, the built-in AI algorithm will automatically analyze the shot and suggest changes that can complement it.
As an alternative for editing, you can consider Adobe products such as Photoshop or Premiere Rush. The tools available in these apps make it possible to create a natural film effect in just a few minutes of work. Mobile versions rarely include AI, so you will most likely have to process the data manually.
When choosing a specialized photo editing app for iPhone, consider RNI Films. Once installed on your mobile device, you can select a set of presets that mimic the look of various types of film, including Kodak, Fujifilm, Agfa, and others. However, the app’s functionality is limited, so you’ll need to fine-tune your photo to perfection in another editor before using it.
Five Steps to Create a Vintage Film Look on Your Phone
The editing principles for achieving a film-like effect in a photo will remain the same regardless of the app used. Therefore, the main focus should be on the solution’s ease of use and versatility. If all the required functions are available in a single app, there will be no need to integrate other tools into your workflow.
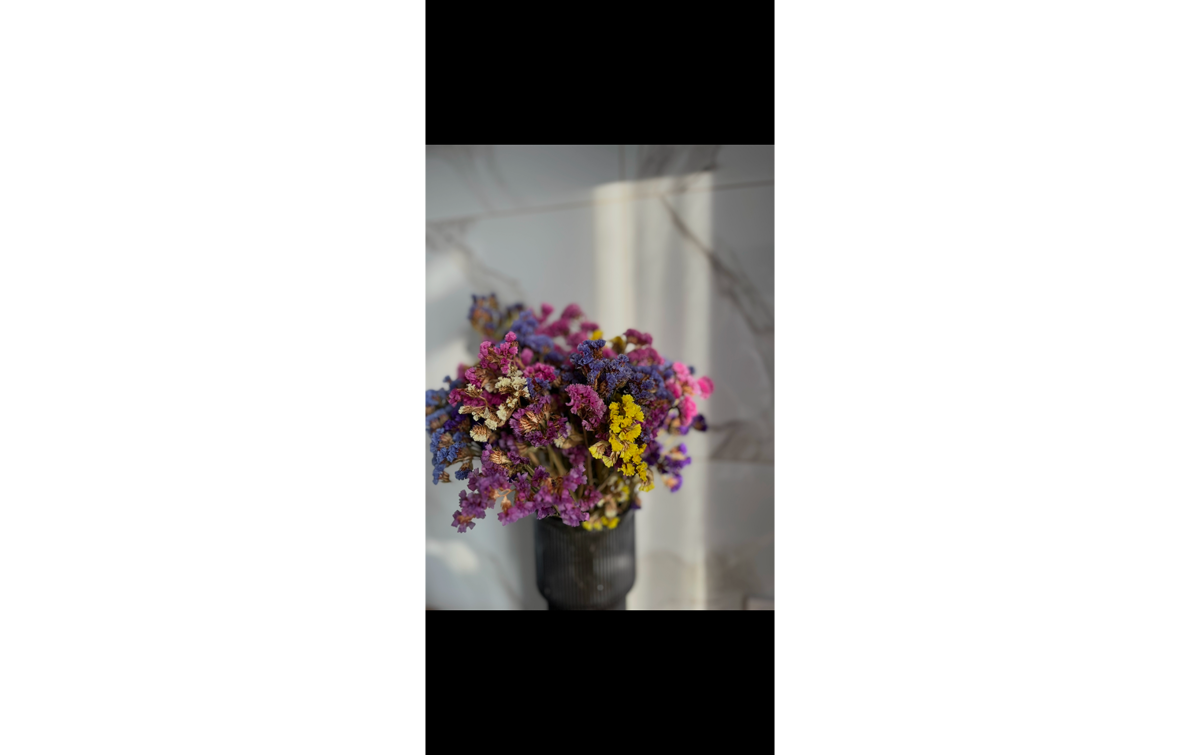
- Choosing the right image. Creating a film-like effect requires extensive editing, during which elements that lack sufficient detail may lose their visual impact. To prevent this from happening, it is best to select images saved in RAW format for processing. Any other formats, including JPEG, are unable to capture the required level of detail, which will inevitably result in unwanted defects during processing.
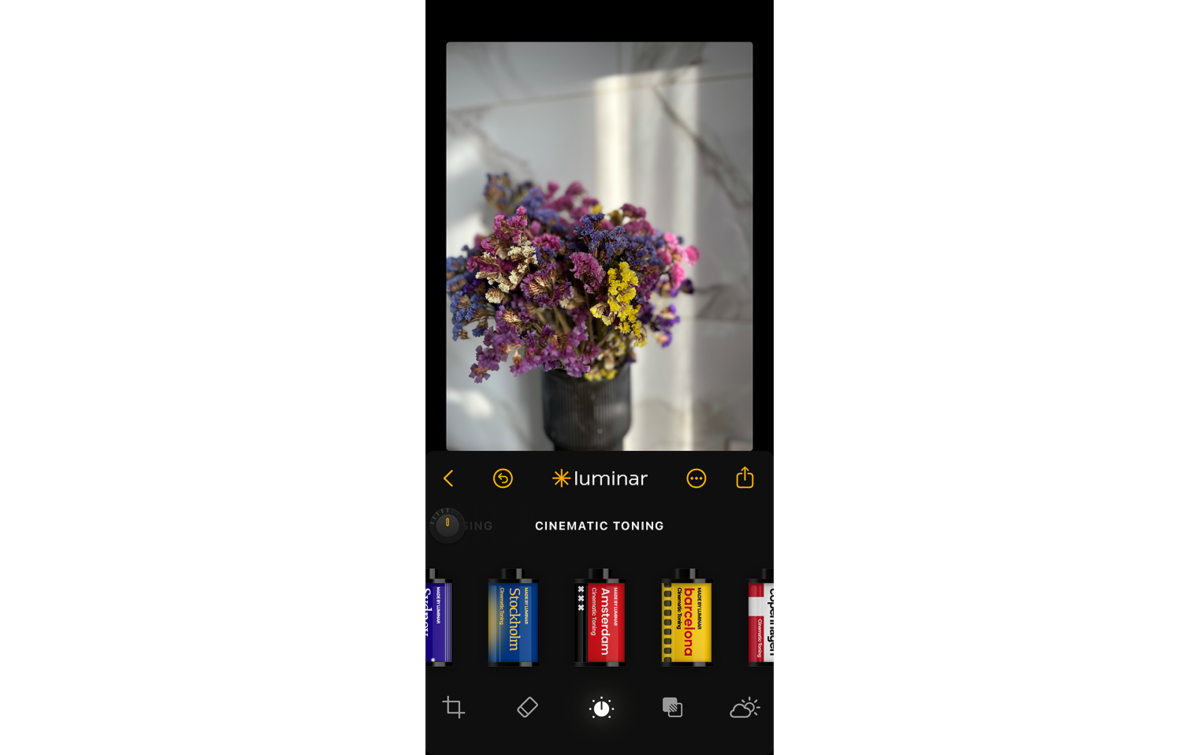
- Applying a base effect. In photo editors like Luminar, there’s a preset gallery where you can find pre-balanced sets of settings for various tasks. It’s best not to choose the ready-made “Film” effect. It looks decent, but if you adjust the settings yourself, you can achieve deeper colors. Choose any other effect that creates a vintage style.
- Adding imperfections. Authentic film photographs are “capricious,” which means that any damage or external influence affects the final appearance of the scene. Photographers usually regard these characteristics as flaws, but it is precisely these imperfections that give the image its unique charm.
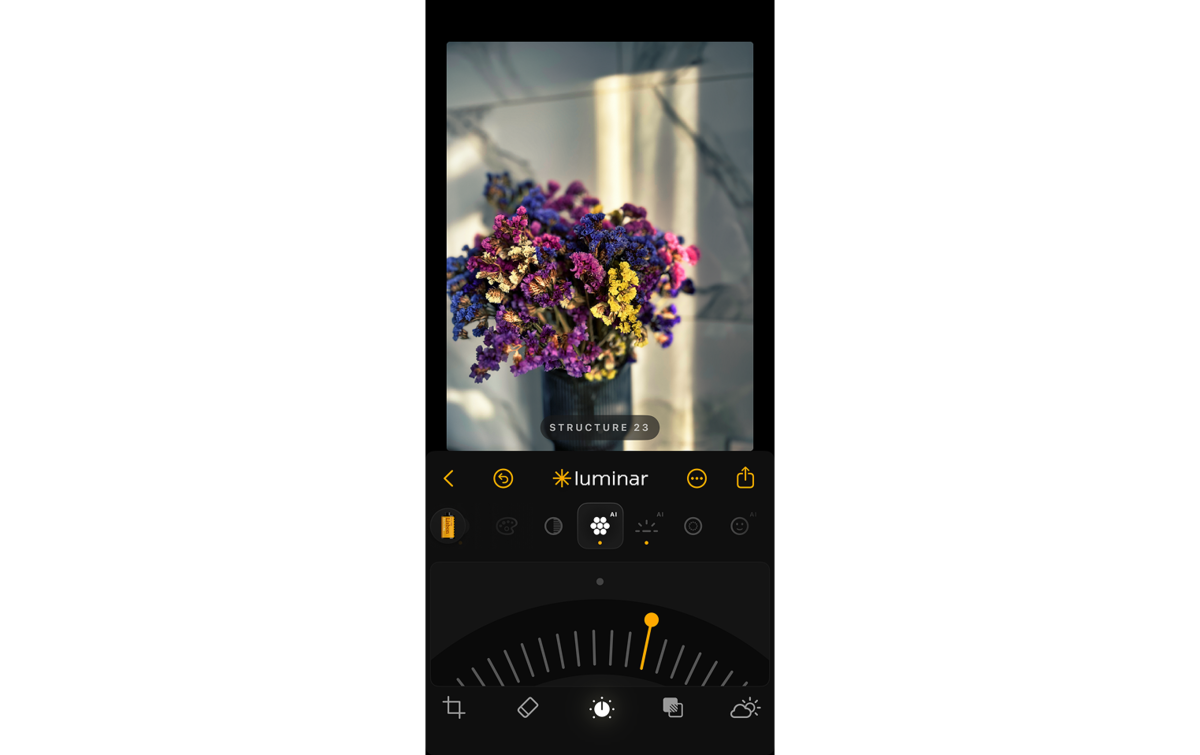
- Distinctive Features. Grain and vignetting can be called the hallmarks of the film style. To reproduce both of these “imperfections” at the same time, you can use the anamorphic effect. This feature is usually found in the “Cinema Effects” group or a similar section. Adjust the intensity so that the changes are visible to the naked eye but don’t ruin the photo.
- Save the image correctly. In the top corner of the screen, find the “Share” or “Export” button. Next, select a location to save the image and choose a format if a corresponding context menu appears. Most software saves a history of changes, so you can return later and make adjustments without having to redo the basic editing.


Mobile editing apps are necessarily limited in functionality due to the low processing power of mobile devices. However, their basic features are sufficient for creating a film-like effect on any photo. If you need a more comprehensive solution—such as the ability to replace the sky or remove an object and then fill the space in a way that fits the context—you’ll need to use the desktop versions of advanced editing software.
Adding Authentic Film Grain and Texture

When film cameras are used, the film grain effect comes from silver particles in the celluloid. This effect gives analog photos a warmth that cannot be achieved through other editing settings. To keep the grain from turning into visually distracting noise, set the effect intensity between 15 and 20%. In that case, it makes sense to set the particle size about twice as high, at around 30 to 40%.
Along with the grain visible in the image, a film-like texture also requires light flares and optical distortions. They appear when a lens that is technically unsuited to the subject is used or when light is handled carelessly. Controlling intensity during an actual shoot is difficult, so these characteristic features are usually added during post-processing. Professional photographers emulate a vintage style using the “Vignette” and “Chromatic Aberration” tools, adjusting the intensity based on the frame’s composition.
Professional Editing. Now in Your Pocket.
Download Luminar on your Mobile Device
Adjusting Colors to Mimic Classic Film Tones
Color forms the foundation of film aesthetics: the chemical development process uniquely distorts hues and softens contrasts. On film, deep shadows turn to a matte dark gray, and bright whites lose their intensity. The “Curves” tool mimics celluloid’s characteristic. Raising the lower-left point of the RGB graph by 10-15% brightens the dark areas, while lowering the upper-right point by 5% mutes the highlights.

Tips for Achieving Cinematic and Washed-Out Effects

The biggest mistake in post-processing is cranking the settings all the way up. Blurring the entire frame completely strips it of its cinematic depth. To recreate the film-like effect, you need to build it up using various settings, carefully monitoring the intensity of each effect. Instead of total defocusing, apply a radial or linear blur at 10-15% exclusively to the edges of the photo, keeping the center of the composition sharp.
Creating your own presets will help simplify the process of editing a series of photos. After adjusting the curves, color correction, and grain on one photo, copy these settings and apply them to the rest of the shots. Then, all that’s left is to fine-tune the exposure by 5-10% based on the lighting of each specific shot.
Saving and Sharing Your Edited Vintage Photos

A finished film frame stands out from other images for its great visual detail. For this reason, it’s easy to ruin it during transmission: messaging apps and free file-sharing services aggressively compress files, turning a carefully composed scene into a series of visual distortions. Saving images in JPEG format at 95-100% quality, or as uncompressed TIFFs, ensures the recipient sees the image at its best.
When you have a lot of photos or frequently work in a specific style, create a separate collection. Use Luminar Spaces or Google Photos to put together a photo album, then send invitation links to friends, family, or clients. Grant editing permissions to specific users via the “Share” section if multiple people are collaborating on a visual collection.
Film Emulation Techniques for Mobile Editing

To create a film-like look when editing on your phone, start by applying a texture that mimics real film grain and dust. Adding effects to a digital photo will help soften it before further editing. Using the “Bloom” effect or “Mist”-type filters will further blur the sharp edges of objects.
Apply the principle of selective toning to add contrast. Despite the complicated name, the principle is quite simple: shift the white balance toward warmer tones, and in the shadows settings, raise the black point. As a result, the contrasting colors will enhance the contrast of the photo’s details, drawing the viewer’s attention. If the colors look too “garish,” manually adjusting the channels in the “HSL” tool will help correct this.
Creating a Cozy Atmosphere Using the Film Effect

The transformation of phone photos is based on a deliberate approach to color and texture. Mastering the tools of the mobile editor recreates the nostalgic atmosphere of classic photography without the need to buy film equipment or wait for chemical development. Adjusting the lighting and simulating grain alters the physical perception of digital images. A couple of minutes in the app restores a timeless aesthetic, a tangible texture, and the warmth of the analog era to your pixel gallery.