Discover the best Luminar tools for quick photo edits and learn how to create impactful, polished images in minutes with an efficient AI-powered workflow.
Luminar has you covered whether you’re settling down for a lengthy editing session or under a time crunch where a quick job will do. And that’s exactly what we’ll be looking at today. If you need some quick fixes for a fast turnaround while still producing impactful and great-looking shots, then read on because I’ll show you some of my favourite tools that help me do exactly that.
It all starts with having a plan and a reliable workflow of tools that you can trust to achieve your vision. Beginners will often run through a gauntlet of tools, aimlessly pushing sliders to and fro with no real idea of how they actually want the photo to look.
And if you haven’t got the time to learn every Luminar tool inside out, don’t worry! It comes packed with AI tools that do a great deal of the heavy lifting for you, allowing you to make a few quick adjustments and move on. Before long, you’ll be exporting images in no time.
So without further ado, let’s get started!
Start With a Good Photo
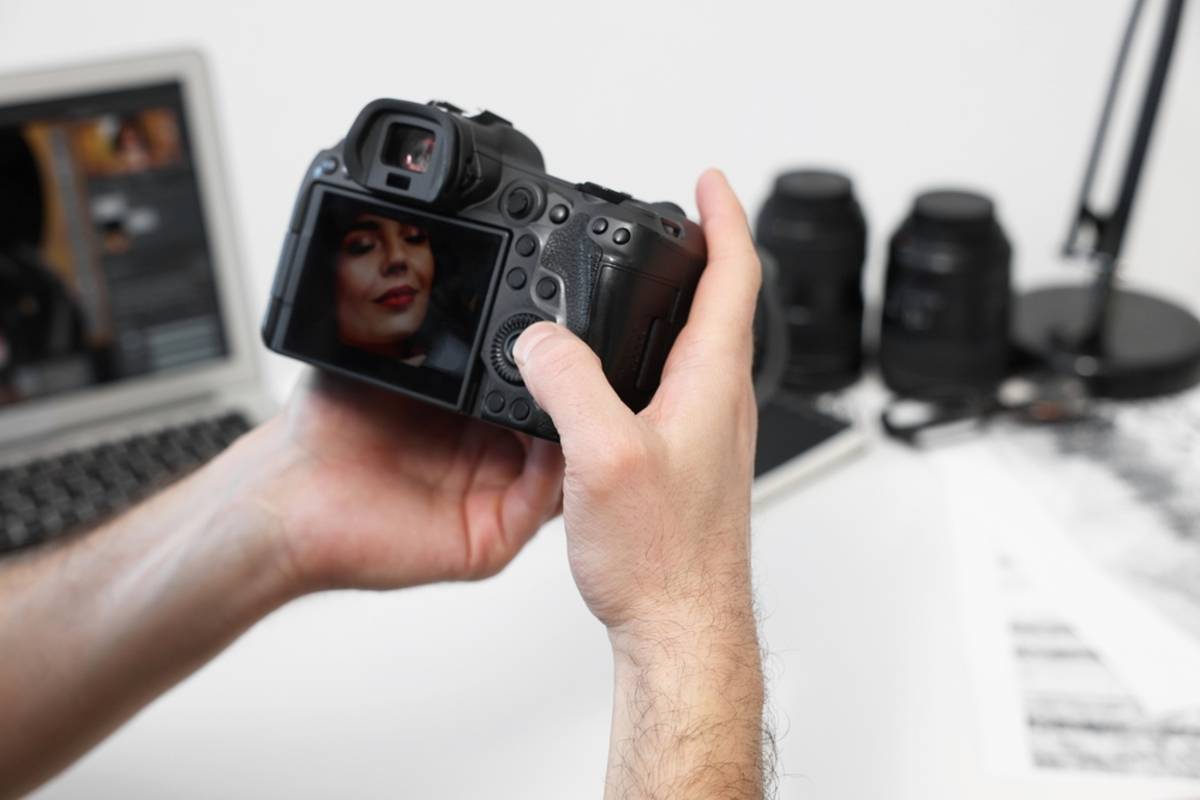
This might seem obvious, but you’ll save yourself a great deal of time by starting with a strong image. If I open up a photo on my computer and immediately see areas that need masking, exposure errors, or distracting elements that need removing, then I know I’m in for a long editing session. But a balanced image that already looks great in-camera can genuinely be finished with just a handful of tools.
Starting with an image that has balanced exposure, good composition, and sharp focus requires very little editing at all.
One way to make balancing exposure much easier is to shoot in RAW. This is simply another file format, just like JPEG, but it offers a wider dynamic range. Don’t worry, it’s not as complicated as it sounds. It simply means there is more recoverable detail in the shadows and highlights, making it much easier to balance exposure without quickly running into image quality issues.
As you gain more experience with editing, you’ll instantly recognise which photos fall into the “quick edit” category and which ones belong in the “grab a cup of tea and settle in” category. I’ll often look through my photos and think, “I really like that shot, but I just don’t have the time or energy to fix it right now,” and simply mark it to come back to later.
So when you come across an image and immediately think, “That looks good,” open it up in Luminar and get to work.
Exclusive Tools of Endless Possibilities in One Editor
Build a Repeatable Workflow: My Approach
Consistency is key. It allows you to go on autopilot, running through a reliable set of tools that help you get the job done quickly. Constantly jumping between tools, experimenting, and trying new things is where you begin to lose time.
The good news is that the tools in my workflow work across a wide variety of photography genres. I shoot all sorts of subjects, yet these are always my go-to tools when I need a quick turnaround.
Before we jump into them, though, I want to stress one important point: small adjustments go a long way. When several subtle edits are combined together, they create fantastic-looking images. If you push every tool too hard, you’ll simply spend your time chasing mistakes with other tools, wondering why your photo doesn’t quite look right.
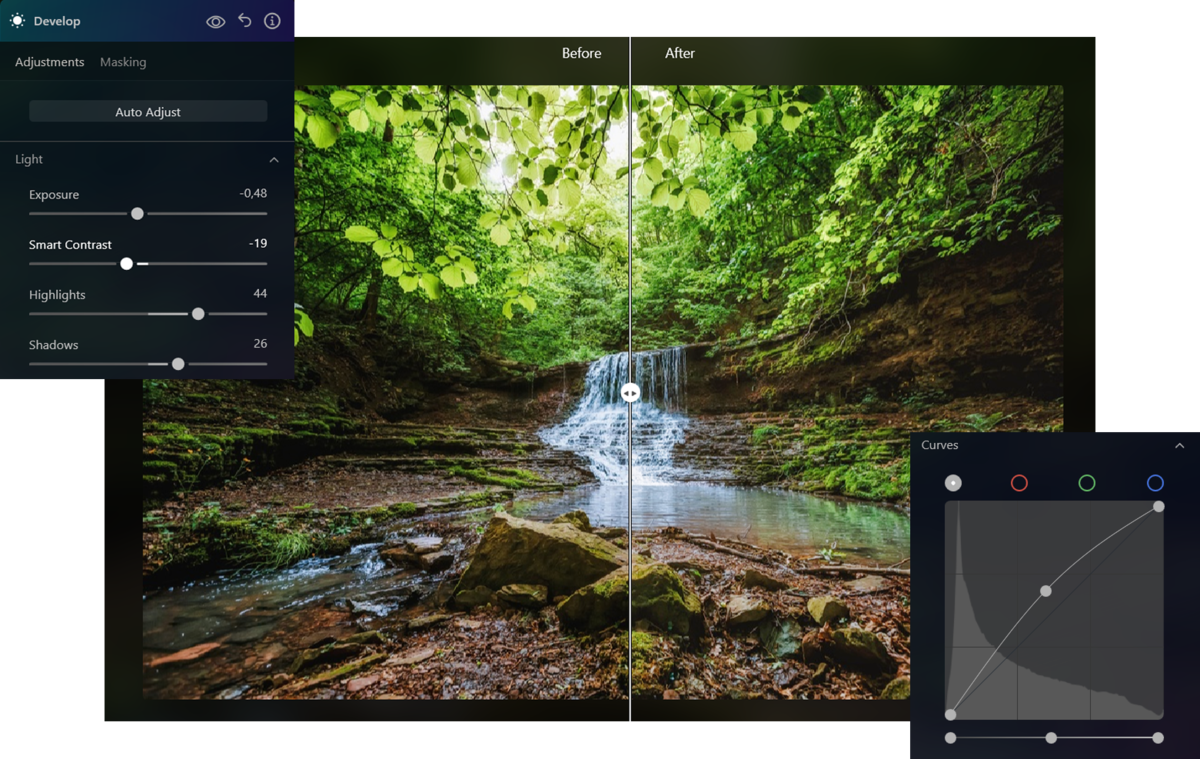
- Develop: Every edit should begin here because it gives you a strong foundation to build from. Simply add a touch of Smart Contrast and adjust the highlights and shadows if needed. In many cases, Smart Contrast alone is enough. Once you become more comfortable with editing, you can start using the Curves tool and quickly create the classic “S” curve that works well with many balanced images. But for now, a small amount of Smart Contrast is all you really need.
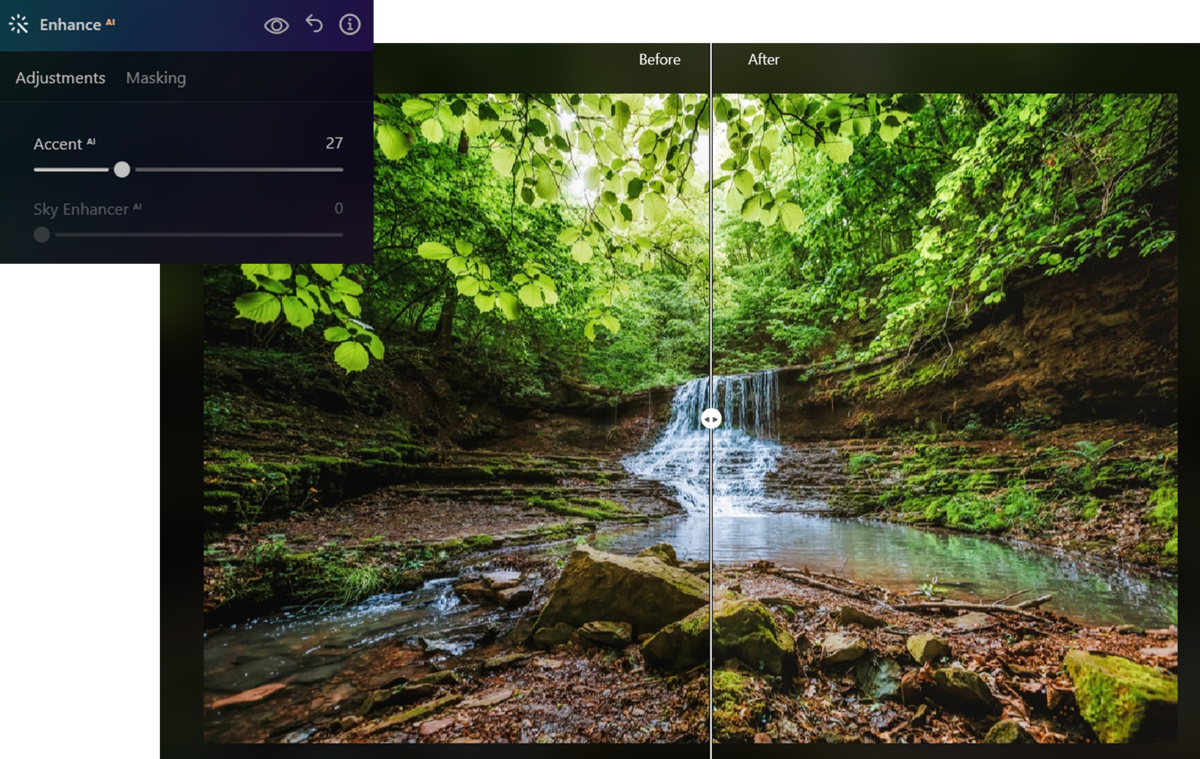
- Enhance AI: This is the pinnacle of quick turnaround tools. It instantly improves your image by intelligently analysing what it needs. It expands the dynamic range, helping separate the shadows and highlights, which creates more depth, impact, and an overall stronger-looking image with almost no effort.
- Structure AI: This is such an incredible tool that I use it in almost every edit, whether it’s a quick adjustment or a more detailed session. It adds clarity and detail to your photo, making it pop while instantly improving the overall quality. This is another tool where only a light touch is needed. You can also use the Boost slider underneath to bring out a little more clarity if required. Everything I’ve mentioned applies when moving the slider to the right. Move it to the left instead and you’ll soften the details, creating a more dreamy look. I often do this when trying to achieve a painterly style or when editing portraits, which brings us nicely to the next tool.
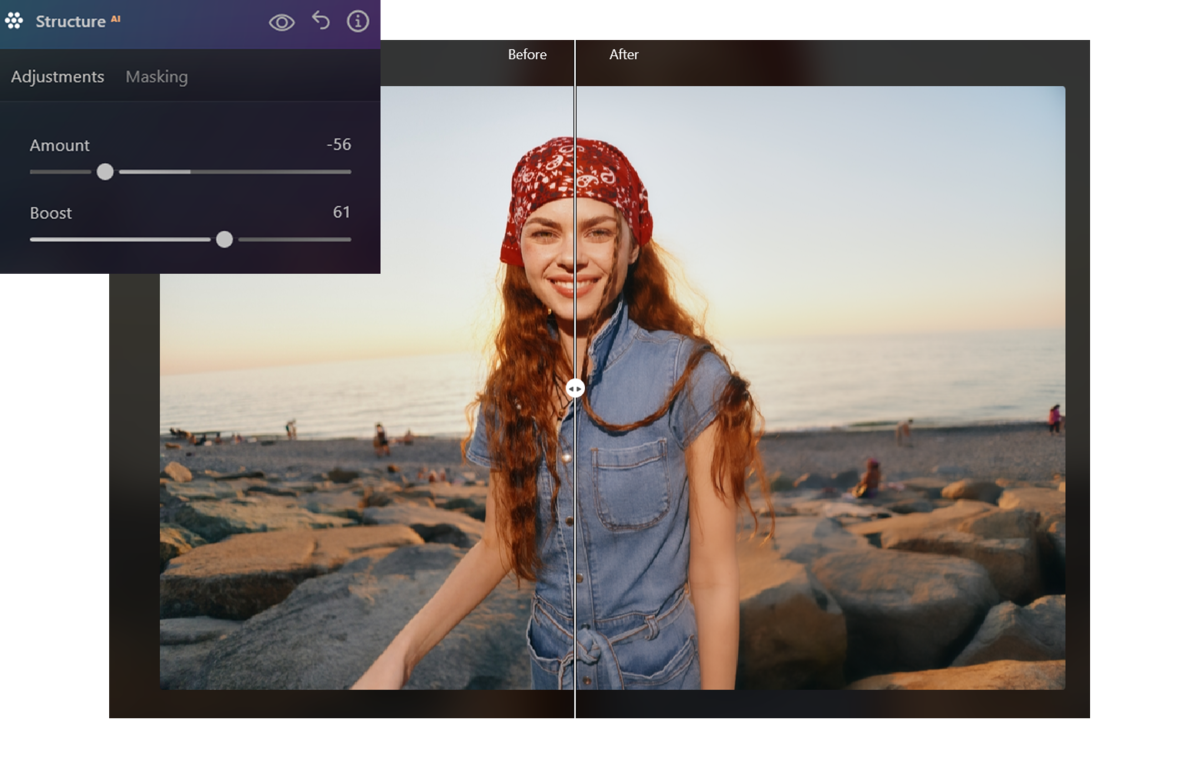
- Portrait Tools: Even when working with people, you can still achieve a quick turnaround. Face AI allows you to brighten the face and make it stand out more, while Skin AI helps even out skin tones, soften imperfections, and remove blemishes. You can also brighten the eyes, add a touch of colour to the lips, and whiten teeth.
All of this sounds like it should require careful masking and time-consuming selections, but that’s the beauty of these AI tools. Luminar automatically detects these areas and enhances them with little more than a push of a slider. These tools might take a session or two to become familiar with, but once you’re comfortable with them, you’ll be flying through portrait edits while still producing fantastic results.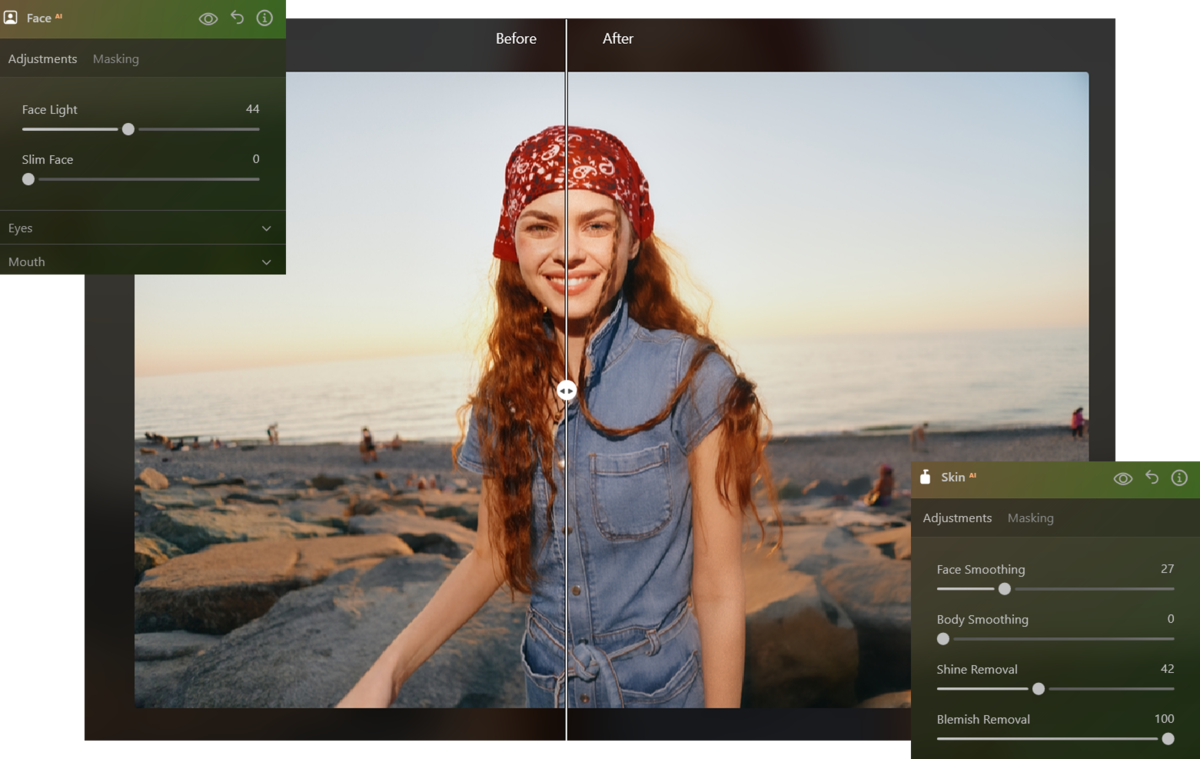
Elevate Your Photography with Our Advanced Software
- Light Depth: This is one of Luminar’s newest tools, and although it uses some seriously impressive technology behind the scenes, it actually takes very little time to improve your image. It’s an important part of my quick workflow because it simply helps tighten up the composition, adding shape while naturally drawing attention towards your subject.
The tool creates a 3D map of your image, allowing you to move the light through the scene until it falls exactly where you want it. Again, you usually won’t need a large adjustment. You can also jump into the advanced settings and slightly reduce the Near Brightness to help keep the viewer’s attention exactly where you want it.
It’s a genuinely fun tool to use, and it adds that final layer of polish to an image that certainly won’t make people think you only spent two minutes editing it.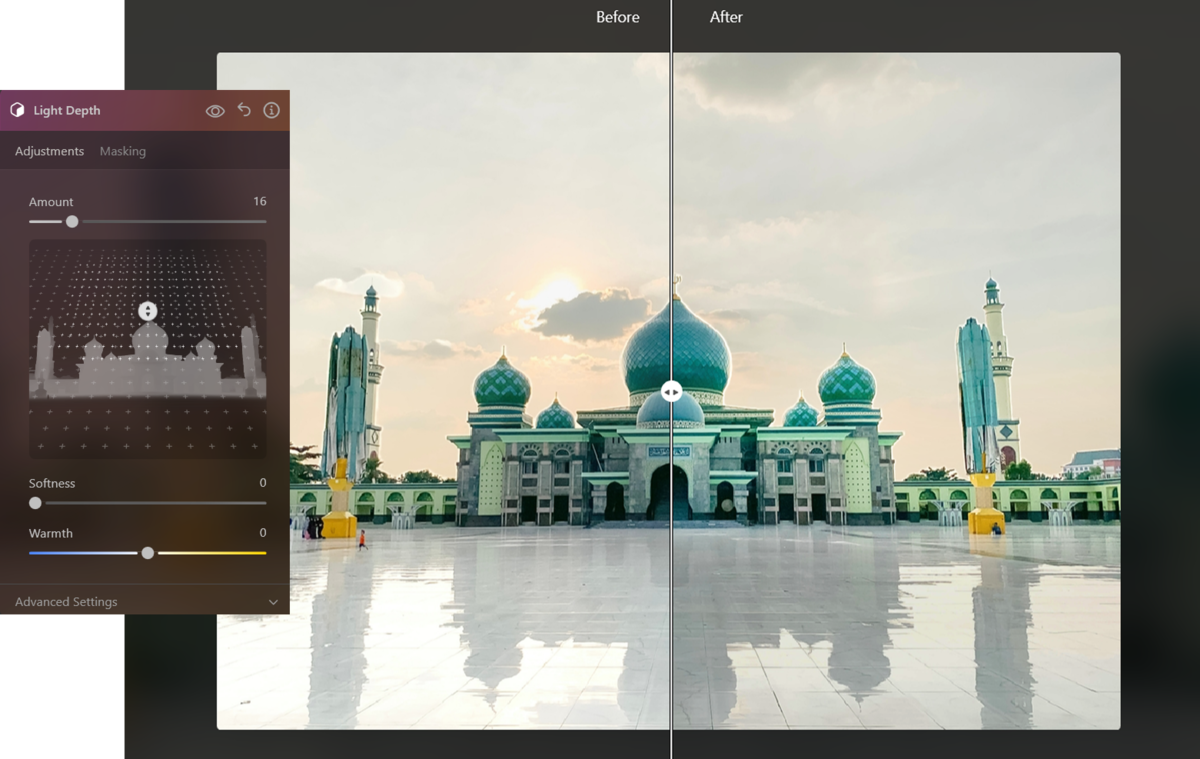
- Toning (Optional): It’s now time to move on to colour grading. I say this tool is optional because it’s very easy to spend far too much time getting colours absolutely perfect, and not everyone is interested in creating cinematic-looking images.
If you simply want to add a little more style to your photo, then Toning is one of the quickest ways to do it. You can quickly introduce colour into the shadows and highlights. Personally, I tend to cool the shadows slightly while warming the highlights, creating a pleasing colour contrast that works particularly well.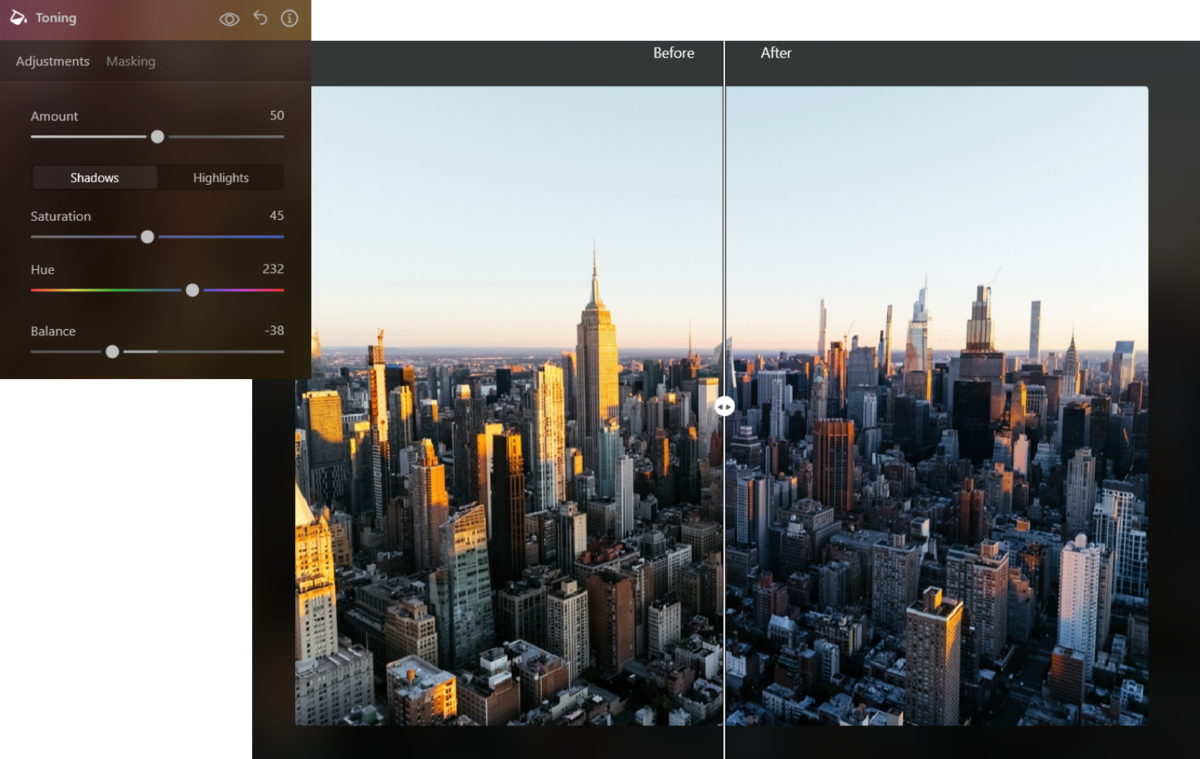
- Colour: This tool allows you to quickly make the colours in your image look richer, but it can also become one of the more time-consuming tools if you dive into every adjustment. For a quick edit, I simply increase Vibrance slightly and add a touch of Remove Colour Cast. That’s usually enough to finish the edit. If you have a little more time, you can refine the overall look further using the Hue, Saturation, and Luminance sliders.
So if you’re not editing portraits, you can realistically complete most of your work using just five core tools. Once you’ve gained experience and trained your eye to know exactly what your images need, it’s entirely possible to complete an edit in under two minutes.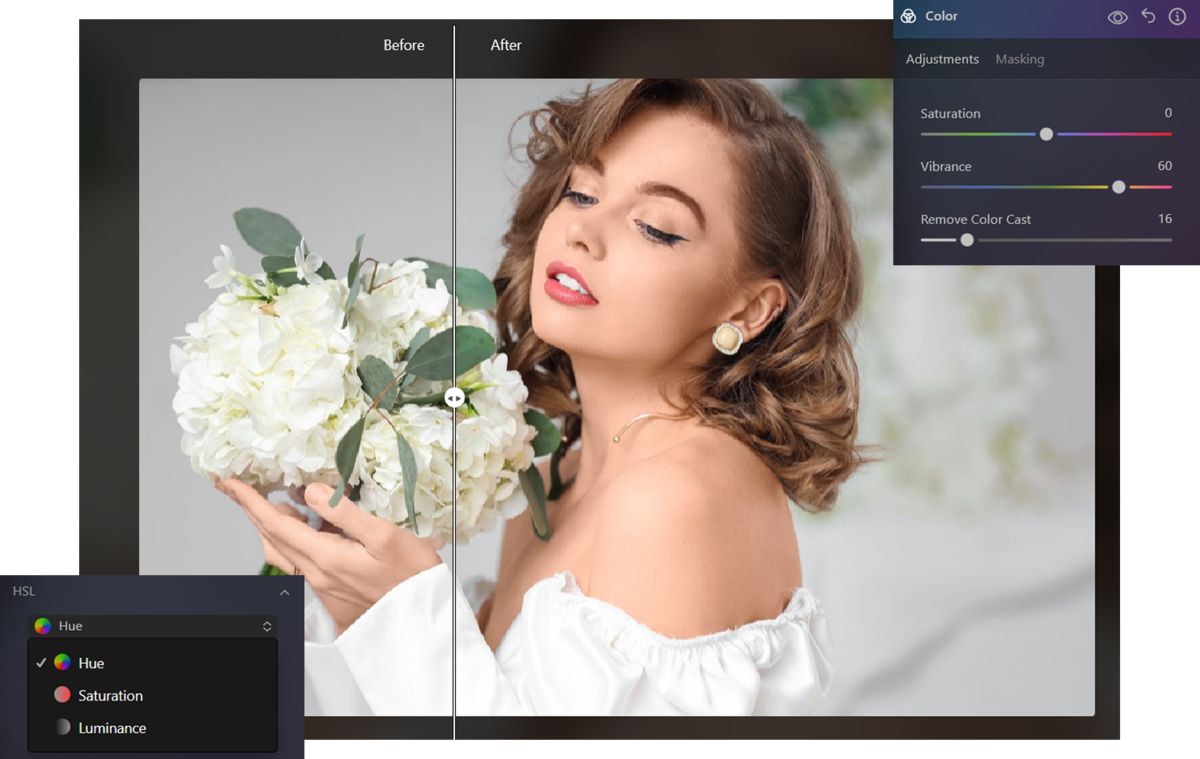
For Stylish Shots: Start with Presets

Presets can be a fantastic jumping-off point for a quick edit, but they can also easily become a bit of a time drain. Let me explain.
If you’re not familiar with them, presets take the edits that have been applied to one image and apply them to yours. They really can be a genuine one-click solution, and in some cases your image could be finished in just a few seconds. However, it’s easy to get carried away.
You can quickly find yourself browsing through every preset in the pack, jumping into the editing history, tweaking the settings, and then adding your own adjustments on top.
To prevent this, go in with the mindset that once an image looks good, you’re happy with it and move on to the next one. No experimenting and no endless fine-tuning.
Luminar’s preset catalogue contains a huge range of packs designed for different photography genres.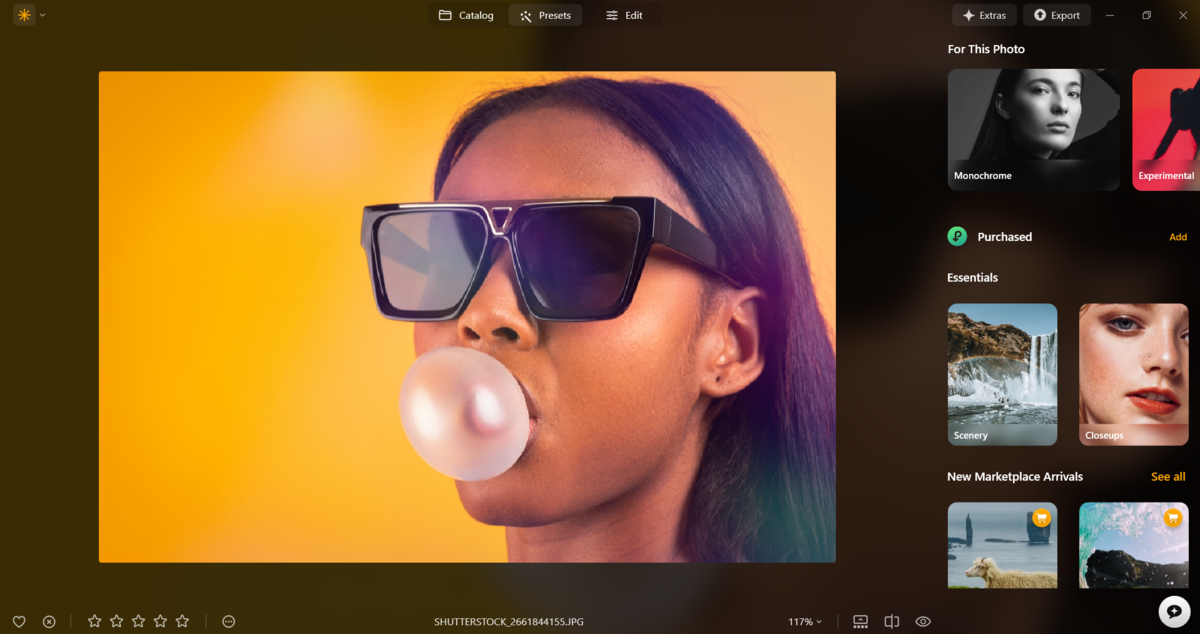 If you want to save yourself as much time as possible, choose a preset pack that’s suited to the type of photography you’re editing. Working on landscape photos? Head over to the Marketplace and look for landscape preset packs. You’ll be much more likely to find a one-click solution than if you were trying to edit those same images using a street photography preset pack.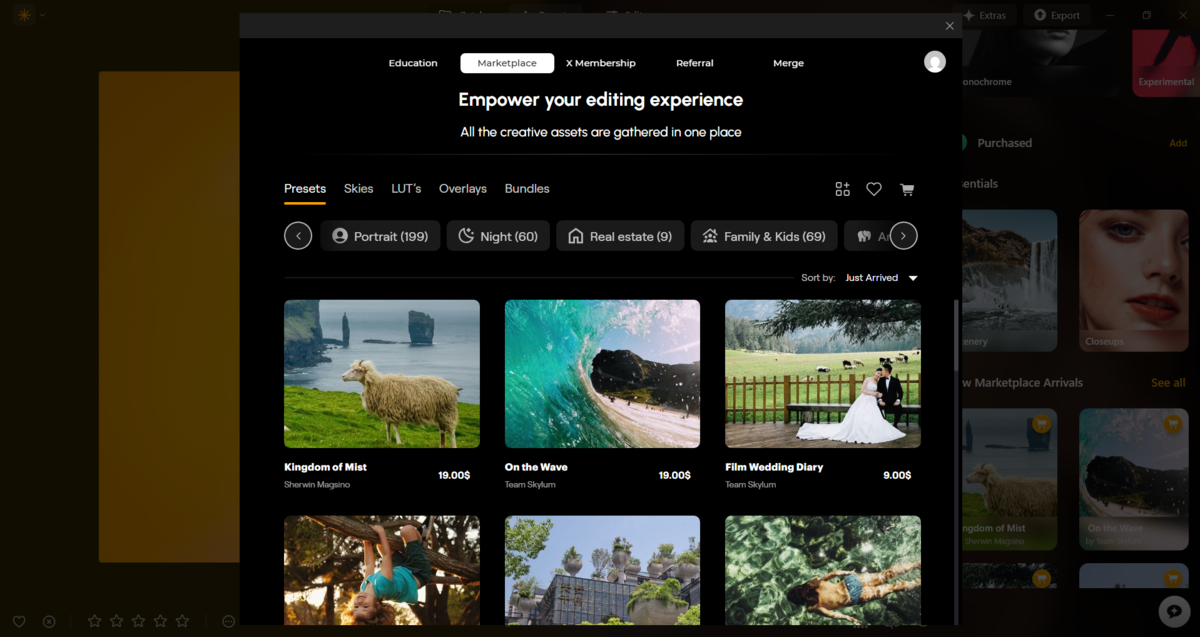
Your AI-Powered Photo Editor for MacOS and Windows
Edit Similar Photos Together
Finally, let’s look at one of the biggest time-saving techniques of all: batch editing.
If you’re working with a series of similar-looking photos, there’s no need to apply the same tools to every single image individually. Simply copy your edit! You can do this by pressing CMD+C on Mac or CTRL+C on Windows, or by heading to Edit > Copy while in the editing window.
Then move on to the next image and press CMD+V or CTRL+V, or go to Edit > Paste, and you’ll instantly have the exact same edits applied.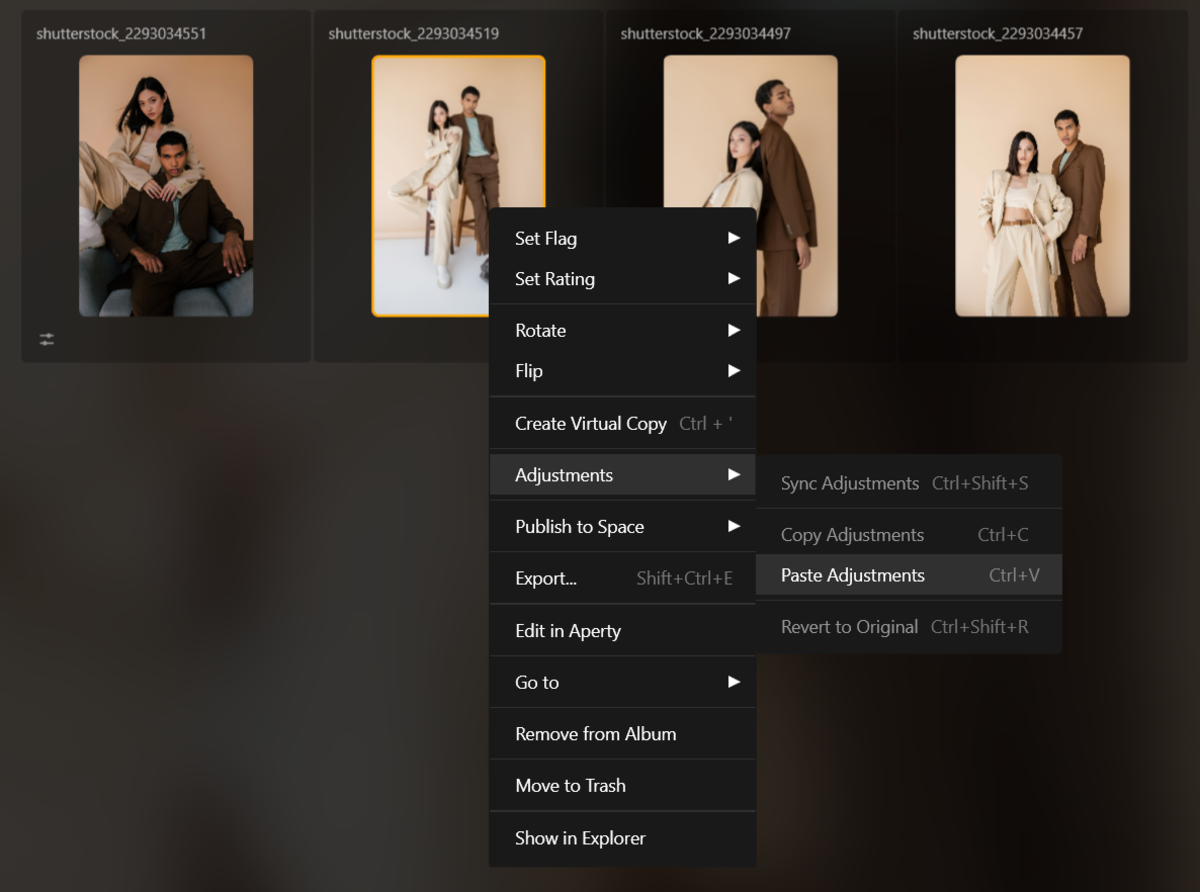 From there, you can either leave the edit exactly as it is or make a few small adjustments if needed. Either way, it will save you a huge amount of time.
Similarly, you can create your own presets so they’re always ready to use whenever you open Luminar. Perhaps you create a portrait preset, a landscape preset, or one specifically for your travel photography. It’s worth spending a little extra time building these presets and refining the colour grading because they’ll continue saving you time when you edit similar images in the future.
The Bottom Line
The next time you’re in a rush, come back to this workflow and start making it part of your own editing process. As you gain experience, you may discover other tools that fit naturally into your workflow, and that’s perfectly fine. Once you become comfortable with any of Luminar’s tools, you’ll instinctively know how to apply them quickly to improve your photos.
Just don’t get sidetracked and spend twenty minutes refining an image for only a tiny improvement. Keep the mindset that once a photo looks good, it’s time to move on to the next one.
Happy editing!