There is an important distinction between a complete beginner and an experienced photographer when it comes to landscape photography. The beginner will find themselves in a nice location with the perfect view and begin to shoot. The experienced photographer will find the same location but question whether the light is optimal for the shoot. If it’s not, they are more likely to leave and return to the spot at a better time.
Light is of course extremely important in photography, shaping the outcome of our photos. As you become more experienced, you learn how to use light as a tool to get the most out of your location, helping you take the best photo you can possibly take.
Today, I’m going to walk you through how to take better advantage of light and take better landscape photos. Let’s get started!
Exclusive Tools of Endless Possibilities in One Editor
Using Light to Create Depth
Why is lighting important? If the scene is bright enough, surely we can just take a photo? Well, not exactly. Light provides different qualities that make an image more aesthetically pleasing, drawing attention and creating a stronger overall result.
The biggest way to maximise the use of light in your image is by creating depth. This is especially important in landscape photography. You often have a great expanse of land ahead of you in your shot, and depth helps the viewer understand that scale through the way light is used.
How to Achieve Depth
The primary way to achieve depth is through the contrast of light and shadow. Even light across your image makes it look flat and, as a result, more dull. Experienced photographers look for uneven light, with portions of their image in shadow and key areas highlighted. These highlights create separation, drawing the viewer’s attention.
For example, imagine your foreground in shadow and a mountain in the background illuminated. The viewer’s eye naturally travels through the image, moving beyond the shadows and into the brighter areas. That’s depth.

So how can we work with light to ensure our images are striking, full of depth, and even influence the mood of the viewer? Let’s take a look.
Understanding Light Direction
I often say the best thing about shooting outdoors, no matter the style, is that your light source is free as opposed to complicated studio setups. But there is a clear drawback, we can’t control that light. We therefore need to work around it.
One of the key ways to do this is by understanding how your position, in relation to the light and your subject, will impact your result.
Front Light
This is when your light source is behind you as you shoot the subject in front of you. So that’s the sun at your back, with your scene fully lit from the front. This results in bright and even lighting. So remembering how uneven lighting creates depth, you can probably guess the result we get with front light.
Front light is often used in commercial photography. It’s simple, clean, and free from distraction. However, it’s not ideal for landscape photography unless used with intention.
If your goal is to showcase colour, then even lighting works well. It can also highlight detail and clarity, as nothing is lost in shadow. You can see why it suits commercial work.
But if you’re looking for drama, mood, and depth, there are better options.

Side Light
This is a landscape photographer’s dream. With the light coming from the side, it creates strong shadows and allows light to fall across the landscape. It brings out the shape of the terrain, as hills and mountains are lit from one side while the other falls into shadow.
It does a remarkable job of drawing attention to your subject. The contrast between light and shadow creates separation, naturally guiding the viewer’s eye to the highlighted areas. This contrast is also what builds depth.
Importantly, you don’t lose texture or detail. In fact, side light enhances it. The way light and shadow interact across surfaces makes textures stand out even more.
So if you are shooting a rugged landscape, side light will emphasise the texture of rocks and uneven terrain beautifully.
Side light is without a doubt the most effective lighting for landscape photography if you want impact, and it should be your priority whenever possible.

Back Light
This is where the light is behind your subject, with you facing into it. For example, the sun sitting behind a mountain as you shoot towards it.
This creates a very distinct look. One of the main effects of backlighting is that it reduces visible colour and texture in your subject, often turning elements into silhouettes. If your goal is to showcase detail, this may not be the best choice.
However, when used intentionally, it can produce striking results. Backlighting works incredibly well for atmosphere and mood, often giving images a cinematic feel. It can also create a subtle glow around elements in your scene, adding a unique visual quality.

I mentioned this in a recent article on spring blossom photography. When light passes through petals, it creates a soft, glowing effect that works beautifully for both landscapes and portraits.
So how do we control this if we can’t control the light itself? A lot of it comes down to timing.
Best Times to Shoot
Here’s a simple guide to how light behaves throughout the day:
Front Light = Midday
Side Light = Golden hour / early morning / late afternoon
Back Light = Golden hour / blue hour
Midday
With the sun at its highest point, it casts strong, direct light across your scene. Shadows are short, which results in a flatter image. Most outdoor photographers tend to avoid shooting at this time for that reason.

Golden Hour
A favourite among photographers and filmmakers alike. With the sun lower in the sky, shadows become longer, adding depth to your scene. The warm tones created by the sunlight give this time of day its name and make it especially appealing.
Your AI-Powered Photo Editor for MacOS and Windows

Blue Hour
This is the period just after sunset or just before sunrise. The sun is below the horizon, and the scene takes on cooler blue tones. It works well for moodier images, though the lower light makes shooting more challenging.

Light and Mood
The quality of light has a direct impact on how your image feels. Understanding this allows you to use light more intentionally.
Warm golden hour light often creates feelings of warmth, nostalgia, and comfort. Cooler tones from blue hour can feel calm, quiet, or even isolated.
Harsh midday light can be used for more dramatic and bold images. While often avoided, it can work well with strong creative intent.
Soft light, typically found in the early morning or late afternoon, creates a more gentle and calming mood.
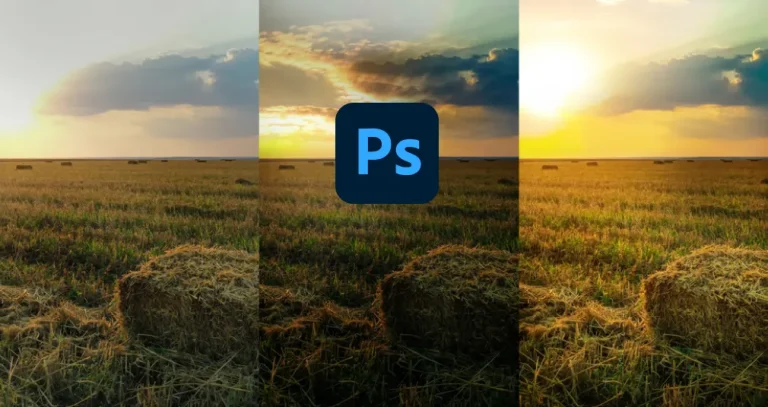
Maximising Light with Luminar Neo
To get the most out of the light in your image, you need to bring it out properly during editing. Luminar Neo is packed with tools that allow you to enhance light, shape your scene, and guide the viewer’s attention. Used correctly, these tools will help you take a good photo and push it into something far more impactful.
Structure
I’ll start with the Structure tool as it’s one of my favourites across all styles of photography. By pushing the slider to the right, it brings out clarity and detail in your shot. This works particularly well for landscapes where you want to emphasise textures, such as rock formations, trees, or distant mountains catching side light.
On the other hand, if you push the slider to the left, the details in your image will soften. This can be useful when working with softer light conditions such as misty mornings or blue hour scenes where you want to maintain a calm and atmospheric look. Being able to move between these two looks gives you a lot of creative flexibility depending on the mood you are trying to create.

Supercontrast
This is an extremely powerful tool and one I rely on heavily. Instead of applying contrast globally across your image, you can control the contrast in your shadows, midtones, and highlights individually.
This is key when working with natural light, as landscapes often have uneven lighting. You might have bright highlights in the sky and deep shadows in the foreground. With Supercontrast, you can deepen shadows slightly to create more depth, while also pulling back highlights to retain detail in the brighter parts of your image.
It allows you to shape the light rather than just increase contrast blindly, which is what gives your image that polished and professional look.

Light Depth
This tool is incredibly fun to use and also very effective. It creates a 3D map of your image and allows you to adjust how light is distributed from foreground to background.
Elevate Your Photography with Our Advanced Software
It might sound complicated, but in practice it’s very intuitive. Think of it as guiding light through your scene. You can darken the foreground slightly to encourage the viewer to look deeper into the image, or brighten midground elements to bring attention to your subject.
It does a fantastic job of mimicking how natural light behaves, enhancing shadows where they naturally fall and boosting highlights where light would realistically hit. This makes your edits feel much more natural rather than over-processed.

Landscape Tool
If you are looking to add warmth to your image, your first instinct might be to adjust the temperature slider. However, this applies a global change and can quickly throw off your colour balance.
Instead, within the Landscape tool, you will find the Golden Hour option. This enhances the warm tones already present in your image rather than applying warmth everywhere. The result is much more natural and helps maintain separation between warm and cool tones.
This works particularly well if you’ve shot during golden hour, as it allows you to really bring out that glow without affecting the rest of the image.

The Bottom Line
When you come across a beautiful scene, don’t just think about the location. Think about the light and whether it’s helping or holding your image back.
Midday light often works against you, making it harder to achieve depth and mood. Shooting when the sun is lower in the sky, and making use of side lighting, will give you far more impact.
Mastering light is what will take your landscape photography from average to something truly striking.