Create clear, consistent product photos with practical advice on lighting, camera settings, styling, and editing. Start with a simple home setup and adapt it to your products.
Good product photography helps shoppers understand an item’s shape, color, texture, and details. A useful image shows what the product looks like while giving it enough visual separation from its surroundings.
You do not need an elaborate studio to begin. A camera or smartphone, a stable support, a suitable background, and controlled light can provide a workable setup. These product photography tips explain how to choose your settings, manage reflections, and edit images without misrepresenting what you sell.
Don’t feel like reading the whole breakdown? We’ve pulled together a quick summary below.
Key Takeaways
- Start with the camera you already have; lighting and positioning matter more than choosing a particular camera type.
- Use a tripod or stable support for consistent framing and slower shutter speeds with stationary products.
- Treat f/5.6–f/8 and a low ISO as starting points for interchangeable-lens cameras, then check whether the whole product is sharp.
- Use one consistent light source where possible; mixed lighting can create color casts that one white balance adjustment cannot fully resolve.
- Capture clean product views, detail shots, and lifestyle images for different purposes.
- Control shiny surfaces by changing what they reflect, using diffusion panels and white or black cards.
- Edit dust, exposure, and backgrounds carefully while preserving the product’s actual color, shape, and features.
Choose the Right Type of Product Photo
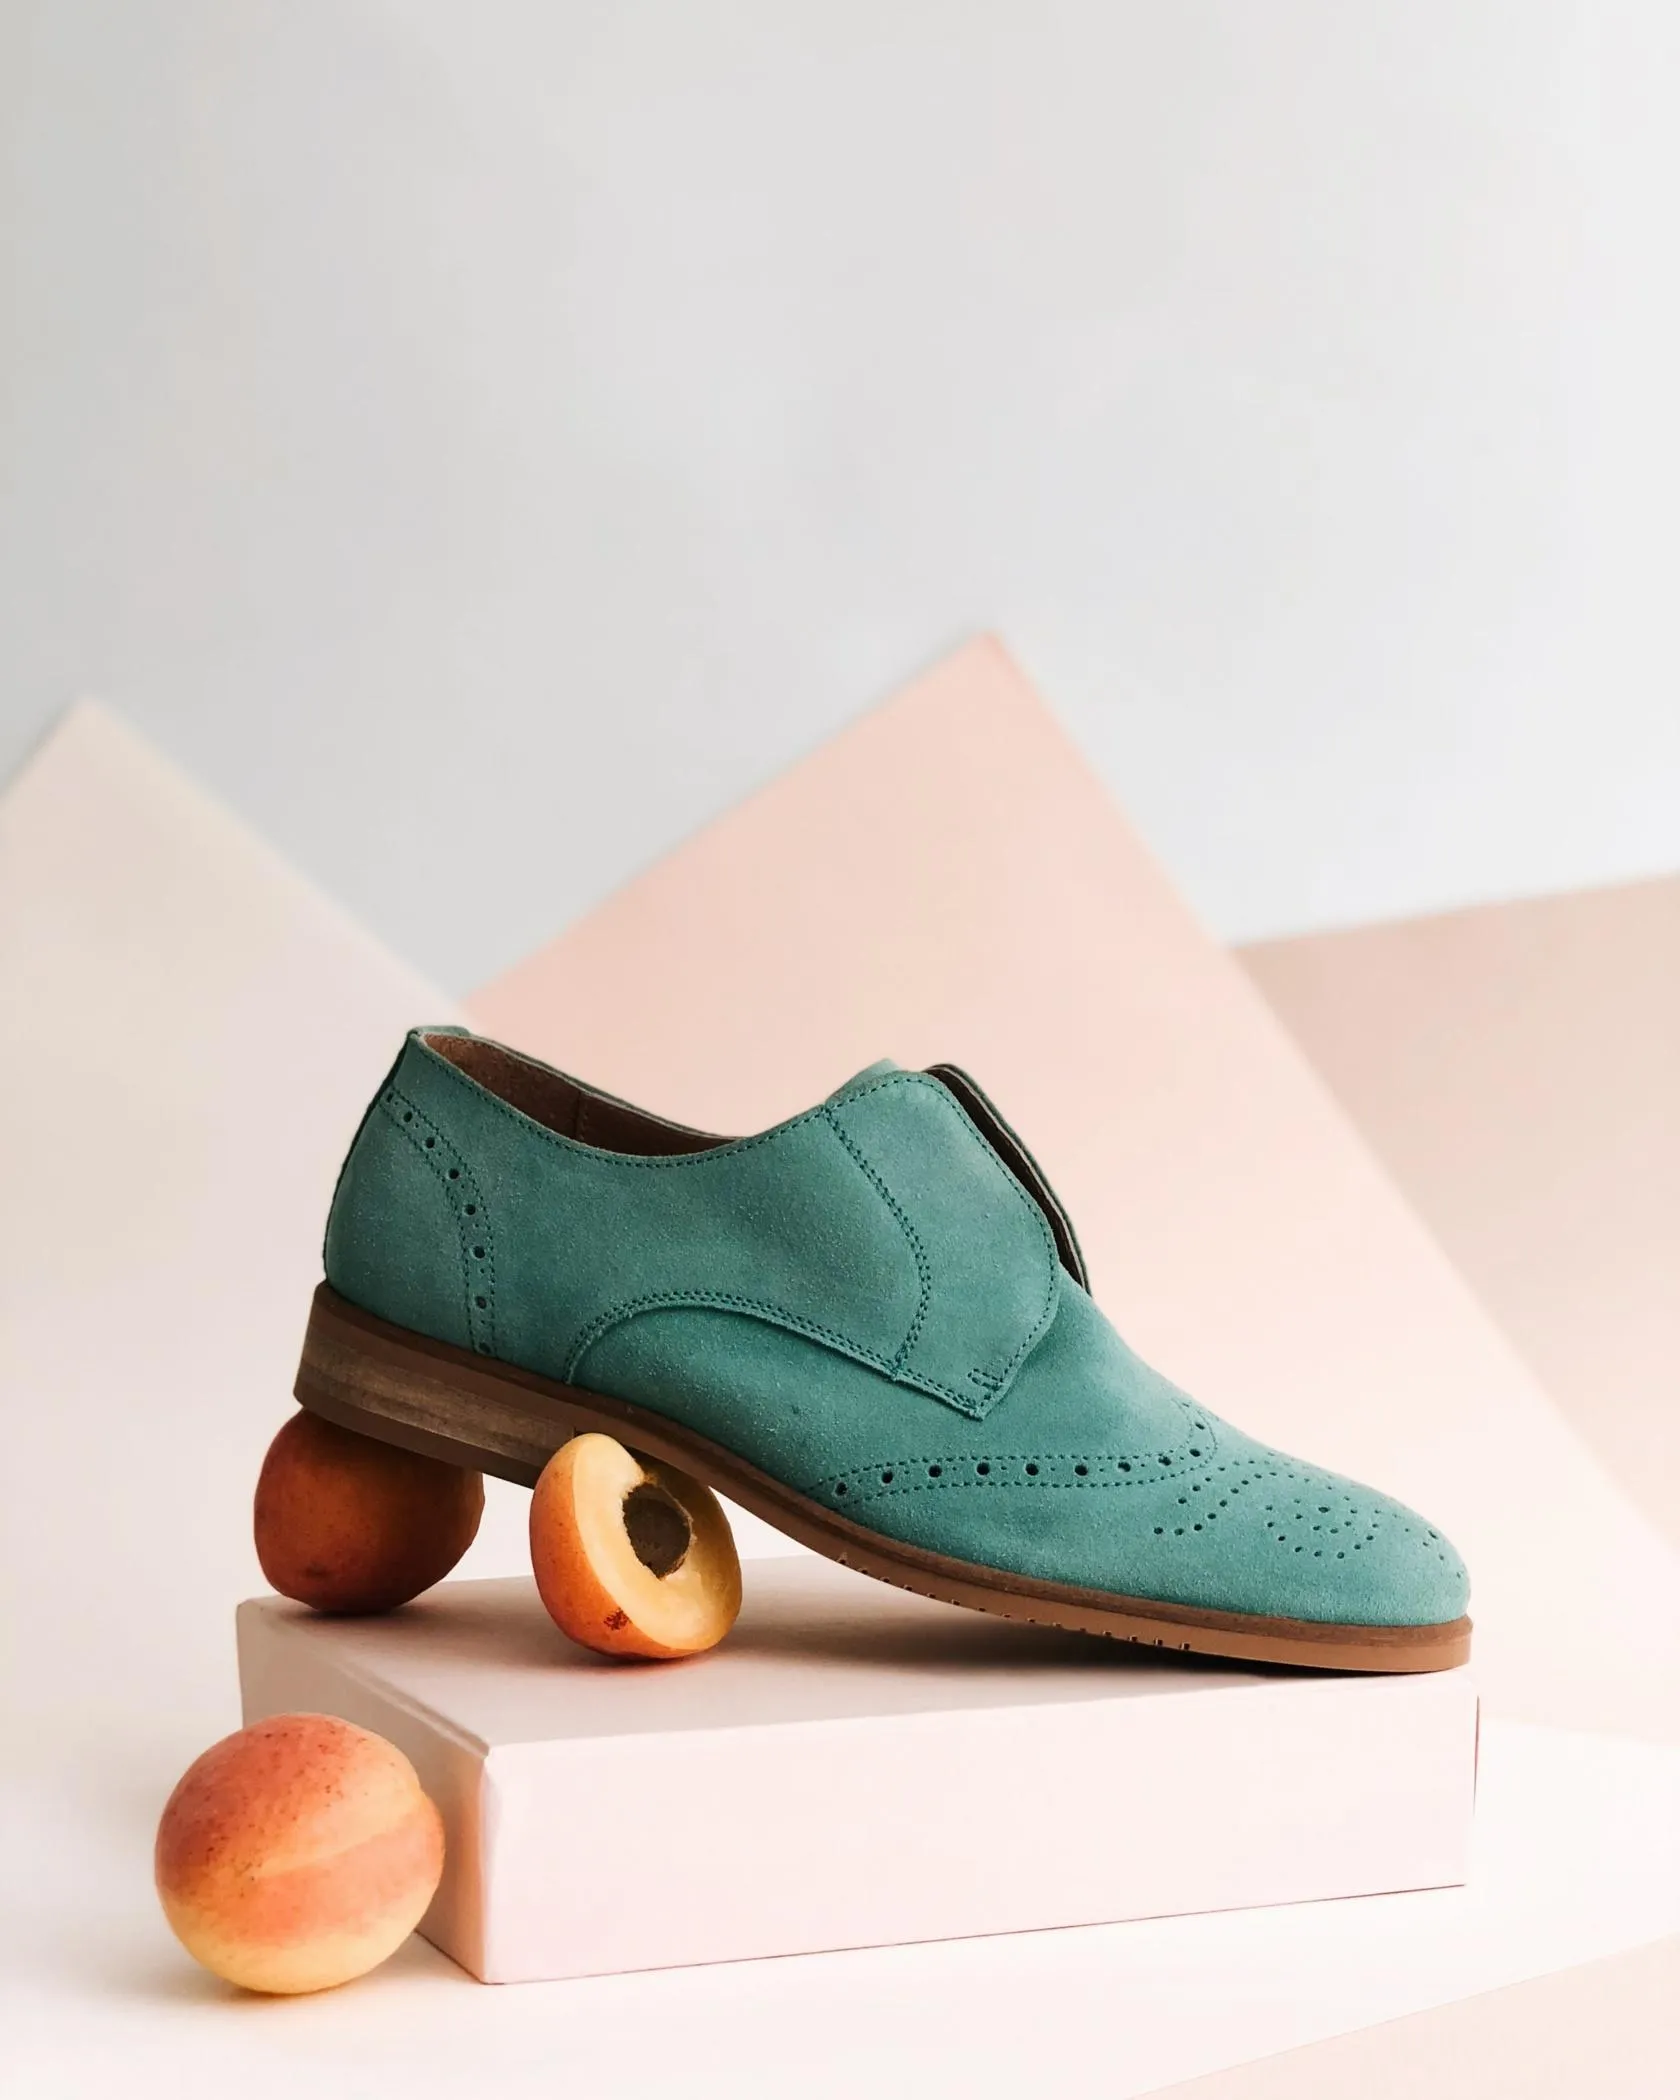
Decide what each image needs to communicate before setting up the camera. A catalog image should make the item easy to inspect; a lifestyle image can show how it is used.
| Image type | Main purpose | What to include |
| Clean product shot | Show the item clearly | Uncluttered background and readable details |
| Detail shot | Explain materials or construction | Texture, stitching, controls, closures, or finish |
| Scale shot | Help shoppers judge size | A person or a familiar object with clear context |
| Lifestyle image | Show use or placement | A relevant setting and restrained props |
| Group shot | Show a set or range | Clearly distinguishable items and accurate quantities |
Check your store or marketplace’s image requirements before shooting. Background, dimensions, cropping, and prop rules can differ by platform and image placement.
Exclusive Tools of Endless Possibilities in One Editor
Product Photography Equipment: Start Simple
A basic home setup needs a camera, a stable shooting position, a surface, a background, and a controllable light source.
| Equipment | What it helps with |
| Smartphone, mirrorless camera, or DSLR | Capturing the product |
| Tripod or stable support | Consistent framing and reduced camera movement |
| White card or seamless paper | Creating an uncluttered background |
| Window or diffused artificial light | Illuminating the product |
| White reflector card | Brightening the shadow side |
| Black card | Defining edges or deepening reflections |
| Microfiber cloth and soft brush | Removing fingerprints and dust before shooting |
Manual controls are useful, but a DSLR is not a requirement. Mirrorless cameras also provide exposure controls, and a smartphone can work for many small-business product photographs.
With a phone, clean the lens, avoid the ultra-wide camera for close product views, and move the phone rather than relying on heavy digital zoom. Check that automatic background blur has not softened product edges.
Lenses, Camera Distance, and Sensor Size
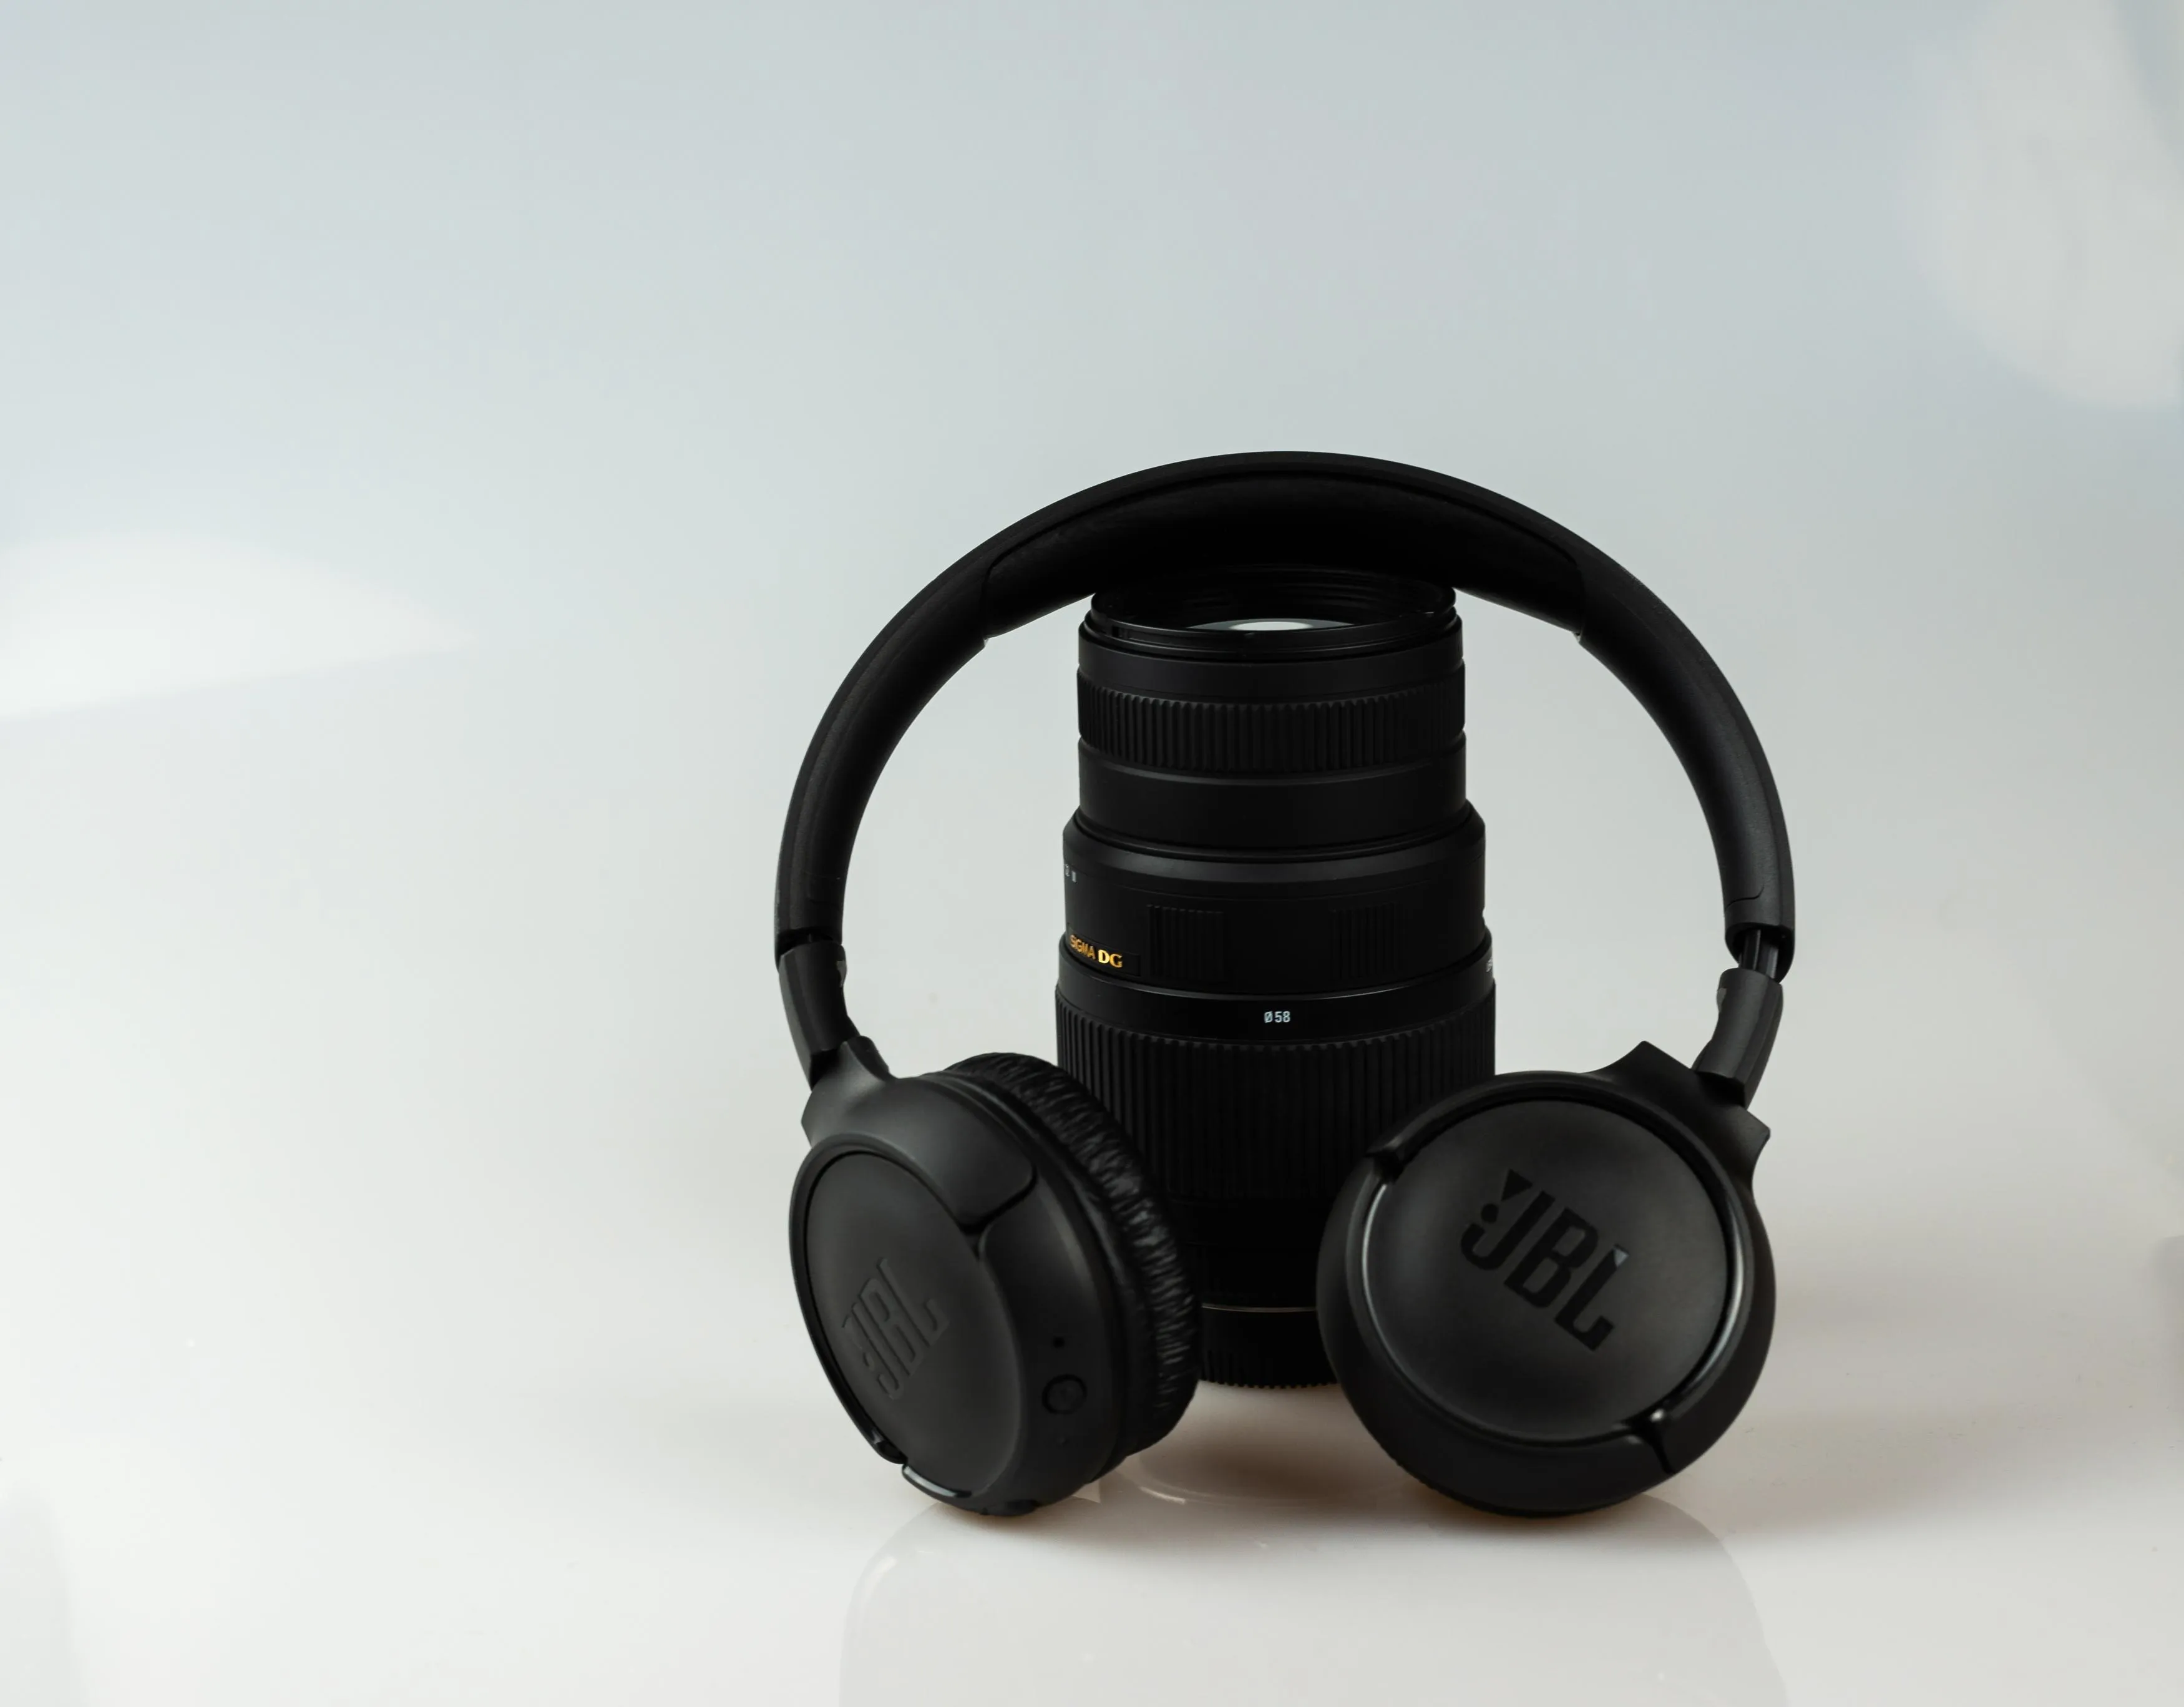
Choose a focal length that lets you frame the product from a comfortable distance. For many tabletop subjects, approximately 50–100mm full-frame equivalent is a practical starting range rather than a fixed rule.
Moving very close can exaggerate the size of the nearest parts of an object. Step back and use a longer focal length when you need a more restrained perspective.
A smaller sensor gives a narrower field of view with the same lens. For example, a 50mm lens on a camera with a 1.6× crop factor gives a field of view comparable to an 80mm lens on full frame. Its physical focal length remains 50mm.
A macro lens is useful for small details because it focuses close and provides high magnification. It is optional for larger products.
Camera Settings for Product Photography
Choose settings around the product’s depth, available light, and whether anything is moving. The following values are starting points for a stationary product on a tripod, not universal settings.
| Setting | Starting point | When to adjust |
| Exposure mode | Manual or Aperture Priority | Use Manual when you need consistent exposure across a series |
| Aperture | f/5.6–f/8 | Stop down if important areas remain soft |
| ISO | A low native setting, often ISO 100 or 200 | Raise it if you need a faster shutter speed |
| Shutter speed | As required for exposure | Use a faster speed for movement or handheld shooting |
| White balance | A fixed setting or custom reference | Recheck when the light changes |
| File format | RAW, if available | Use JPEG when simpler capture and delivery are sufficient |
| Focus | Single-point autofocus or manual focus | Check the nearest and farthest important details |
Aperture and Depth of Field
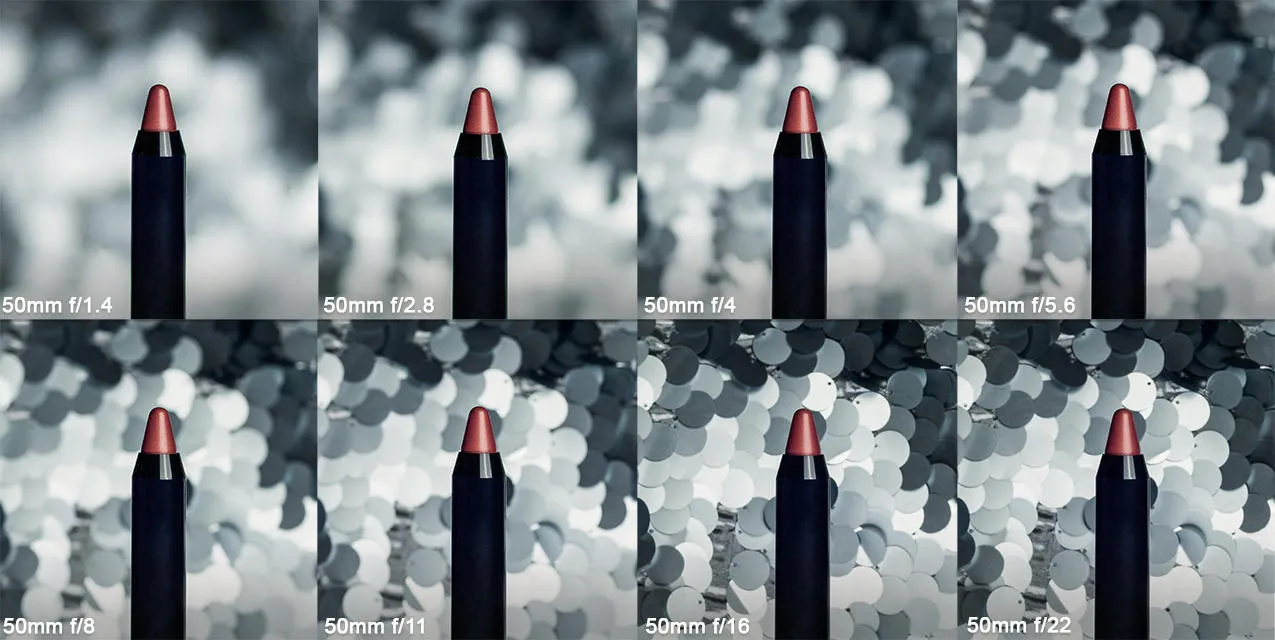
Depth of field is the range of distances that appears acceptably sharp. A wider aperture, such as f/2.8, gives less depth of field than f/8 under otherwise comparable conditions.
For a main product image, keep the important parts sharp: the label, edges, controls, and defining details. Shallow depth of field can suit a lifestyle photograph, but it should not hide information shoppers need.
Very small apertures, such as f/16 or f/22, can introduce diffraction softness. Compare results rather than assuming the highest f-number produces the most detailed image.
If a close-up needs more depth than one exposure provides, focus stacking can combine photographs focused at different distances. It requires a stable setup and careful checking for blending artifacts.
Shutter Speed and ISO
Shutter speed determines exposure duration. With a stationary product and camera on a tripod, a slower shutter speed can allow you to retain a low ISO.
Use a timer or remote release to avoid moving the camera when pressing the shutter. A tripod will not freeze moving props, splashing liquid, or a person holding the product.
Increasing ISO does not make an image “pixelated.” Higher ISO settings often make noise more noticeable and reduce highlight headroom. Use the lowest setting that supports the exposure and motion requirements.
RAW vs. JPEG
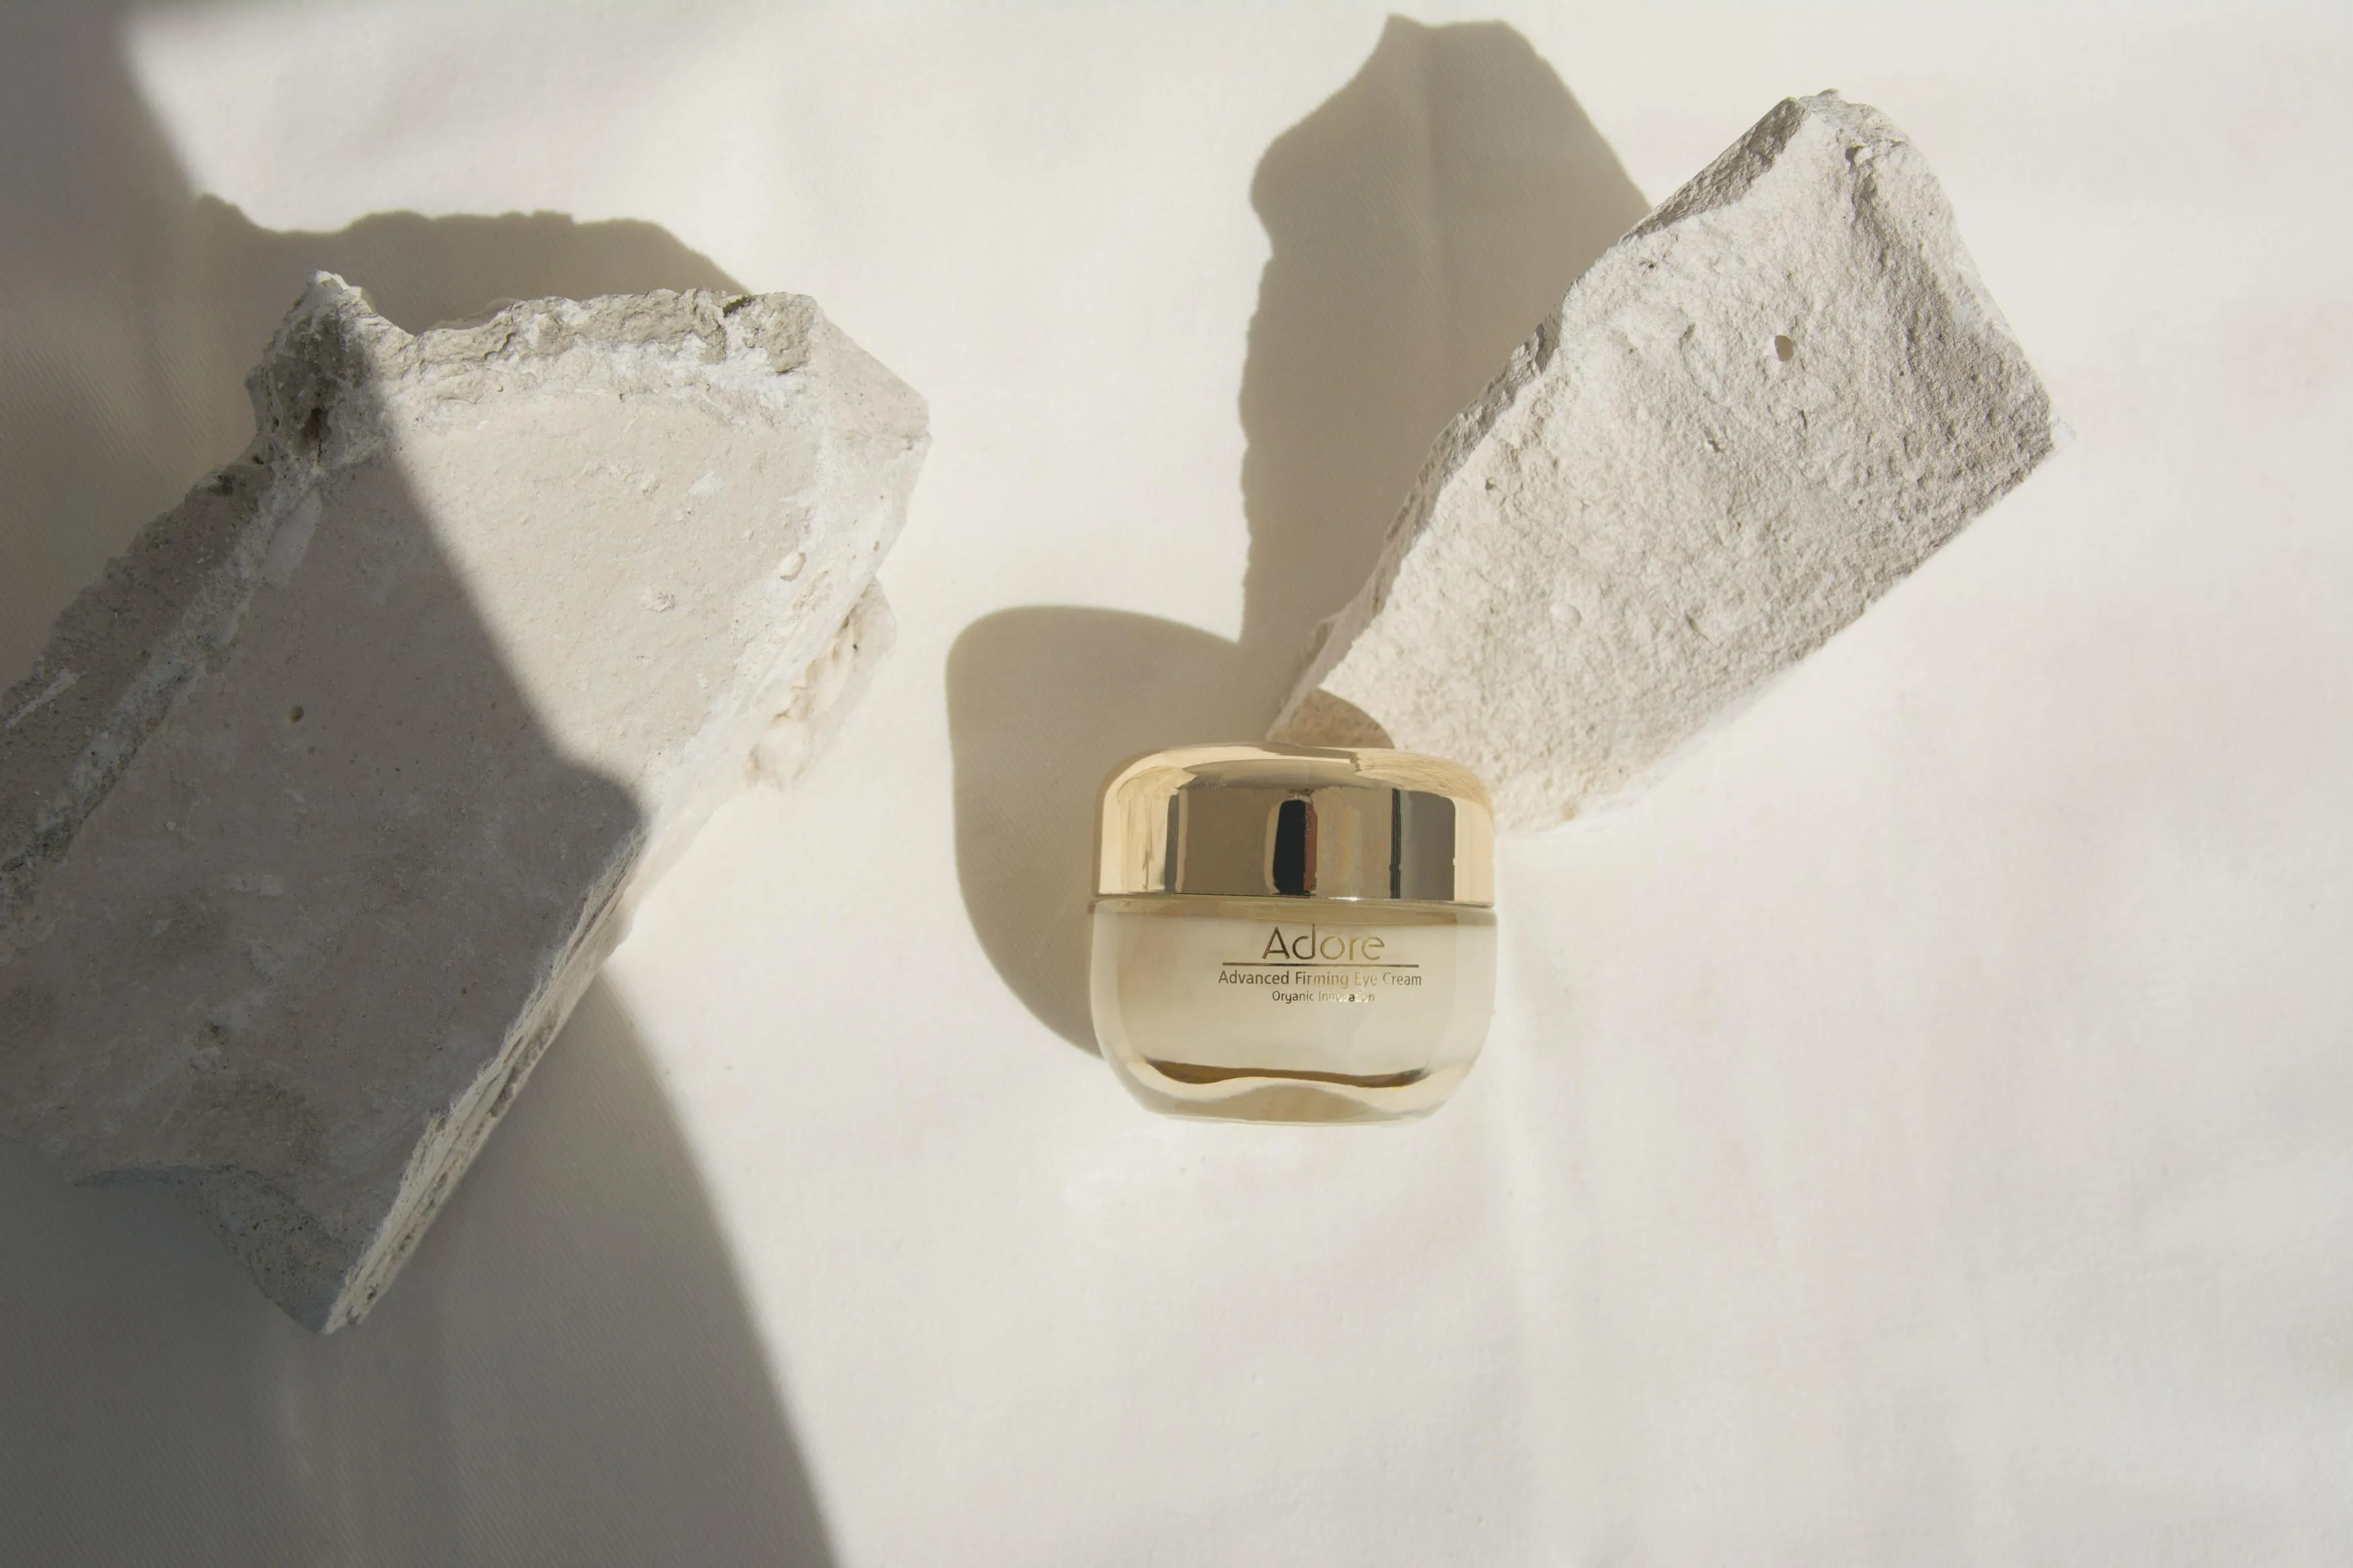
RAW files generally retain more tonal and color information for editing. JPEG files apply camera processing and lossy compression, making them convenient for immediate use.
| Format | Advantages | Limitations |
| RAW | Greater flexibility for white balance and tonal adjustments | Requires processing and generally uses more storage |
| JPEG | Smaller files and straightforward sharing | Less flexibility for substantial corrections |
Expose carefully with either format. A RAW file cannot reliably recover detail that was clipped during capture.
A RAW photo editor lets you refine white balance, exposure, and tonal detail before exporting a finished product image.

White Balance and Color Accuracy
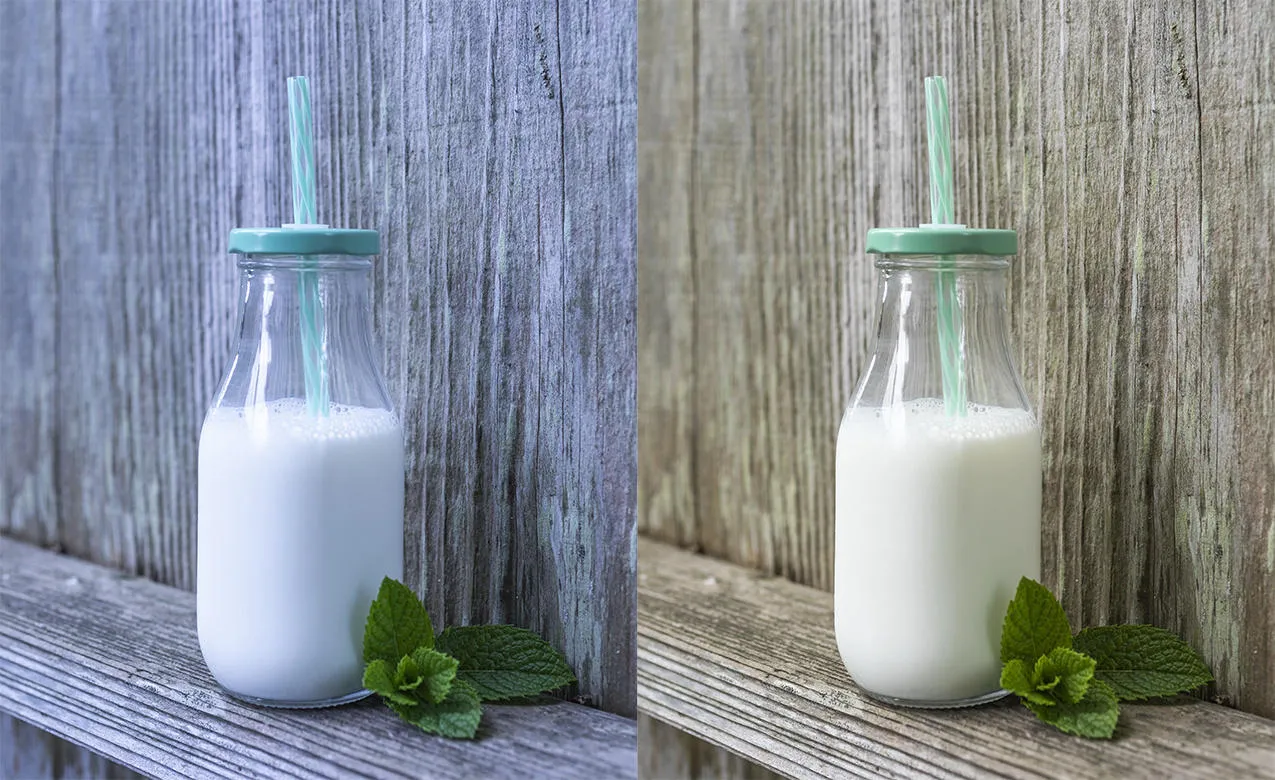
White balance compensates for the color of the illumination so neutral objects appear neutral.
For a repeatable setup:
- Use one main light source where possible.
- Turn off room lights that introduce a different color.
- Photograph a neutral gray reference under the same lighting as the product.
- Use that reference to set or refine white balance.
- Keep the setting consistent while the light remains unchanged.
Auto White Balance can vary between frames. It also cannot make every part of a scene neutral when different light sources create different color casts.
Your AI-Powered Photo Editor for MacOS and Windows
Product Photography Lighting at Home
Start with a large window and a reflector for a simple setup. Use a diffused artificial light when you need greater consistency regardless of daylight.
| Lighting approach | Useful for | Main limitation |
| Indirect window light | A simple home setup and lifestyle images | Brightness and color can change |
| Diffused continuous light | Seeing reflections and shadows before capture | Output and color quality vary by light |
| Flash with a modifier | Repeatable studio lighting and motion control | Requires compatible equipment and exposure practice |
Window Lighting
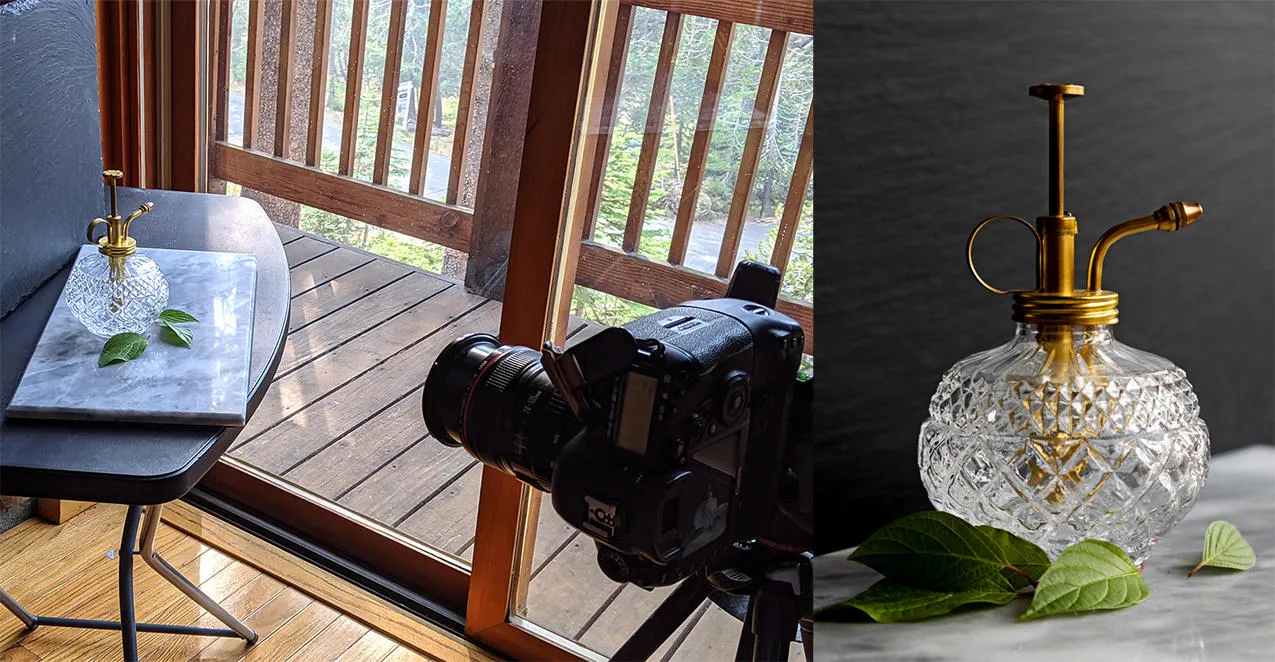
Place the product beside a window receiving indirect light. Direct sunlight can create hard shadows and bright reflections; diffuse it if that look does not suit the image.
Position a white card opposite the window to brighten shadows. Move it closer for more fill or farther away for stronger shading.
Side lighting can reveal texture and shape. Adjust the product’s angle until the light shows the material clearly without obscuring the label.
One-Light White Background Setup
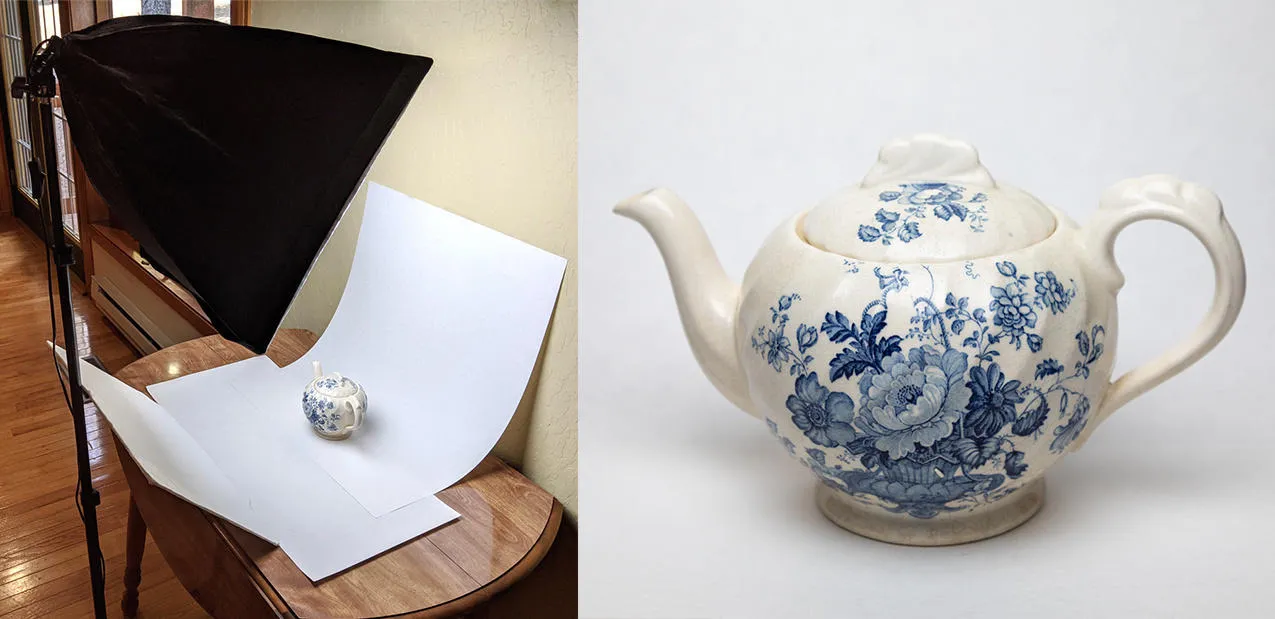
A curved sheet of white card or paper creates a sweep without a visible corner between the surface and background.
- Secure the top of the sheet behind the product.
- Let it curve gently onto the table.
- Position a diffused light to one side.
- Add a reflector opposite the light.
- Check the product’s edges, label, and highlights.
One light may leave the background light gray rather than pure white. Avoid overexposing the product simply to brighten the backdrop. Adjust the setup or lighten the background selectively afterward.
White products may need black cards outside the frame to create edge definition.
How to Photograph Shiny Products
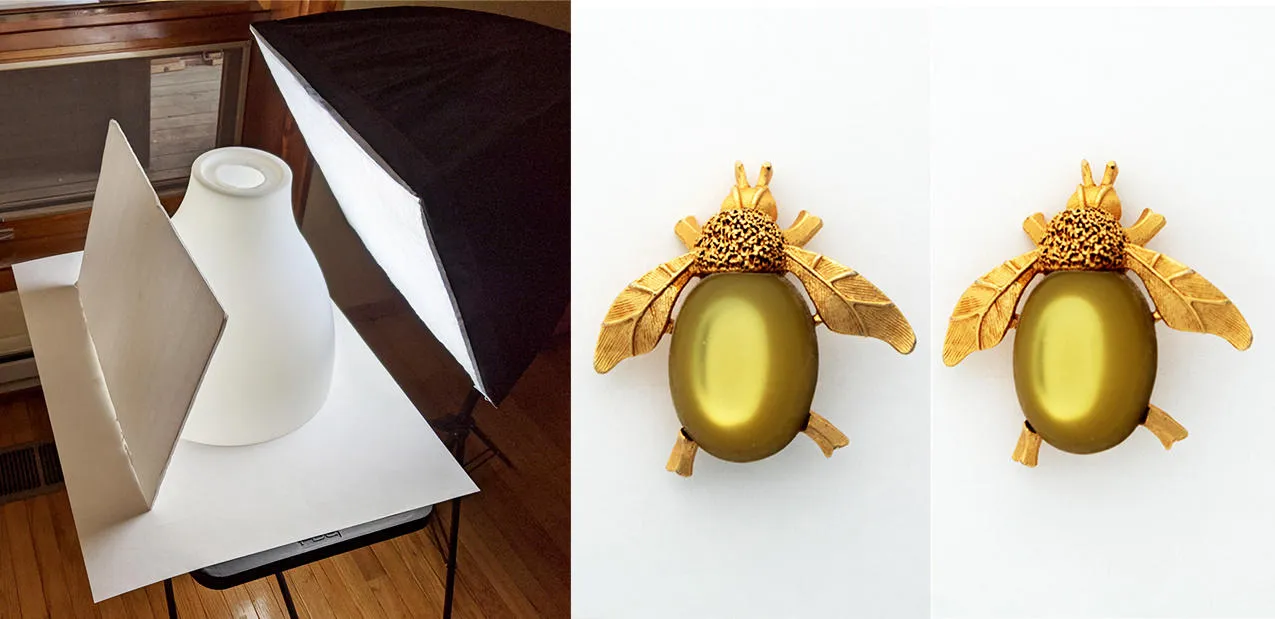
Reflective products show their surroundings. Control those reflections by changing the position and size of light sources, diffusion panels, and cards.
For jewelry, glass, or polished packaging:
- Clean the product before arranging the shot.
- Move the camera and lights to identify unwanted reflections.
- Use a large diffusion surface for smoother highlight transitions.
- Add white cards for bright reflections and black cards for darker edges.
- Check highlights without removing every reflection that describes the material.
A light tent can simplify the reflected surroundings, but it may also flatten the appearance of a shiny object. Some controlled reflections help metal look metallic and glass remain visible.
Watch the histogram and highlight warnings. Reduce exposure if important surface detail is clipping, rather than underexposing every shiny product by default.
Product Styling and Composition Tips
Use styling to explain the product, not compete with it. Clean the item, straighten labels, and remove fingerprints before shooting.
For lifestyle photographs, choose a few props connected to the product’s purpose. Lavender beside lavender bath salts can support the scene, while unrelated decorations can distract.
Make it clear which items are included in the purchase. A styled photograph should not imply that decorative accessories come with the product.
Capture a consistent set of views:
- Front or main three-quarter view.
- Side and rear views where useful.
- Close-ups of important details.
- A scale or in-use image.
- A lifestyle image when relevant.
Keep camera height, product placement, and crop similar across related items.
Shooting Products on Location
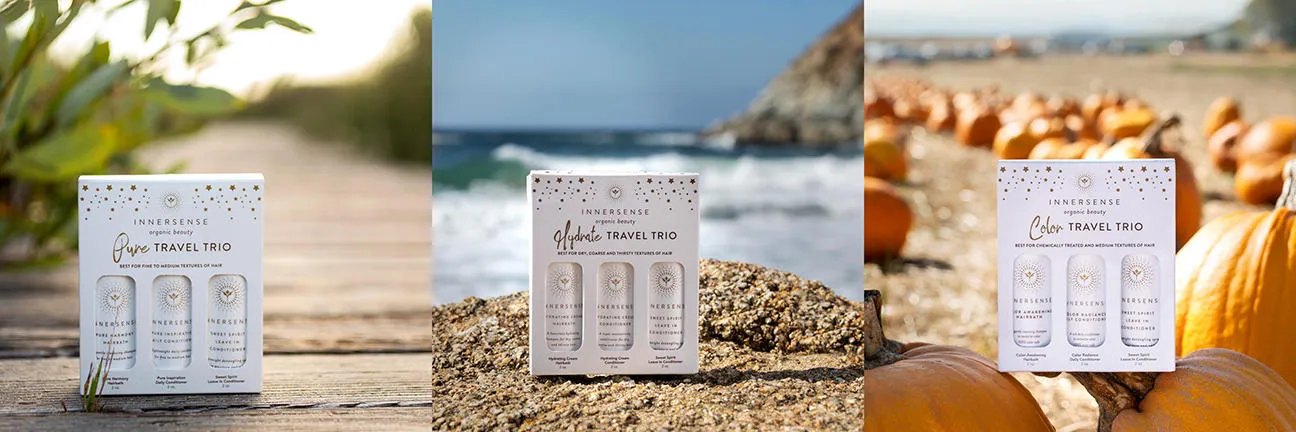
Choose a setting that supports the product’s use. Outdoor gear may benefit from a relevant landscape, while travel-size toiletries can be photographed in a travel context.
Open shade is a useful starting point for avoiding harsh sunlight. However, surrounding foliage, walls, or fabric may cast color onto the product. Check neutrals and labels before continuing.
Carry a reflector, secure lightweight items against wind, and watch for light changes. Direct sunlight can also work when crisp shadows suit the intended image.
The Photo Perspective Correction Tool You've Been Waiting For
Editing Product Photos in Luminar
Use editing to improve presentation while retaining the item’s actual appearance.
A practical workflow is:
- Select sharp images. Check labels and important details at 100%.
- Correct white balance and exposure. Use Develop or Develop RAW, depending on the file.
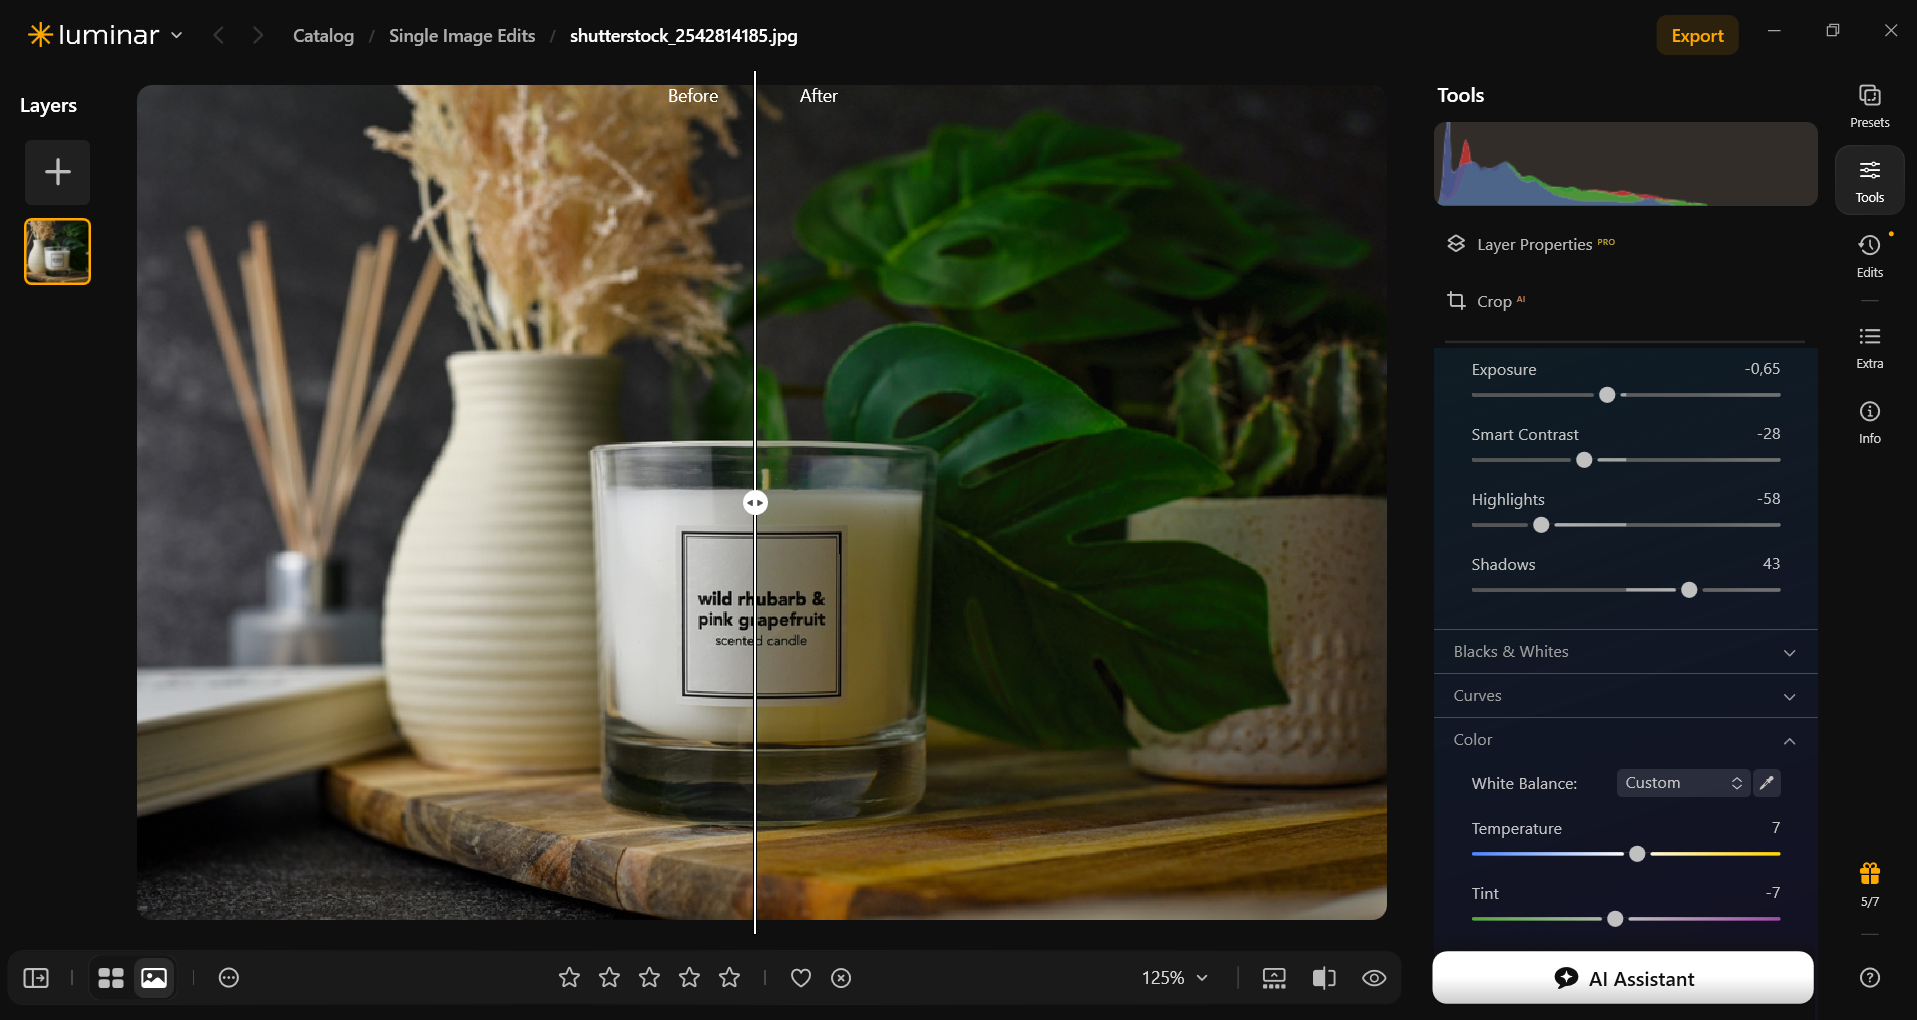
- Apply relevant lens corrections. Inspect straight edges and product proportions.
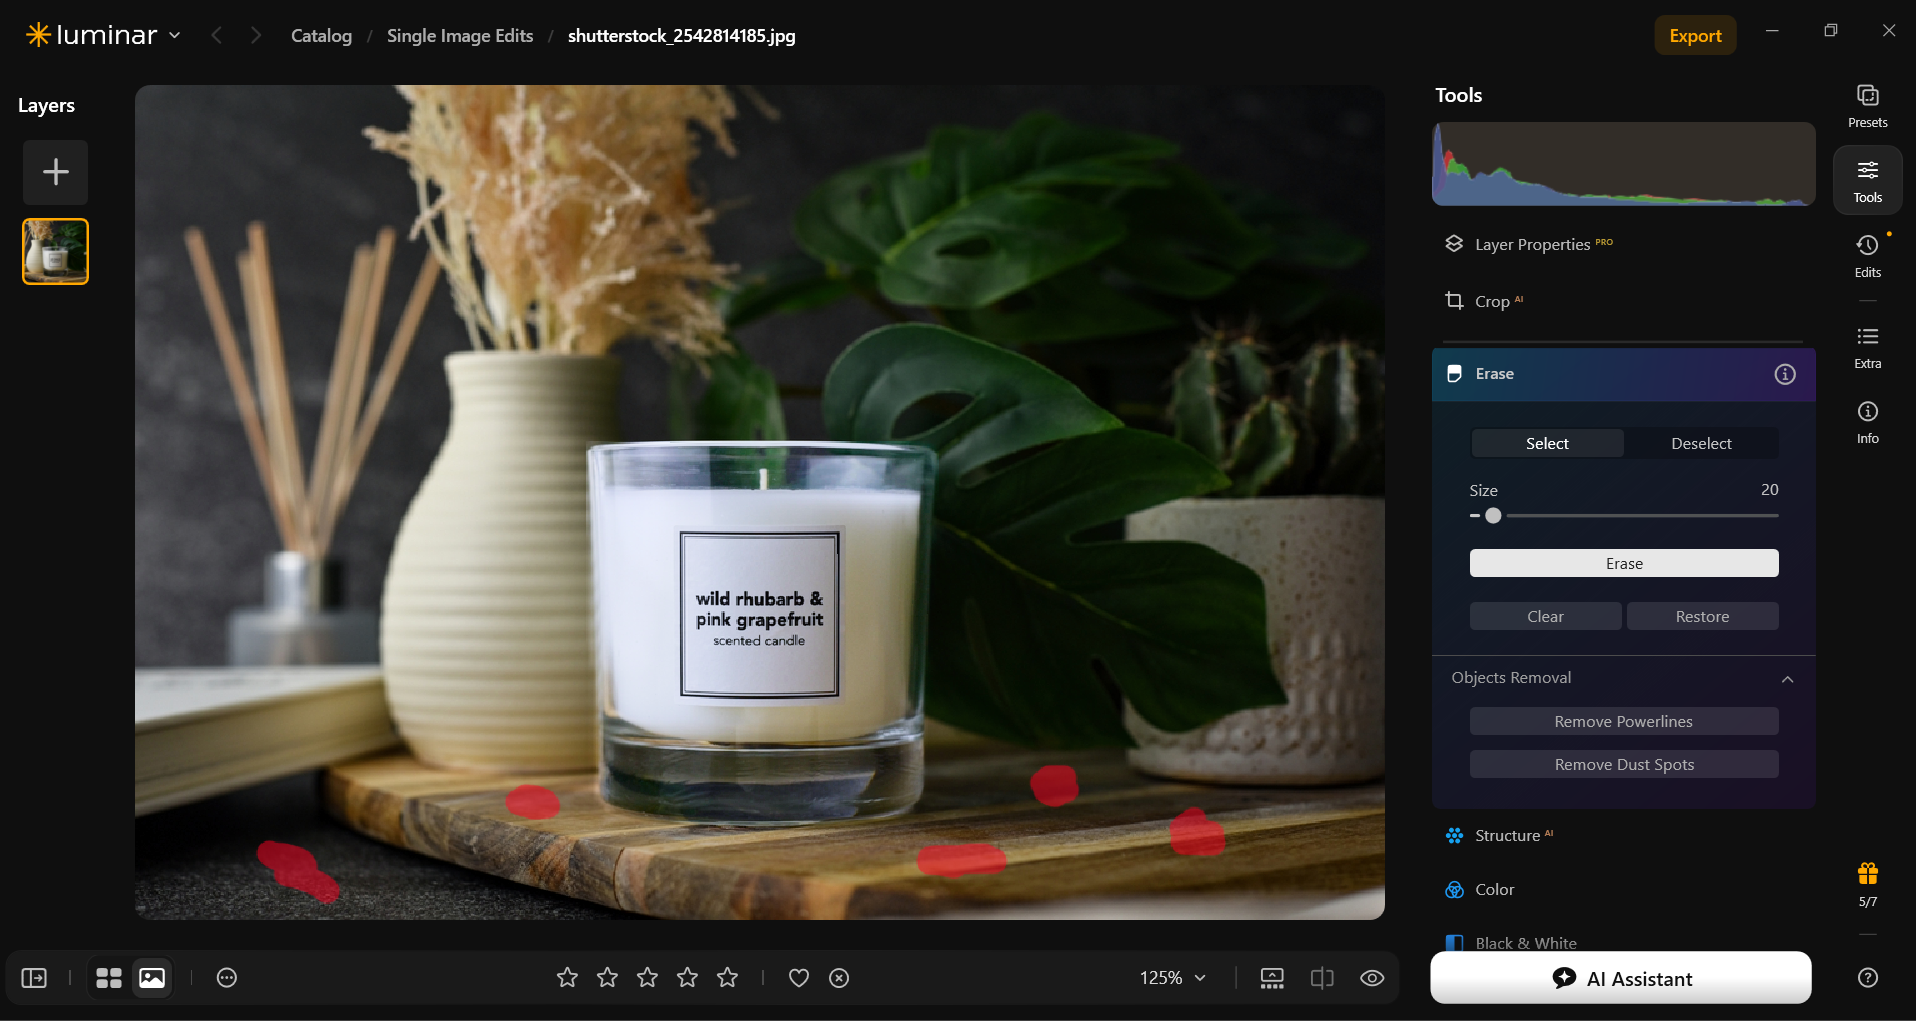
- Remove incidental dust. Use Erase carefully and inspect repeated textures.
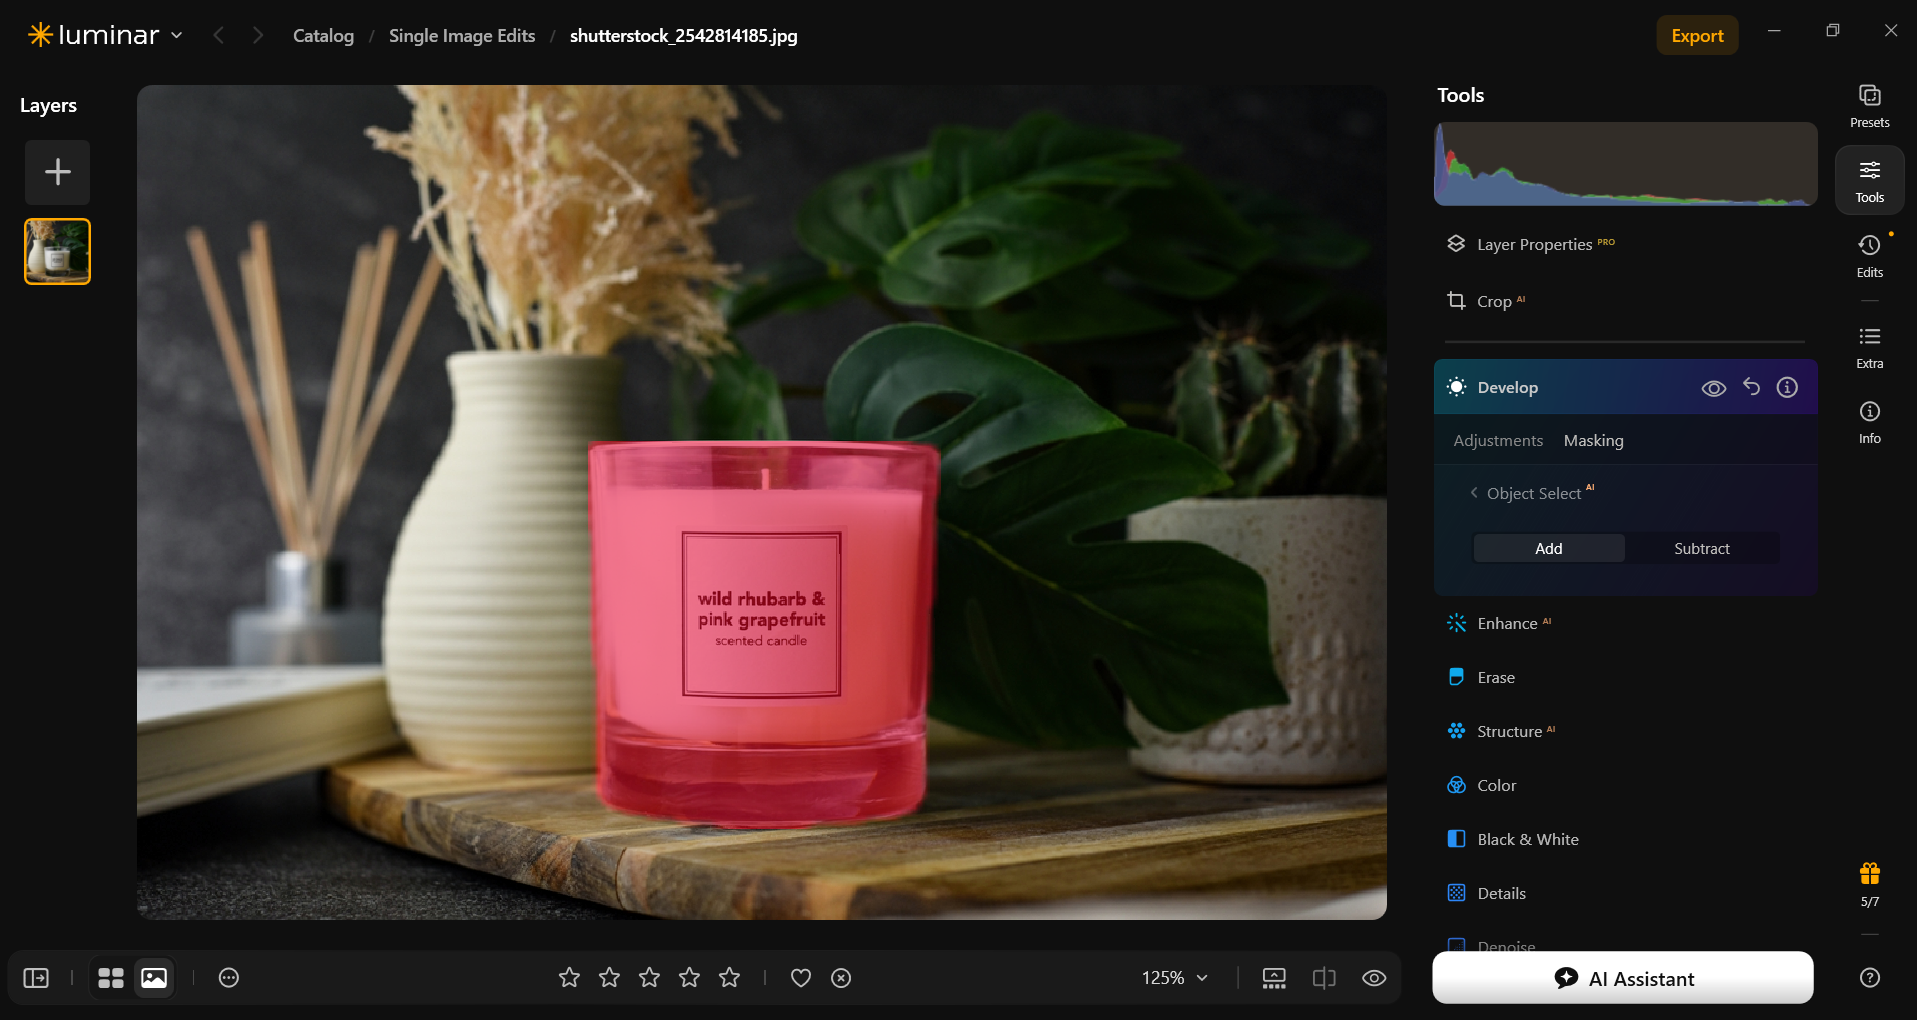
- Adjust the background separately. Use a mask to avoid changing the product along with it.
- Standardize the crop. Keep scale and margins consistent across the set.
- Export for the destination. Check dimensions, format, and compression requirements.


Luminar’s AI photo masking tools can help target adjustments, but review the mask around fine edges, transparent materials, and shiny surfaces.
Use a photo color editor to correct unwanted casts carefully. Avoid recoloring the item into a shade that customers cannot buy.
For resale photographs, preserve scratches and other condition details that buyers need to see. For any product image, check that cleanup has not altered lettering, stitching, texture, or construction.
Conclusion
Start with one product, one controlled light source, and a repeatable camera position. Capture clear views before experimenting with styling, then edit the set for consistency. The goal is to help shoppers see the item accurately and understand what they are buying.
Frequently Asked Questions
Yes, a smartphone can produce useful product images with controlled lighting and careful positioning. Use the main camera, avoid excessive digital zoom, and check the final image at the size shoppers will see.
There is no single best aperture. Start around f/5.6–f/8 on an interchangeable-lens camera, then adjust until the important areas are sharp. Close-ups may require a different approach, including focus stacking.
No. Background requirements depend on the platform and image’s purpose. A clean white background suits many catalog images, while lifestyle photographs can use a relevant setting.
Use consistent lighting, a neutral reference, and a fixed white balance while the setup remains unchanged. Edit related images together and review them on a calibrated display when color accuracy is critical.
Flat lighting often provides too little separation between surfaces. Try moving the light to one side, reducing reflector fill, or adding a black card. Keep enough shadow to describe shape without hiding important details.