Unleash your creativity outdoors by exploring unique ideas for nature photography that transform ordinary scenes into captivating visual stories.
Breathtaking nature photographs are born from a photographer’s ability to see the extraordinary in the commonplace. Buying expensive equipment or traveling to a picturesque location doesn’t in itself guarantee an outstanding photograph. Nature offers ready-made scenes, but in return demands a willingness to experiment.
Don’t feel like reading the whole breakdown right now? Here’s a tighter, more practical summary of what actually changed.
Exclusive Tools of Endless Possibilities in One Editor
Key Takeaways
- Plants and fungi benefit from deliberate micro-light. The guide recommends compact lights with small diffusers, placing an LED low and to the side for grazing shadows in moss, or backlighting a mushroom to make gills glow.
- Sharpness has specific “targets”, with f/5.6 cited as the aperture that reaches maximum sharpness for high-quality plant photography, and software suggested when the frame still lacks impact.
- Water scenes use different methods depending on motion. A split-shot requires a transparent acrylic dome (at least six inches) to hold focus above and below the waterline, while surf motion is captured with panning around 1/15s for a sharp crest against a blurred shoreline.
- Calm water is treated as a symmetry tool. Lowering the lens a few centimetres above the surface boosts mirror reflections, and the text advises avoiding a circular polariser here to preserve reflected brightness.
- Wildlife success is built on behaviour, knowledge, and viewpoint. The article stresses subject research, shooting at eye level to avoid “pressing” animals into the ground, using 1/2000s with ISO around 800 to freeze wings, and backlighting to make thin insect wings translucent.
- Settings for moving subjects are pragmatic. AF-C (continuous autofocus) is recommended because unpredictable movement makes manual focus impractical, and RAW is emphasized to preserve detail for later refinement.
- Landscapes are framed as depth + precision. The Mark Adamus-style approach uses a 14mm ultra-wide lens with the lens about 10cm from a textured foreground, hyperfocal focus at f/11 for front-to-back sharpness, and focus bracketing when stopping down past f/16 reduces detail.
- Low light is planned, not improvised. Full moon shooting is described with 30s at ISO 400, blue hour is used to balance sky/ground brightness, and astrophotography follows the 500 rule (example: 20mm → 25s) with f/2.8 and a weighted tripod to prevent wind blur.
- Weather becomes a compositional tool. Fog simplifies scenes by hiding clutter and evening out light, rain adds saturation and drama, and AI editing is positioned as a way to restore cloud detail and microcontrast without adding halos.
Creative Approaches to Capturing Plants and Fungi

When photographing mushrooms, capturing the micro-relief requires highlighting even the slightest irregularities on the cap and the ground. The B&H Photo Video guide to macro photography recommends using compact light sources with small diffusers. Place an LED light directly on the ground to the side of the subject.
Low, grazing light will cast shadows in every hollow of the moss and emphasize the texture’s depth. Placing the light source behind the mushroom will illuminate the translucent gills from within. These techniques fit naturally into current nature photography themes, shifting the focus from wide-angle shots to the pinpoint detail of the macro world.
Finding geometry in fern fronds comes down to capturing natural fractals and the tight spirals of young shoots. The maximum sharpness required for high-quality plant photography is achieved at an aperture of f/5.6 or similar. If the image is ready but lacks impact, use specialized software to increase sharpness.
Master the Art of Photo Clarity with AI-powered Sharpen Tool
Techniques for Photographing Water and Light Effects

Looking for creative nature photography ideas? Try combining the underwater and above-water worlds within a single frame. To create a split-shot, place the lens inside a transparent acrylic dome with a diameter of at least six inches. The dome’s curved surface creates distance between the waterline and the camera’s front lens.
Shifting the focus from shallow water to the dynamics of the surf requires a different approach to exposure. The speed of the oncoming wave is captured using a panning technique. The photographer smoothly synchronizes the camera’s movement with the speed of the wave crest. Shots are taken at shutter speeds of about 1/15 of a second. The final image shows a sharp outline of the water against a blurred shoreline.
When the water is completely calm, techniques based on optical symmetry work best. The camera lens is lowered a couple of centimeters from the water’s surface. The sharp viewing angle naturally boosts the water’s mirror-like reflections, which usually look strongest when the reflection is left clean and uncluttered. Minor tonal correction can be added later in post-processing. Avoiding a circular polarizing filter at this point preserves the original brightness of the objects reflected on the water.
Exploring Wildlife and Insect Photography Tips
Success in even simple nature photography hinges on studying your subject and proper preparation. British macro photographer Pete Burford often says, “If you know where an animal lives, what it eats, and when it is most active, the chances of capturing a great shot increase exponentially.” Mastering the basic rules of composition and working with light guarantees that when an opportunity arises, the photographer will pounce on it like a lion on its prey.
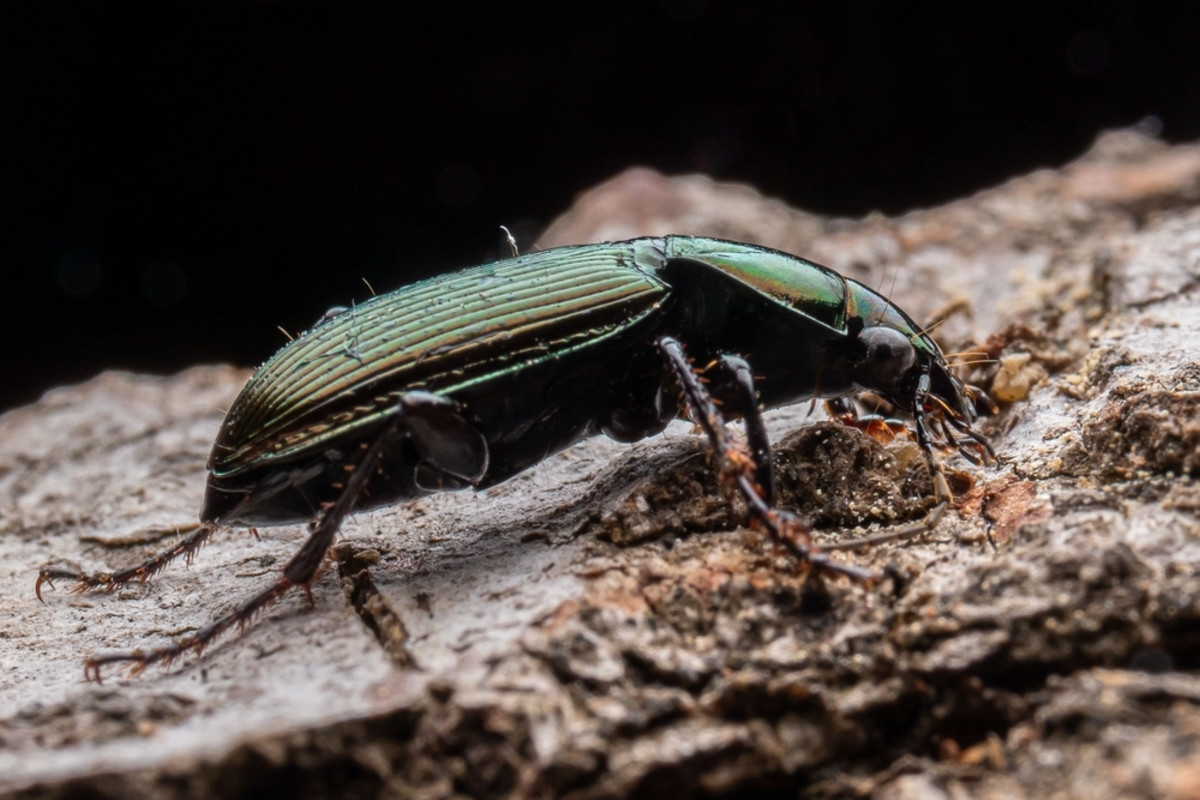
- Lower the camera to the subject’s eye level. Shooting a beetle or a lizard from a height equivalent to a person’s height distorts the proportions and visually presses the animal against the ground. Positioning the lens parallel to the surface creates the effect of the viewer being present in the subject’s natural habitat, making the photo look natural.
- Capturing motion with ultra-short shutter speeds. You won’t be able to freeze the wings of a flying bird or bee without setting the exposure to 1/2000 of a second. Increasing the ISO sensitivity to 800 compensates for the lack of light when the shutter fires quickly.
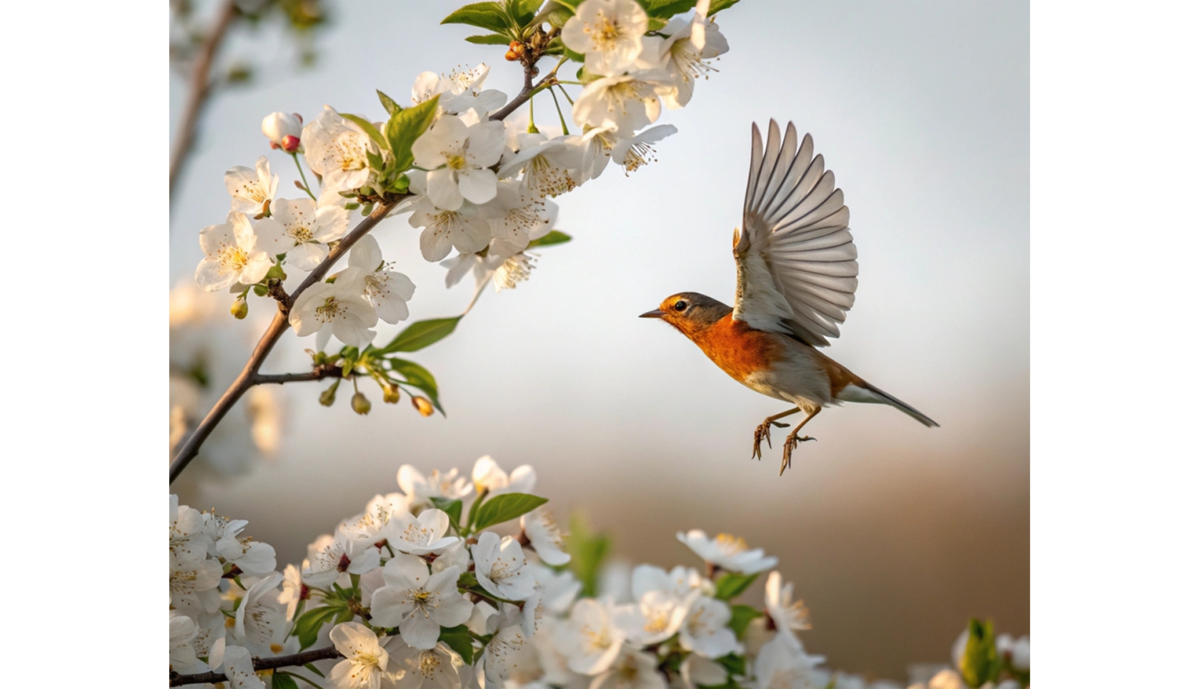
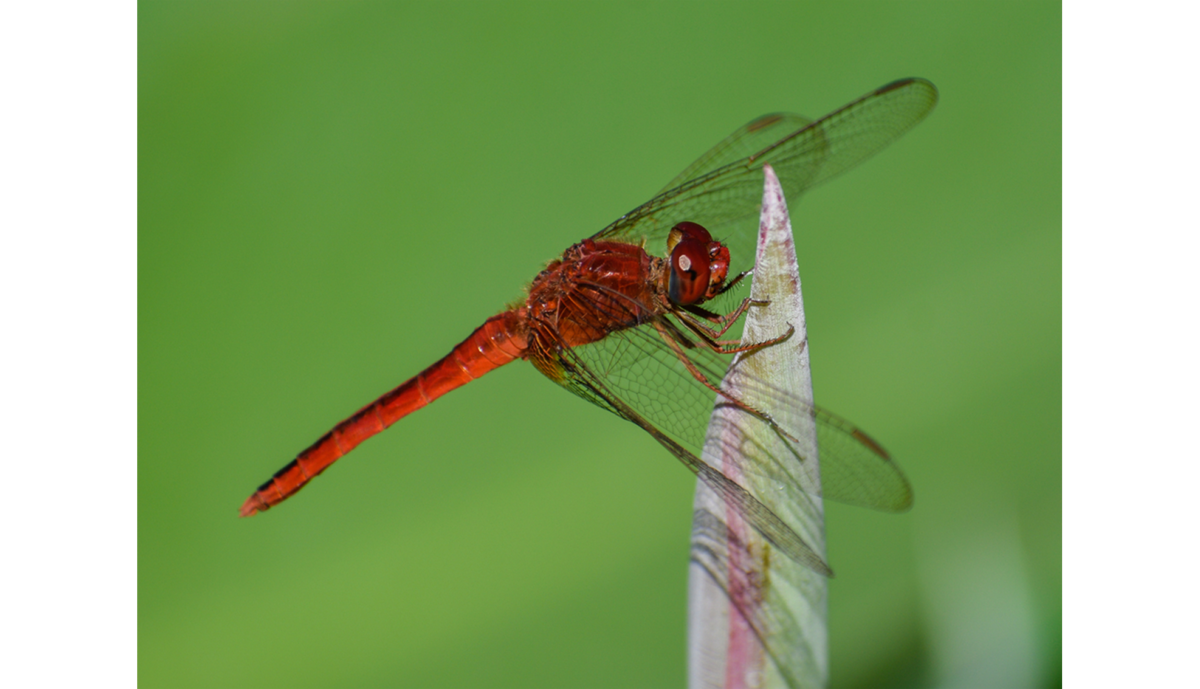
- Use backlighting to highlight texture. Use natural light sources to visually separate the insect from the background by creating contrasting shadows. If your subject is a winged insect, directional light will make the thin wing membranes appear translucent. This creates an unusual effect and is sure to draw attention to your work.


The unpredictable movements of animals make manual focusing impractical. To provide sharp focus on a moving subject, switch the camera to AF-C (continuous autofocus) mode. In this mode, the sensor will continuously predict the subject’s trajectory, tracking it using phase-detection sensors. An analysis of technical nature photography examples confirms the superiority of dynamic ranges during continuous shooting.
Be sure to save your photos in RAW format. Macro photography or working with rapidly changing scenes does not provide the best conditions for high quality. Therefore, the main goal is to preserve as much detail as possible so that the scene can be perfected during post-processing.
Discover AI's Power in Wildlife Photography
Capturing Landscapes and Natural Scenes with Impact

Creating multi-layered shots in the style of Canadian photographer Mark Adamus relies on the use of ultra-wide-angle lenses. Shooting at a focal length of 14mm visually stretches the perspective, making foreground objects appear larger. The lens is positioned ten centimeters away from a textured rock or a crack in the ice, setting the stage for countless nature photography ideas.
The 14mm ultra-wide-angle lens visually pushes the horizon back, requiring precise hyperfocal distance calculations. Setting the lens to infinity leaves the foreground out of focus. Shifting the focus point to the hyperfocal distance at an f/11 aperture extends sharpness from the nearest rock to the edge of the frame. This approach to perspective generates unconventional nature photography ideas.
The lenses’ physical limitations reduce detail when the aperture is stopped down beyond f/16. A professional result is achieved through focus bracketing: shooting a series of frames with a shift in the focus distance. Merging the data set using a landscape photo editor, Luminar Neo produces a seamless image. Stacking preserves the micro-relief of the foreground and the sharp outlines of distant ridges simultaneously.
Nighttime and Low-Light Nature Photography Ideas

Low-light photography relies on the phases of the moon. A full moon acts as a natural softbox. A 30-second exposure at ISO 400 reveals the texture of pine needles and the fine relief of the rock formations. Direct overhead lighting prevents dark spots from appearing where the forest stands.
The blue hour opens up new ideas for nature photography by eveninging out the brightness of the sky and the ground. The sensor captures landscape details without overexposing the horizon. The sharp outlines of trees against the twilight gradient create a sense of depth in the scene.
Astrophotography requires applying the 500 rule. Dividing this number by the lens’s focal length determines the maximum exposure time to preserve the stars’ points. For a 20mm lens, the limit is 25 seconds. The f/2.8 aperture gathers photons to reveal the structure of the Milky Way. A tripod with counterweights prevents micro-blur in the frame caused by wind gusts.
Using Weather and Natural Conditions to Enhance Photos

Thick fog physically clears away visual clutter by concealing extraneous details in the background. The suspension of water droplets in the air scatters direct light rays, preventing deep shadows and evening out the overall lighting of the entire scene. The specific environment simplifies the execution of nature photography ideas with a phone, helping the sensors capture clean sky gradients without graininess.
Precipitation transforms the matte bark of trees into glossy surfaces with deep saturation. The contrast between the wet vegetation and the gray sky creates a natural sense of drama. Post-processing with AI photo editing software corrects the effects of humidity, restoring details in the light clouds. Algorithms adjust microcontrast, preserving the atmosphere without introducing artificial halos.
From Experiments to a Personal Visual Signature

The transformation of technical skills into a distinctive style occurs through repeated practice of techniques on location. Regularly bringing original nature photo shoot ideas to life fosters a unique perspective on familiar subjects. A personal perception of space gradually replaces standard compositional schemes. Over time, repeated choices in framing and light begin to shape a recognizable style.