A practical guide to editing RAW files that will help you choose the best software and master basic editing techniques to achieve the highest possible image quality.
Even if you’re just getting started with photography, you’ve probably already heard of the RAW format. It preserves as much detail as possible in the image, making the results of photo editing look more natural. To my surprise, many professional photographers still use JPEG and TIFF formats without even considering switching to RAW. To help you avoid such mistakes, this guide will cover the basics of working with “raw images” and explore free alternatives to Luminar, the best RAW editor.
Don’t feel like reading the whole breakdown? We’ve pulled together a quick summary below.
Key Takeaways
- RAW format basics. Unlike JPEG or TIFF, these files preserve original, uncompressed data from the camera sensor, providing much greater detail and flexibility for professional editing.
- The necessity of conversion. RAW files require specialized software to adjust exposure, color, and contrast before the images become suitable for sharing or printing.
- Diverse software options. The choice of editor ranges from automated AI-driven tools like Luminar Neo to industry standards like Adobe Lightroom, Capture One Pro, and capable free options like Darktable or RawTherapee.
- Balancing automation and control. Professional workflows often combine manual precision for fine-tuning with AI features—such as noise reduction or lighting correction—to speed up complex tasks.
- Hardware and software requirements. Advanced editing suites often demand substantial processing power, whereas simpler or browser-based tools offer better accessibility for users with limited device performance.
- Testing multiple platforms. Because each editor handles color science, cataloging, and processing differently, photographers should trial various applications to find the one that best fits their specific workflow and creative goals.
What is a RAW Photo?

The name of the format itself highlights its main difference. When the camera is set to “RAW” mode, the photos taken are no longer automatically compressed or converted. To post them on social media or print them, they must first be processed and converted.
The camera’s processor automatically processes JPEG or TIFF files. It smooths out details and reduces the number of brightness levels, making the photo look less vibrant. Where RAW captures the smooth texture of clouds or fine hairs in the shadows, other formats result in nothing but a white spot or solid black. This raises another question: how to process RAW photos?
Exclusive Tools of Endless Possibilities in One Editor
Popular RAW Photo Editors
There are countless RAW editing programs out there. I’ve tested the most popular ones and come to some unexpected conclusions.
Luminar Neo by Skylum: your RAW image editor

My experience with Luminar Neo has been the longest and most comprehensive. The image editor offers a comprehensive approach to photo editing. It is available for both Windows and macOS, and a mobile version has been developed for travel photographers.
The software offers a transparent pricing policy: you can choose a subscription plan that suits your needs or purchase a lifetime license. If you’re not entirely sure how useful Luminar will be, try the free trial.
The interface is designed to be intuitive right from the start. Unlike Photoshop or Capture One, you won’t have to spend weeks learning complex menus. At the same time, the software integrates seamlessly into your existing workflows—for example, as a plugin for Adobe products.
This editor is suitable for both beginners and professionals. It includes a wide range of filters and sliders for high-quality processing of RAW files:
- Sky AI: light and shadow improvements let you replace a night sky with an evening sky or remove clouds in just a couple of clicks;
- Enhance AI / Accent AI: automatic enhancement helps you quickly improve photo quality by adjusting just a few settings;
- Gen AI: generative tools let you remove unwanted objects and expand the frame boundaries;
- Face AI, Skin AI, Body AI: perfect portrait helps you retouch photos quickly, with high quality, and without losing texture.
If your camera shoots in two formats at the same time (RAW + JPEG), this program will help you organize your photo library. Similar shots are combined into a single image, and you can switch between the different versions with a single click.
Lightroom and Photoshop by Adobe

Photoshop offers maximum control over details, but it isn’t designed to process RAW files directly. Historically, the built-in Camera RAW plugin has been used for this purpose. The built-in Camera RAW plugin is typically used to import and enhance these images. Within this module, the workflow is based on two main elements:
- Histogram. It displays color parameters in real time and changes with every adjustment step.
- Sharpening radius. Programmatically increases the sharpness of object edges—the higher the value, the broader the contour effect.
A free alternative to the plugin is the Olympus Workspace program, which offers a similar set of features. It places a significant load on the graphics processor, so a powerful device is required to run it. However, the available functionality is more than sufficient for simple corrections and gaining initial experience with processing raw images.
Lightroom remains the go-to solution for working with RAW files. The program takes some time to master, but it offers users powerful tools, including presets, tone curves, and sliders for exposure and color correction.
Capture One Pro by Phase One

Capture One Pro occupies a middle ground between the simple Luminar Neo and the complex Photoshop, thanks to its balance of automation and manual tools. The software was designed for those who have outgrown simply applying preset filters but don’t yet need advanced tools for painting and photo compositing. I believe Capture One can compete with Adobe Lightroom because it adjusts the base image more precisely without creating noisy pixels in the dark areas of the frame.
The program accurately renders the colors of clothing and faces immediately upon import, as the developers have fine-tuned the color reproduction for each camera model individually. Database updates are released, have been released, and will continue to be released. Instead of the usual general sliders, here you can select a specific shade directly on the photo and change only that shade without affecting the rest of the frame. This saves the photographer time by eliminating the need to manually recolor adjacent colors that have been affected.
- shooting directly to a computer via a cable instantly displays the finished image on a large monitor;
- a standalone session system saves all settings within a single working folder for easy transfer;
- the skin tone correction tool automatically ensures that skin tones are consistent across the entire series of photos;
- the color editor enables you to change specific colors without risking damage to other parts of the photo;
- dynamic layers let you lighten or darken specific areas of the frame without losing quality.
Phase One is suitable for fast, comprehensive work. However, due to its limited functionality and high license cost, it is hardly suitable for amateurs.
Elevate Your Photography with Our Advanced Software
Photopea

Photopea offers an interface and features that are virtually identical to Photoshop, making it easy to get up to speed with the app. The program is suitable for standard photo editing and graphic design. However, the software lacks advanced AI technologies and in-depth automation tools.
Photopea’s built-in RAW module is very limited and falls short of specialized alternatives. It offers only basic adjustments for exposure, white balance, and contrast. It lacks masks, separate adjustments for highlights or shadows, and sliders for sharpness and texture.
However, Photopea wins in terms of accessibility. The software is completely free, requires no installation, and works with all popular file formats. Users can run it on a low-spec laptop without worrying about it freezing or crashing.
Affinity Photo 2

Affinity Photo has a distinct character of its own. That’s what makes it special, in my opinion. The software offers a unique “double RAW processing”. Here’s how it works:
- the first development adjusts the image based on the highlights to fully restore detail in the sky and glare;
- creating a linked layer within the converter instantly duplicates the original RAW file while preserving all data;
- the second development on a new layer drastically brightens only the deep shadows and dark objects;
- developing through a mask erases excess areas of the top layer with a brush, seamlessly blending details from the two versions.
The developers added this tool so that photographers can bring out both dark shadows and bright clouds in detail without losing pixel quality. The versions are blended within the built-in editor using soft masks, making the tedious manual process of stitching frames a thing of the past. This editor has a couple more features that made me take a liking to it.
Although Affinity Photo offers a full suite of tools for advanced retouching and graphic design, its main feature, “merging two versions of a single raw image,” isn’t very stable. Due to the high processing load, the service isn’t comfortable to use on low-end devices. And the increased processing time will prevent you from quickly editing different photos in this way.
RAW Photo Editors Comparison

To help you choose the right software for your workflow, here is a detailed breakdown of how the leading tools on the market compare in terms of cost and key technical features:
| Feature | Luminar Neo | Capture One Pro | Lightroom & Photoshop | Affinity Photo 2 | Photopea |
| License Cost | $79-109 (perpetual) | $299 (perpetual) or $18/month | $10.99/month (subscription only) | $70 (fixed perpetual) | Free (online browser-based) |
| RAW Processing Engine | Automatic image segmentation via a built-in neural network | Mathematical demosaicing tailored to specific camera sensors | Data decompression based on the standard Adobe profile | Manual pixel-by-pixel dynamic range distribution | Basic rendering of embedded JPEG preview from a RAW file |
| Color Isolation | One-click hue separation via an AI algorithm | Manual narrow-range targeting on a 3D color wheel | Target hue adjustment via standard 8 HSL sliders | Numerical channel separation using individual values | Global image correction without channel-based division |
| Masking Tools | Automatic recognition of 9 object types in the photo | Mask application on non-destructive RAW layers | Manual mask drawing via radial or linear gradients | File duplication for blending via raster masks | Local masking tools are locked inside the RAW module |
| File Database | Automatic thumbnail import from source folders | Isolated session creation with cache stored inside the folder | Single external catalog file generation (.lrcat) | Direct reading of the operating system file structure | One-by-one file opening via browser buffer |
| Batch Adjustments | Background parameter copying to selected images | Batch metadata transfer via the styles tool | Selected slider synchronization via the side panel | Successive manual settings export for each frame | Manual action repetition for every new file |
In my honest opinion, by 2026, the choice will come down to either Luminar Neo or Adobe products. Other apps perform quite well, but in the long run, the major photo editing suites come out on top due to their comprehensive features.
Your AI-Powered Photo Editor for MacOS and Windows
Editing a RAW Photo in Luminar Neo: Bonus Guide
Editing RAW files always involves complex technical challenges, including washed-out colors, digital noise, and optical distortions. Manual correction takes a lot of time, and it’s certainly not a simple task. To avoid finding yourself in this unpleasant situation, let’s take a look at how to process RAW photos using Luminar.
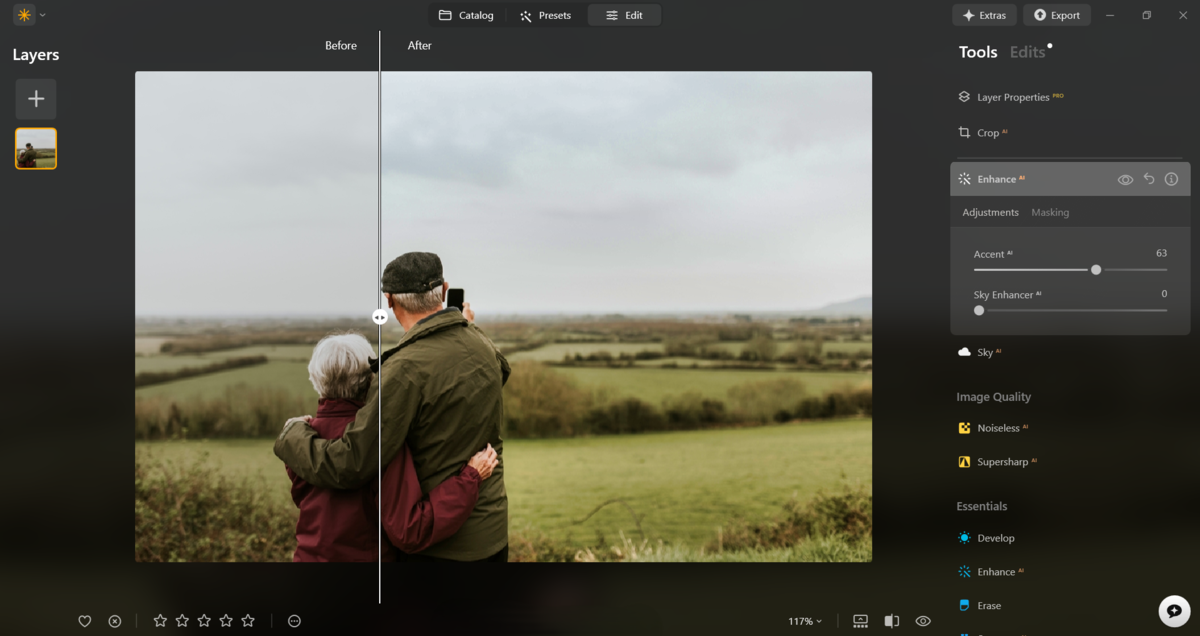
- Flatness. Unlike the JPEG format, the camera’s processor does not automatically apply contrast, saturation, or a tone curve to a RAW file. The Accent AI slider (within the Enhance AI tool) instantly analyzes the light distribution and automatically sets the correct balance of contrast, saturation, and brightness.
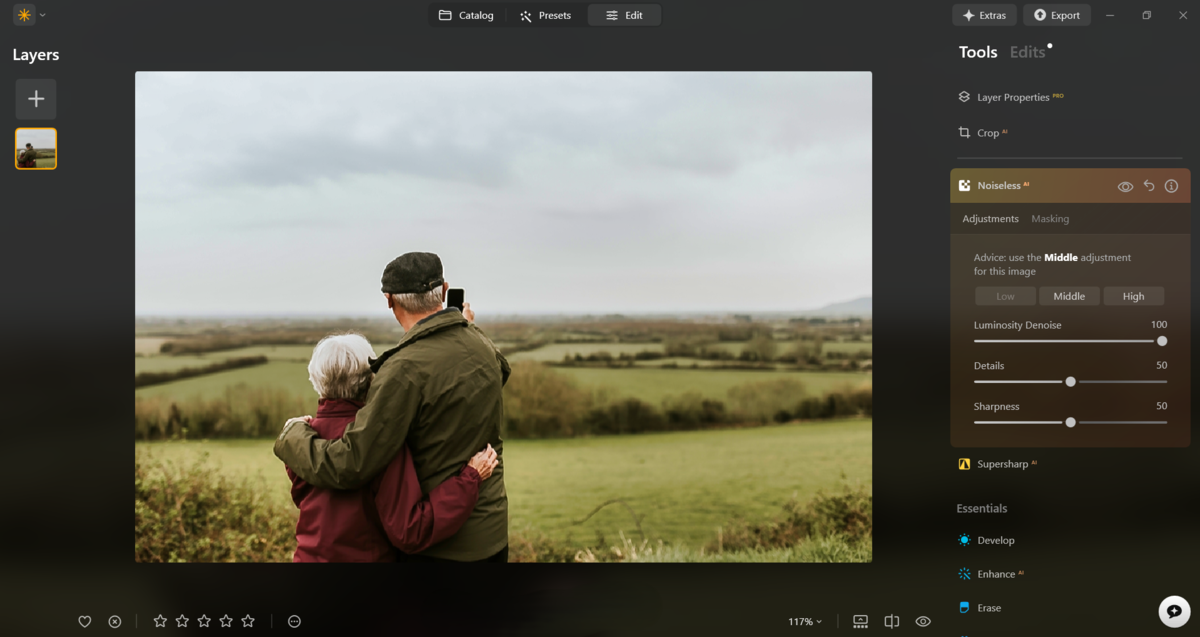
- Digital noise. When shooting at high ISO settings or in low light, the electrical signals on the sensor’s pixels are amplified unevenly. This results in visible noise in the form of dots on the photo. The Noiseless AI module scans for grain and carefully removes color and monochrome noise without damaging the subject’s structure.
- Loss of sharpness and blurred details. Due to interpolation (demosaicing), when the processor calculates the missing colors of neighboring pixels, the fine edges of objects become slightly blurred. The Structure AI extension selectively enhances microcontrast on inanimate objects, but automatically detects people and keeps their skin soft and natural.
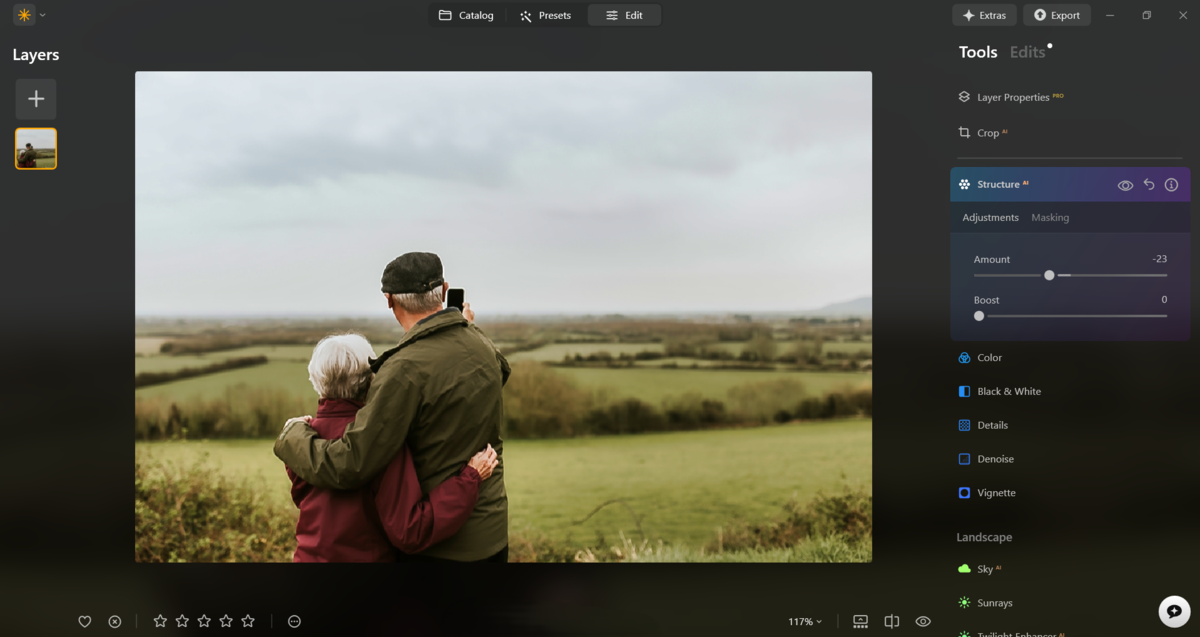
- Lighting artifacts. The camera’s exposure meter often makes mistakes when the frame contains both a very bright sky and dark ground at the same time. With the Sky AI tool, you can adjust the brightness and warmth of the light separately for the foreground and background.
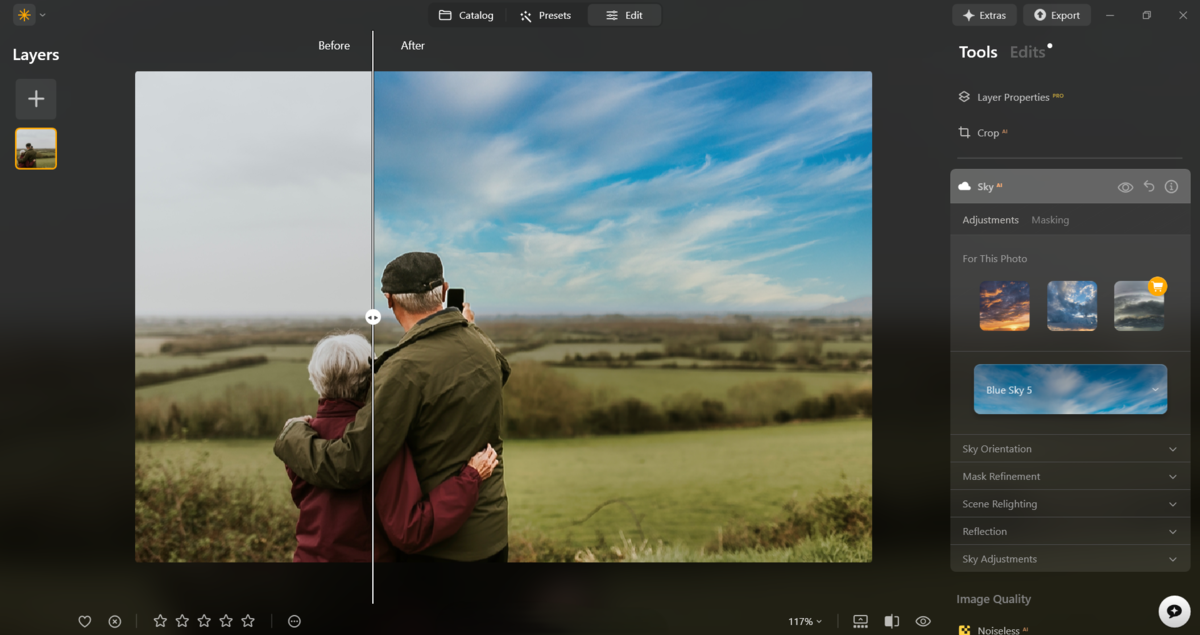


Thanks to constant updates and rapid development, Luminar will always have a solution for any problem you might face. I’ve seen this for myself and can recommend this photo editor to both beginners and experienced photographers.