Discover 20 easy senior portrait ideas and natural poses, with practical tips for locations, outfits, prompts, group photos, and authentic editing.
Senior portraits celebrate the transition from high school to whatever comes next. The strongest images do more than document how a graduate looks: they show their personality, interests, confidence, and connection to this stage of life.
In this guide, senior portraits means graduation portraits of high school seniors. You will find simple pose prompts, location and outfit advice, group ideas, and editing tips that help the final gallery feel personal rather than overly staged.
Don’t feel like reading the whole breakdown? We’ve pulled together a quick summary below.
Key Takeaways
- Begin with simple standing, sitting, and walking poses before trying more expressive ideas.
- Give the senior an action or prompt instead of asking them to “act natural.”
- Use hobbies, meaningful locations, school colors, and personal objects to tell their story.
- Vary the framing and direction of the body while keeping hands relaxed and visible.
- Prioritize comfort, mobility, and the senior’s own style when choosing outfits.
- Retouch lightly so skin texture, facial features, and identity remain authentic.
- Create visual variety with close-ups, full-body portraits, movement, family, friends, and graduation details.
How to Prepare for a Senior Portrait Session
A short planning conversation prevents most problems on the day of the shoot. Ask what the senior wants the photographs to communicate and where they genuinely feel comfortable. Discuss hobbies, activities, favorite places, future plans, and whether they want a polished, casual, athletic, artistic, or nostalgic mood.
Build a loose shot list rather than scripting every frame. Include:
- One or two locations
- Two or three outfits
- A few meaningful props
- Individual, family, and friend portraits if requested
- A mix of close-up, half-length, and full-body images
- Both vertical and horizontal compositions
Ask the senior to share any accessibility needs, insecurities, or posing preferences privately. Never pressure someone into a pose, outfit, or physical activity that makes them uncomfortable.
20 Senior Picture Poses and Ideas
1. Relaxed Standing Pose

Begin with the senior standing at a slight angle to the camera rather than facing it squarely. Ask them to shift most of their weight onto the back leg, soften the front knee, and let their shoulders relax. This creates a natural base pose that is easy to adjust.
Give the hands a purpose: one can rest in a pocket, lightly hold a jacket, or touch a necklace. Avoid hiding both hands completely or pressing the arms tightly against the torso.
Exclusive Tools of Endless Possibilities in One Editor
2. Lean Against a Wall

A wall, fence, column, or tree gives the subject something to interact with. Ask them to lean lightly rather than placing their full weight against the surface. Try variations with one shoulder, the upper back, or one foot touching the wall.
This senior portrait pose works especially well for students who feel unsure about what to do with their bodies.
3. Sit and Lean Slightly Forward

Use stairs, a bench, a low wall, or a sturdy chair. Have the senior sit near the edge and lean forward slightly from the hips. Keep the spine long and place the hands loosely on the knees or between them.
Check the position of the feet and legs before shooting. Small adjustments can make a seated portrait look intentional instead of compressed or awkward.
4. Walk Toward the Camera

Movement often produces more natural posture and expressions than a static pose. Ask the senior to walk slowly toward you, look away for a moment, and then look back at the camera. Shoot in burst mode and keep enough distance for several steps.
You can also photograph them walking across the frame for a more candid, editorial feel.
5. Look Over the Shoulder

Position the body away from the camera and ask the senior to turn their face back toward you. This creates a strong portrait with clear shape and works well with graduation gowns, jackets, and locations that deserve to remain visible.
Make sure the turn feels comfortable. If the neck looks strained, rotate the torso slightly toward the camera.
6. Use a Genuine Laugh Prompt

Instead of telling the senior to laugh, give them something to respond to. Ask about a funny school memory, invite a friend or parent to stand beside you, or have them attempt an intentionally exaggerated pose before returning to a relaxed one.
Continue shooting immediately after the prompt. The most authentic expression often appears in the transition.
7. Include a Hobby

Use an object connected to the senior’s real interests: a musical instrument, sketchbook, camera, sports equipment, books, dance shoes, or something they have made. The prop should support the portrait rather than cover the subject or become the only point of interest.
Photograph both a composed portrait and a few frames of the senior actively using the object.
8. Wear a Sports Uniform
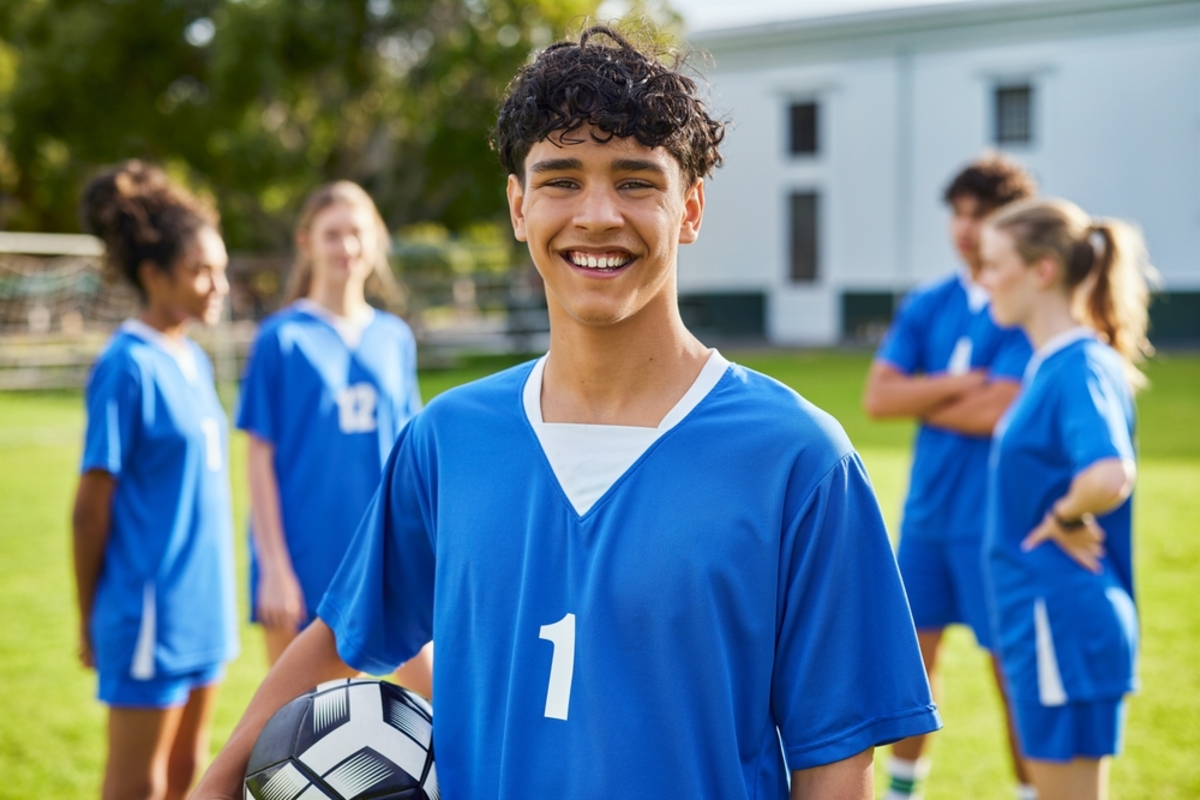
For athletes, capture a clean portrait in uniform and a few action-inspired frames at the field, court, track, or gym. Include details such as shoes, jersey numbers, equipment, or hands preparing for the activity.
Follow venue rules and choose movements that can be performed safely in the available space.
9. Recreate a Childhood Photo

Ask the graduate to bring a favorite childhood photograph. They can hold it for a simple then-and-now portrait, or recreate the original pose, outfit colors, or setting. The result feels personal without requiring an elaborate concept.
Avoid relying on the childhood image alone: capture a clean senior portrait in the same location as well.
10. Photograph the Cap and Gown

Take a few classic graduation portraits before experimenting. Ask the senior to hold the cap at their side, adjust the tassel, look down at the diploma, or walk while carrying the gown over one shoulder.
If you photograph a cap toss, leave extra space above the subject, use a fast shutter speed, and repeat the action several times. Check local rules before throwing objects near buildings or crowds.
11. Use School Architecture

Photograph the senior near a recognizable entrance, corridor, stadium, library, or campus sign. Use leading lines and architectural frames to make the setting part of the story.
Arrange permission in advance and avoid blocking entrances, classes, or other people.
12. Return to a Meaningful Location

The best location may be a neighborhood park, café exterior, family property, music venue, or another place associated with the senior’s life. A meaningful setting often creates more natural expressions than a visually impressive but unfamiliar location.
Look for uncluttered angles and backgrounds that complement the outfit.
Elevate Your Photography with Our Advanced Software
13. Use Flowers or Natural Elements

Flowers add color and give the hands something gentle to do. The senior can hold a small bouquet, walk through tall grass, sit near wildflowers, or interact with leaves in autumn.
Use only locations where picking or touching plants is permitted. Watch for allergies, insects, uneven ground, and delicate ecosystems.
14. Add Movement to Fabric

A flowing dress, graduation gown, loose jacket, or scarf can create shape and energy. Ask the senior to turn slowly, walk, or lift the edge of the fabric rather than repeatedly spinning at full speed.
Use a faster shutter speed to freeze the movement or a slower one intentionally for controlled blur.
15. Use a Mirror or Reflection

Mirrors, windows, puddles, and calm water can produce layered compositions. Place the senior so both the reflection and face remain clear, then check the frame for unwanted reflections of the photographer, lighting equipment, or bright distractions.
Use this technique for a few creative frames rather than the entire gallery.
16. Sit on Steps

Steps offer several posing heights and strong leading lines. Ask the senior to sit diagonally, place their feet on different steps, and keep their hands relaxed. Photograph from both eye level and slightly above, without exaggerating the size of the head or legs.
17. Take an Environmental Portrait

Step back and show the senior within a wider scene. This works well in a school, studio, city street, field, or landscape that says something about them. Compose deliberately so the environment adds context without making the subject disappear.
18. Include a Best Friend

Friend portraits create easy opportunities for real interaction. Ask them to walk together, exchange an inside joke, sit side by side, or recreate a familiar school-day moment. Capture both posed images and the reactions between them.
Confirm that the individual senior remains the main subject if the session is primarily for their gallery.
19. Add Family or a Pet

A few photographs with parents, siblings, grandparents, or a pet can make the session more meaningful. Plan these frames early, before people become tired or clothing and hair need adjustment.
For pets, bring water, treats, waste bags, and another person who can take the animal after its part of the session.
20. End with a Celebration

Finish with an energetic idea such as confetti, school-color streamers, balloons, or a joyful group frame. Choose reusable or biodegradable materials where possible and clean the location afterward.
Avoid colored powder near the eyes or lungs, and do not use it where it could stain property, damage camera equipment, or violate venue rules. A simple cap toss, jump, or burst of laughter is often safer and just as effective.
Flattering Posing Tips for Senior Portraits
The goal is not to force every person into the same “flattering” shape. Good posing helps someone appear comfortable, confident, and recognizable as themselves.
| Common issue | Direction to try | Why it helps |
| Stiff shoulders | Ask for a slow breath and gentle shoulder roll | Releases visible tension |
| Hands look awkward | Give each hand a light task | Creates natural shape and intention |
| Body looks square to camera | Turn the torso slightly and shift the weight | Adds dimension without exaggeration |
| Chin is pulled back | Ask the subject to bring the forehead slightly forward, then lower the chin a little | Defines the jaw while keeping the pose natural |
| Smile feels forced | Use conversation, movement, or a memory prompt | Produces a genuine transition and expression |
| Pose feels too static | Add a step, turn, clothing adjustment, or glance away | Creates momentum and variation |
Give one instruction at a time and demonstrate when useful. Avoid gender-based posing rules: choose direction according to the individual’s style, comfort, clothing, and the mood they want.
What to Wear for Senior Pictures
Suggest outfits that fit well, allow movement, and feel like the senior’s real style. Solid colors and subtle patterns are usually easier to coordinate with a location, but bold clothing can work when it is an intentional part of the concept.
A practical combination is:
- A polished outfit for classic portraits
- A casual look the senior wears regularly
- An optional uniform, activity outfit, or graduation gown
Ask the senior to bring comfortable shoes for walking between locations, plus a lint roller, hairbrush, safety pins, and any necessary makeup for small touch-ups. Check every outfit for restrictive movement, visible tags, twisted straps, and items left in pockets.
Your AI-Powered Photo Editor for MacOS and Windows
Lighting and Camera Tips
Open shade and soft window light are reliable choices for flattering portraits. During golden hour, place the senior with the sun behind or to the side and expose carefully for the face. Use a reflector or gentle fill light when shadows become too deep.
For individual portraits, focal lengths around 50–135mm on a full-frame camera often produce natural-looking perspective when the photographer maintains a comfortable working distance. Wider lenses can be useful for environmental portraits, but avoid placing the face or body close to the edge, where distortion is stronger.
Use continuous autofocus with eye detection when available, and focus on the eye closest to the camera. Choose a shutter speed fast enough for the subject’s movement—especially when walking, turning, or tossing a cap. Review sharpness, blinking, background distractions, and clothing details throughout the session.
How to Edit Senior Portraits in Luminar
Begin with exposure, white balance, and crop. Keep skin tones consistent across the gallery, especially when the session moves between shade, direct sun, and indoor light.

In Luminar, portrait tools can help refine faces and skin without turning the senior into a different person. Apply skin smoothing, shine removal, eye enhancement, and face lighting subtly. Preserve freckles, natural texture, scars, moles, and other identifying features unless the client specifically requests a temporary blemish to be removed.
Use masking to limit corrections to the areas that need them. Remove only genuine distractions—such as litter, sensor spots, or an unwanted object at the frame edge—with an object removal tool. Avoid changing body shape or facial structure as a default part of the workflow.
For a consistent gallery, choose one color direction and apply it gently across the set. Luminar Presets can provide a starting point, but adjust the result for each lighting situation and skin tone rather than applying the same strength to every photograph.

Common Senior Portrait Mistakes
| Mistake | Better approach |
| Copying poses without adapting them | Adjust each idea to the senior’s body, clothing, comfort, and personality |
| Giving too many directions at once | Offer one clear prompt, let the subject respond, and refine gradually |
| Using props with no personal meaning | Choose objects connected to the senior’s actual life |
| Ignoring the hands and feet | Check the entire frame before moving to the next pose |
| Photographing only close-ups | Mix detail, close-up, half-length, full-body, and environmental frames |
| Over-retouching skin or features | Preserve texture and identity; remove only temporary distractions when appropriate |
| Treating the session as a performance | Build breaks and conversation into the shoot so the senior can relax |
Final Thoughts
The best senior portrait ideas are easy to personalize. Start with a comfortable pose, introduce movement, and build the session around places and details that matter to the graduate. Clear direction helps, but the photographs should still feel like the person in front of the camera.
Create enough variety for a complete gallery, then edit consistently and with restraint. Years later, the senior should recognize not only their appearance but also the personality and excitement of this milestone.
Frequently Asked Questions
Explain what will happen, begin with easy poses, give one direction at a time, and keep the conversation focused on their interests. Show a few successful frames if that helps build confidence, and never insist on a pose they dislike.
Reliable starting points include standing at a slight angle, leaning against a wall, sitting and leaning forward, walking toward the camera, and looking over the shoulder. Adapt each pose to the person rather than copying it exactly.
Bring the agreed outfits, comfortable walking shoes, graduation items, meaningful props, water, and a small touch-up kit. It is also useful to save the schedule, location details, and photographer’s contact information offline.
Two or three outfits usually provide enough variety without using too much session time. Prioritize one polished look, one everyday outfit, and an optional uniform, activity outfit, or cap and gown.
Correct exposure and color first, then reduce temporary blemishes or distractions if requested. Keep skin texture and permanent features intact, and apply facial enhancements lightly so the result remains recognizable and natural.