
Find out how to boost sky contrast in your photos. These simple edits bring back deep blue tones and sharp cloud details for better outdoor shots.
You take a shot on a bright day, the foreground looks great, and then you notice it—the sky is pale, almost gray, with none of the depth you saw with your own eyes. It’s one of the most common letdowns in phone photography, and it happens to nearly everyone at some point.
The reason usually comes down to how a camera reads light rather than any mistake on your part. Bringing back that contrast between blue tones and clouds can turn a flat, forgettable shot into one you’d want to share, and it takes far less work than most folks expect.
Don’t feel like reading the whole breakdown? We’ve pulled together a quick summary below.
Key Takeaways
- Shoot at the right time: The sun sits lower during sunrise and sunset, allowing light to travel through more atmosphere and giving clouds warmer, deeper colors.
- Watch the air quality: Dust, humidity, and pollution scatter light in the lower atmosphere, making skies near cities look washed out even on perfectly clear days.
- Avoid global over-editing: Adjusting contrast and removing haze across the entire image can ruin skin tones and shadows in the foreground, so rely on local adjustments instead.
- Fix the original sky first: Before replacing a sky completely, separate the light and dark tones with contrast and use the dehaze tool to restore natural blue shades.
- Use AI for complex edits: Modern mobile apps can isolate the sky automatically, letting you change its brightness or replace it without manually masking around trees and buildings.
Understanding Sky Contrast in Photography

The sky can be dark enough or, conversely, saturated. Sometimes this isn’t enough, for example, it can be a deep, saturated blue but still look monotonous if the clouds in it have the same brightness and lack shaded lower edges.
Camera sensors also don’t see the sky the way the human eye does. They have a limited range between the brightest and darkest tones they can capture in a single frame, and the sky often falls at the edge of this range—bright enough to lose detail if the foreground is exposed correctly, though not to “blow out.” It is precisely this gap that most sky edits attempt to address, details that were technically captured.
Professional Editing. Now in Your Pocket.
Download Luminar on your Mobile Device
Why Some Skies Look Flat in Photos

The sky’s own contrast changes with the time of day and the weather, and no amount of editing replaces a good starting shot. Around sunrise and sunset, the sun sits low, and light travels through more atmosphere, so blues turn deeper, and clouds pick up warm edges along their outlines. At midday, the sun is high, and light is flatter, which is when skies tend to look pale in photos; there’s less atmosphere for the light to pass through.
A sky with scattered cumulus clouds naturally holds more contrast than a thin, even layer of haze or overcast cloud, since puffy clouds cast their own shadows and catch light unevenly across their surface. A solid gray overcast, by comparison, scatters light so evenly that there’s barely any tonal difference to work with. No bright edge, no dark underside, and one flat tone from horizon to horizon.
Air quality plays a part, too. Dust, humidity, and pollution scatter light in the lower atmosphere; that is why skies near cities or on humid days often look washed out even under full sun, while the same sky over open water or higher elevation can look noticeably deeper in color. None of this is something a phone can control at the moment of shooting.
How Light and Weather Affect Sky Contrast

Some causes keep recurring. Haze and moisture in the air scatter light and dull colors, so even on a clear day, the sky looks gray. Here you’ll encounter the well-known problem of overexposure. If the camera meters the exposure based on a darker foreground, the sky becomes brighter than it naturally is and loses detail in the clouds. Some smartphones also compress the dynamic range so heavily during processing that the subtle tonal transitions between the light and dark areas of the sky simply disappear.
Mobile photo editors, such as Luminar Mobile, recognize the sky separately from the rest of the frame and can restore these details without affecting the foreground. This way, the tools restore the horizon line and work with the sky independently of other objects.
Techniques to Enhance Sky Contrast

The methods for improving photos depend on what you want to emphasize. Whether it’s applying settings to the entire photo or using tools that work exclusively on the sky, global corrections such as increasing overall contrast, toning down bright areas, or removing haze really do help. However, they also affect the foreground, so don’t overdo it if you don’t want unnatural skin tones or shadows.
Special sky tools let you avoid this. They automatically isolate the sky, allowing you to make it brighter, deeper, or even replace it entirely without affecting the rest of the frame. Here, you’ll need to figure out which photos’ atmosphere resonates with you most and choose the right tools. Be willing to check out the Luminar Mobile link to find what works best for you.
Using Editing Tools to Deepen Blues and Clouds
A few basic adjustments to the original sky almost always yield better results than replacing it entirely. The lighting, cloud shapes, and highlights already match the rest of the photo perfectly. Plus, it’s faster than messing around with a full replacement (Sky Replacement), so it’s always better to start with this step before moving on to more complex tools.
- сontrast—separates the light and dark tones in the sky;
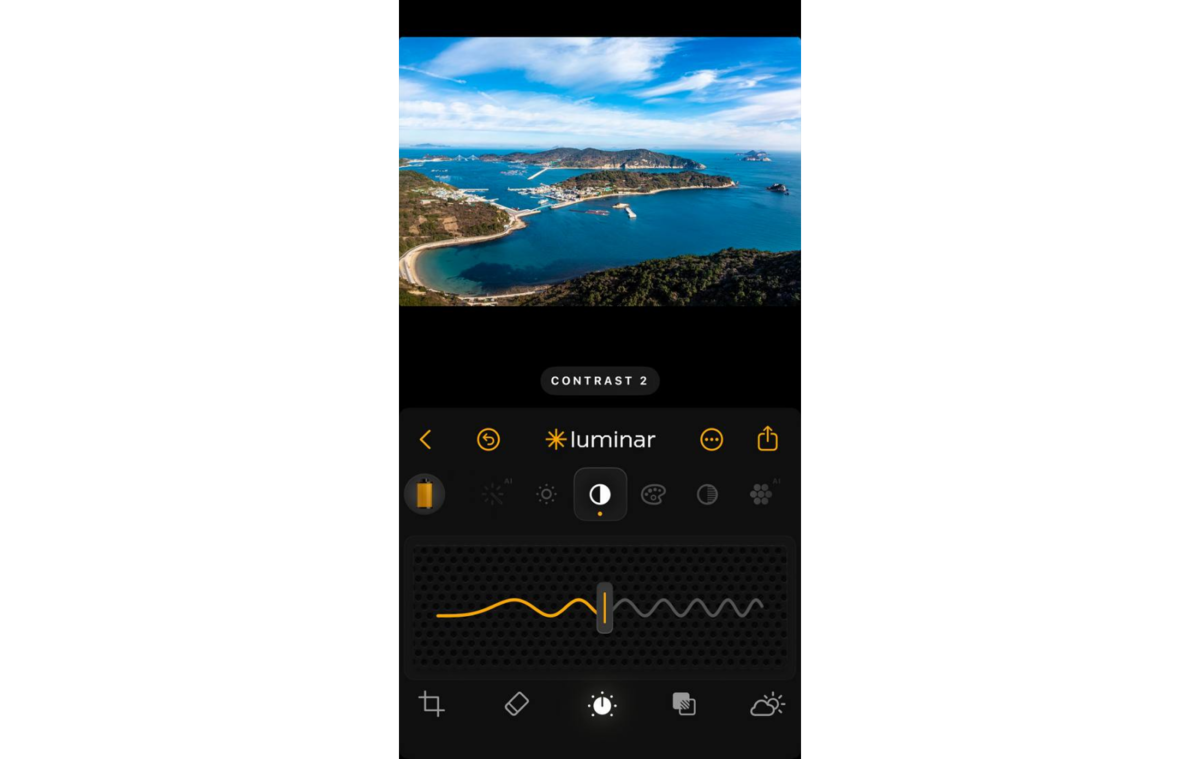
- dehaze—removes atmospheric haze that “dulls” colors on foggy or damp days;
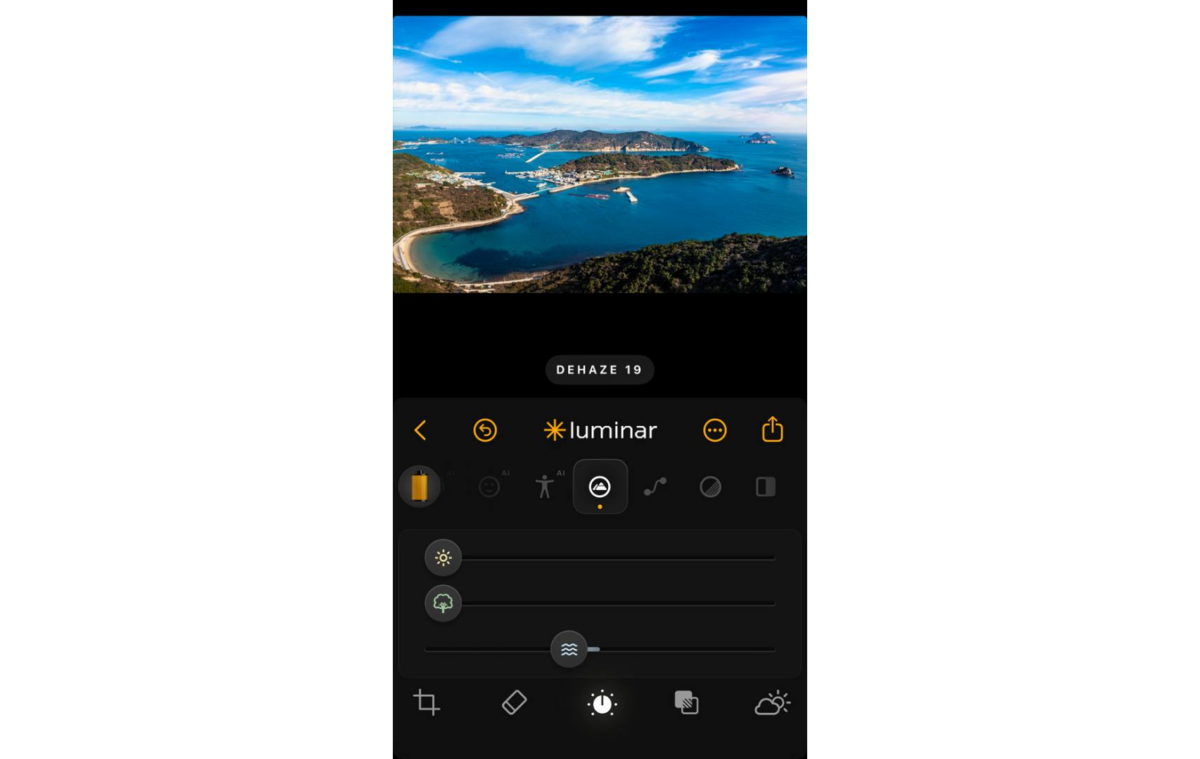
- saturation and vibrance—restore blue tones without oversaturating the rest of the photo;
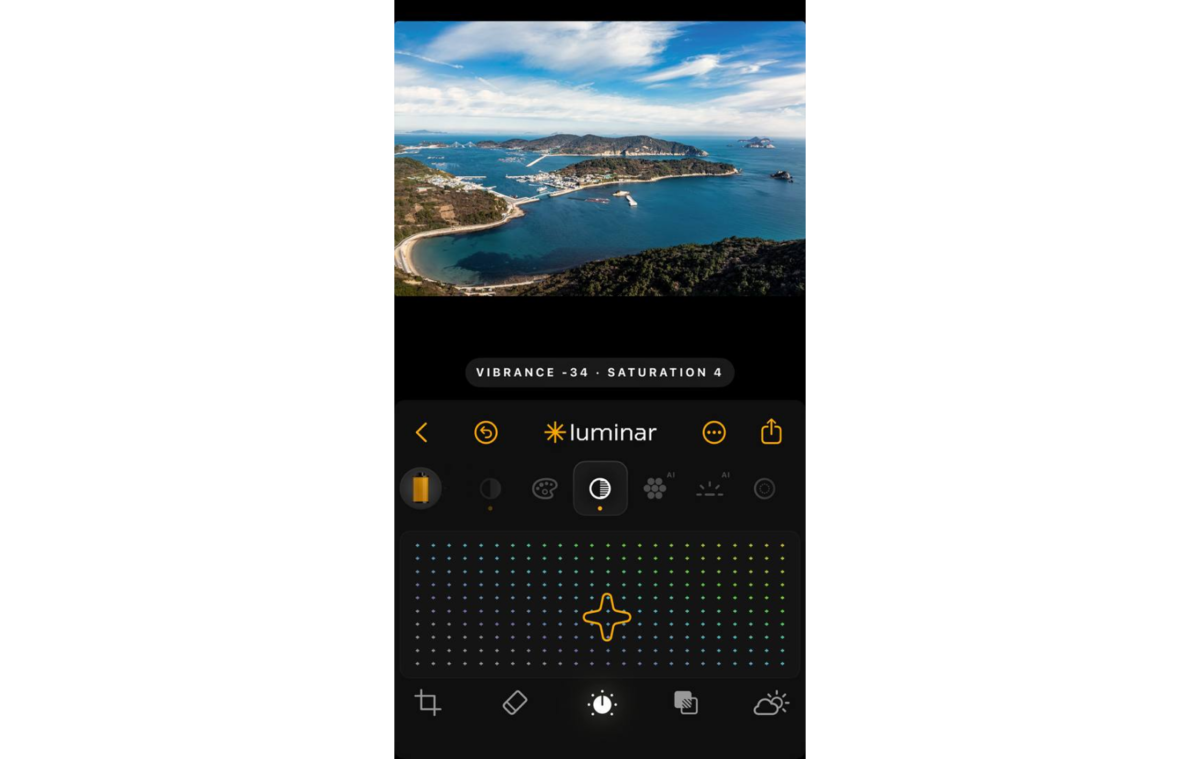
- brightness and warmth (Sky Replacement panel)—help adjust the selected sky;
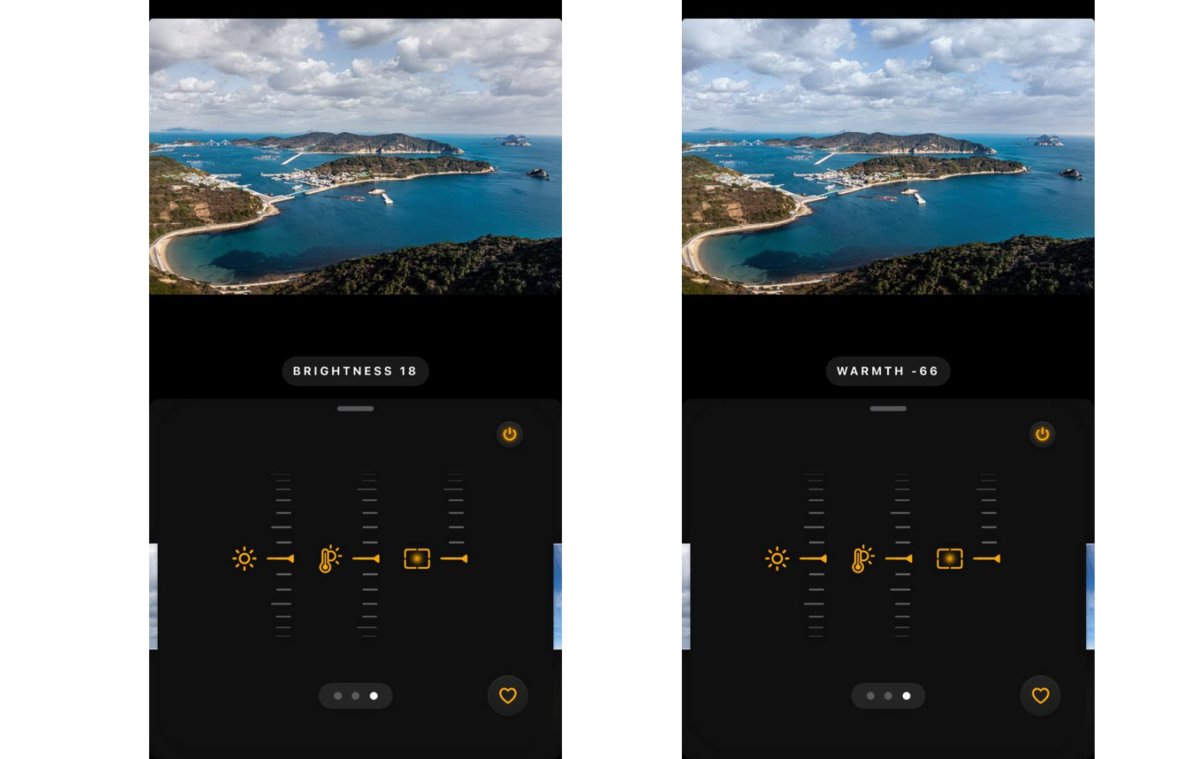
- defocus (Sky Replacement panel)—slightly blurs the sky.
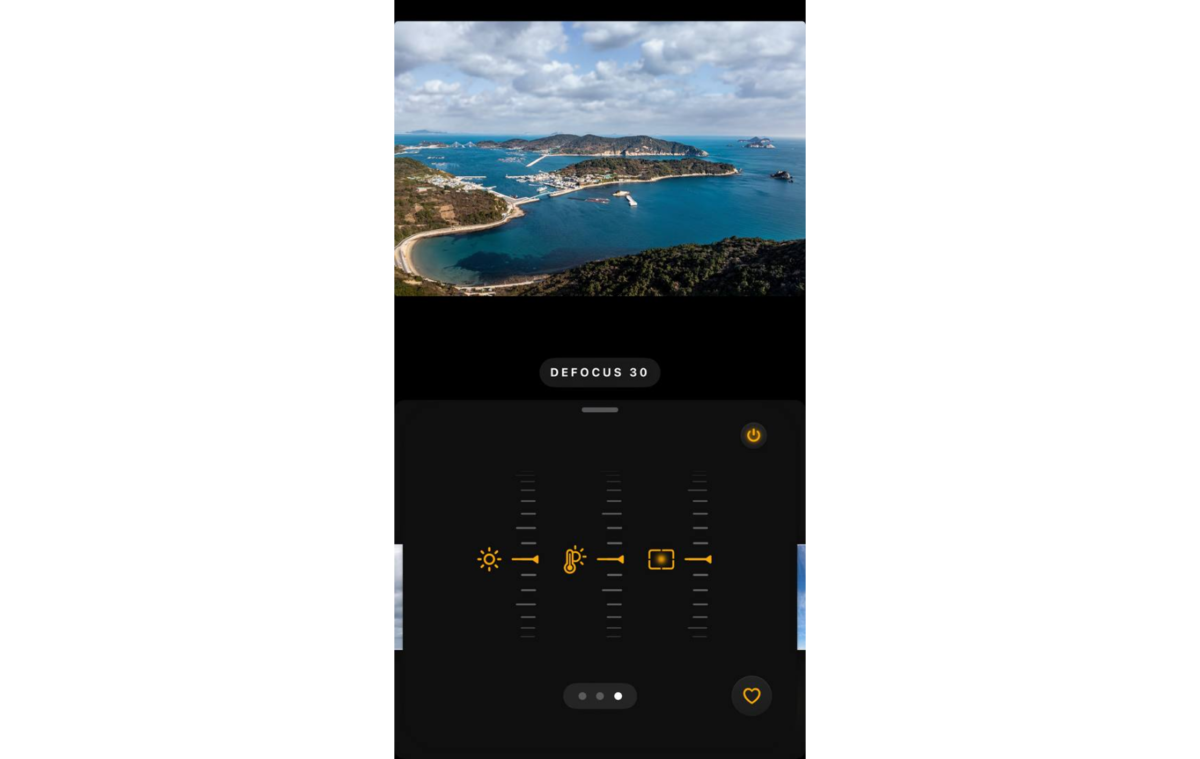


If you apply them in this exact order, the result will look natural, with no obvious signs of editing. A photo starts to look artificial when you turn one of the sliders up too much. Slight correction and frequent “before/after” comparisons work much better than a single drastic change.
Advanced Methods for Natural‑Looking Results
The Sky Replacement scans the photo, identifies the edges of the clouds, and separates them from foreground objects such as buildings, trees, or even hair. After that, you can choose a new sky from the built-in library or upload your own photo. The program automatically matches the lighting and colors of the new sky to the original scene so that they look like a single, cohesive image rather than a crudely pieced-together collage.

Masking sliders such as “Global,” “Close gaps,” and “Fix details” help you carefully refine complex edges. If there’s water in the frame, the reflection feature will mirror the new sky in it for maximum realism. Luminar Sky AI technology fixes photos that couldn’t be repaired with standard general settings.
Final Thoughts on Boosting Sky Contrast
Sometimes, a small contrast and dehaze adjustment is all a photo needs. Other times, a full sky swap gets a better result than pushing sliders on a sky that was never going to look good in the first place. Either way, working on the sky separately from the rest of the photo tends to give the most natural outcome. A phone in your pocket, paired with the right editing app, is usually enough to turn a flat sky into one of the better parts of the photo.


