Your first roll starts with choosing film and understanding exposure. These beginner film photography tips cover shooting, developing, and scanning, with ideas for your first session.
Film photography adds a physical recording medium and delayed feedback to the familiar process of making pictures. I’ll explain how to choose a working camera, expose your film, and turn your first roll into photographs you can view and edit.
My recommendation is to begin with one tested camera, one fresh film stock, and an ordinary daylight subject. Keep notes and arrange processing before you shoot. That makes it easier to understand the results without introducing too many variables.
Don’t feel like reading the whole breakdown? We’ve pulled together a quick summary below.
Key Takeaways
- Film records a latent image that needs chemical processing. A scan or photographic print makes the developed image convenient to view.
- Start with a tested camera and fresh film. Condition and compatibility matter more than a famous model name.
- Use the film’s box speed initially. Changing the camera’s ISO setting changes metering, not the film’s physical sensitivity.
- Keep loaded film protected from light. Follow your camera’s unloading procedure before opening the back.
- Edit digital scans, not the physical film. Luminar can refine a positive scan after processing and digitization.
What Is Film Photography?
Film photography records light on a light-sensitive emulsion supported by a film base. In common photographic films, silver-halide crystals are held within gelatin emulsion layers.
When the shutter opens, the lens projects an image onto the film. Exposure produces an invisible latent image. Development turns that record into a visible image.
With conventional black-and-white negative film, the developed image consists largely of metallic silver. Color negative film produces dye images through its processing sequence. The exact workflow depends on the stock.
The result is not “burned” onto film in the everyday sense. Nor does every film produce a negative: reversal film produces a positive image.
The Main Film Types
| Type | Developed result | Practical consideration |
| Color negative | A negative, typically with an orange mask | Usually processed in C-41 chemistry |
| Conventional black-and-white negative | A monochrome negative | Requires a suitable black-and-white process |
| Color reversal, or slide | A positive transparency | Typically E-6; exposure generally needs more precision |
| Instant film | A physical photograph through its built-in process | Must match the specific camera system |
Check the stock’s processing instructions. Some black-and-white films use C-41, so appearance alone does not tell you which chemistry is appropriate.
For a first roll, I would choose a fresh, familiar stock that your chosen lab accepts.
Choosing Your First Film Camera
A 35mm camera is a practical place to begin. Common rolls offer 24 or 36 exposures, although capacity varies by film and camera format.
You do not need a collectible camera to learn. I would prioritize a tested example with usable controls, an accessible manual, and a film format you can process locally.
| Camera type | Why you might choose it | What to check |
| Point-and-shoot | Compact and often automatic | Battery, autofocus, flash, winding, and exposure operation |
| 35mm SLR | Through-the-lens viewing and more direct control | Shutter, meter, lens operation, and light seals |
| Rangefinder | Compact viewing system and a different focusing experience | Rangefinder alignment, lens compatibility, and close-distance framing |
| Medium format | A larger negative and a different working pace | Format, frame count, handling, processing, and scanning costs |
Medium format can record more detail under suitable conditions, but it is not automatically the best first choice. A poorly maintained camera or inaccurate focus can undermine its advantages.
Check a Used Camera Before Loading Film
Inspect:
- The shutter’s operation at different settings.
- The meter and required battery type, if applicable.
- Film advance and rewind mechanisms.
- Light seals, hinges, and the back’s closure.
- The lens for obvious haze, fungus, or damage.
- The aperture and focusing mechanism.
A visual inspection cannot reveal every fault. A recent film test, trustworthy seller, or service check provides more useful evidence than a clean exterior.
I would run a test roll before using an unfamiliar camera for an important event.
Choose Film Around Your Light
Film speed indicates sensitivity. A higher-speed stock generally needs less exposure than a lower-speed one, but its grain and tonal appearance also depend on the stock, processing, and scanning.
| Starting situation | Possible film-speed choice | Limitation |
| Bright outdoor light | ISO 100 or 200 | Less flexibility as light fades |
| Mixed daylight and changing conditions | ISO 400 | Still needs sufficient light for your chosen settings |
| Dimmer available light | A suitable faster stock | Grain, contrast, and exposure choices need review |
These are starting points rather than promises. Lens aperture, subject movement, and available light determine whether you can make the exposure.
Keep the camera’s meter at the film’s printed ISO, or box speed, for your first roll. Some cameras read a DX-coded cartridge automatically; others require manual entry.
For an example of a versatile monochrome stock, ILFORD HP5 PLUS is rated ISO 400. It is one option rather than a requirement.
I would postpone expired film until you understand the camera and your baseline results. Age and storage introduce variables that can be difficult to separate from exposure errors.
Film Camera Settings Explained
Film and digital cameras share the same basic exposure principles. The important difference is that the loaded stock has a fixed sensitivity for the roll.
Aperture
Aperture controls the lens opening. A lower f-number, such as f/2.8, means a wider opening than f/8 and lets in more light.
At otherwise comparable settings, a wider aperture produces a shallower depth of field; a smaller opening increases depth of field. Aperture does not determine how much of the scene fits into the frame—that relates to focal length, format, and camera position.
Shutter Speed
Shutter speed controls exposure time. A faster setting helps freeze movement; a slower one admits light for longer and may show motion or camera shake.
For moving subjects, choose a speed that suits the action. For a static scene in dim light, support the camera if the exposure becomes too slow to hold steadily.
Available shutter speeds depend on the camera.
ISO and Exposure Index
Setting a different ISO on the camera changes the exposure the meter recommends. It does not transform ISO 400 film into a physically different stock.
Rating a film at another exposure index and arranging push or pull processing is a deliberate workflow. Processing affects the roll as a whole and does not restore shadow detail that was never recorded.
I recommend discussing such changes with the lab before experimenting. Do not change the rating halfway through a beginner’s roll simply because the light changes.
For a broader explanation, review the exposure triangle in photography and apply it with the film’s sensitivity held fixed.
Focus and Focal Length
Manual and autofocus film cameras are both valid starting options. Learn how your camera confirms focus and how close its lens can focus.
A 35mm lens and a 50mm lens provide different angles of view on a conventional 35mm camera, but neither is compulsory. Perspective changes with camera position; focal length often influences where you stand to achieve your framing.
I would begin with the lens you already have rather than buying several before your first roll.
How to Shoot Your First Roll
1. Arrange Processing First
Ask the lab whether it accepts your stock and which services it offers. Confirm the total cost of development, scans, optional prints, and returning the negatives.
If you want to edit the images later, ask about scan dimensions and file formats. A higher-quality scan can provide more useful flexibility than a small delivery file.
2. Load According to the Manual
For a typical 35mm cartridge camera, load in subdued light and follow its film-leader instructions. Make sure the film engages correctly and advances as intended.
Different cameras use different confirmation methods. Do not assume a frame counter alone proves that the film is moving.
Avoid opening the back once film is loaded. The cartridge protects the film inside it, but exposed film stretched across the camera remains vulnerable to light.
3. Set the Film Speed
Confirm the DX setting or enter the box-speed ISO manually. Check again if you change cameras or stocks.
I would also photograph or record the film box so you can identify the roll later.
4. Meter the Scene
Use the built-in meter, a suitable handheld meter, or a meter app whose operation you understand. A bright sky or dark background can mislead a reflected-light reading.
For your first project, choose relatively even light. Backlit scenes and extreme contrast are useful later exercises.
5. Make a Small, Repeatable Project
Photograph a short walk, a window-lit portrait session, or household objects. Include notes about shutter speed, aperture, light, and anything unusual.
You do not need to finish the roll in one day. A manageable project is more useful than rushing through frames just to unload the camera.
6. Unload Without Exposing the Film
With most conventional 35mm cameras, rewind the film fully before opening the back. Follow the manual; automatic systems may handle this differently.
Do not force the advance lever when the roll ends. If the winding behavior feels wrong, stop and check the instructions.
Medium-format roll film follows a different unloading procedure: it winds onto a take-up spool rather than rewinding into a 35mm cartridge.
7. Develop, Scan, and Keep the Film
Send the roll for the correct process and tell the lab about any agreed changes. Keep the processed negatives or transparencies in suitable sleeves.
Label them with the film stock, camera, date, and processing notes. Back up digital scans separately.
Ten Tips and Film Photography Ideas
1. Use One Stock for a Few Rolls
Consistency helps reveal whether a result comes from your exposure choices or a change of materials. Experiment more widely once you have a reference.
2. Change One Variable at a Time
Try the same subject with two apertures or two viewpoints. Record the difference so the returned scans become useful feedback.
3. Keep an Exposure Notebook
Note the frame number, settings, lighting, and subject. On an automatic camera, record what you can, including flash use and exposure compensation.
4. Practice in Ordinary Daylight
A familiar location with steady light makes it easier to learn loading, focus, and metering before adding low-light difficulties.
5. Explore Black and White Deliberately
Look for tonal separation, shape, and texture. Color film does not inherently record less detail than monochrome film; they simply offer different materials and visual choices.
This guide to contrast in black-and-white photography can help you plan monochrome compositions.
6. Learn Flash Instead of Avoiding It
Flash can be useful for low light, fill, or a deliberate direct-flash style. Follow the camera and flash instructions for compatibility, exposure, and synchronization.
Use a repeatable subject while learning. Film’s delayed feedback means notes are especially helpful.
7. Use Composition as a Choice
Try leading lines, natural framing, symmetry, or the rule of thirds. A three-by-three grid is not the golden ratio, and centering a subject can also work well.
8. Make a One-Subject Series
Photograph one tree, person, or street corner from different positions. A coherent series gives you something specific to evaluate.
9. Ask Before Trying Special Techniques
Multiple exposures require a suitable camera or a controlled method. Long exposures may need reciprocity compensation specified by the film manufacturer.
I would check those instructions before committing a roll to an unfamiliar technique.
10. Review the Negatives and Scans Together
Scans reflect the scanning setup and interpretation as well as the film. If a result looks unexpectedly dark or strongly colored, ask the lab to help distinguish capture, development, and scanning issues.
Film vs. Digital Photography
Neither medium guarantees more thoughtful or more creative work. Film’s limited frames and delayed feedback encourage a particular pace, but digital photographers can also work deliberately.
| Consideration | Film | Digital |
| Feedback | Usually after processing | Usually immediate |
| Sensitivity | Fixed by the loaded stock | Can generally change between frames |
| Ongoing costs | Film, development, and digitization or printing | Storage, maintenance, and equipment |
| Capacity | Limited by the roll or sheet supply | Limited by storage and battery |
| Appearance | Influenced by stock, exposure, process, and scan or print | Influenced by sensor, exposure, processing, and output |
| Physical original | Negative or transparency | Digital file |
I would choose film when you enjoy the process and can support the recurring costs. Digital remains useful for immediate feedback and high-volume work; using both is a reasonable option.
Editing Film Scans With Luminar
After processing, digitize the film through a lab, film scanner, or suitable camera-copy setup. For a straightforward Luminar workflow, begin with a positive, already converted scan.
A raw photograph of a color negative usually needs more than simple inversion because of its orange mask and color characteristics. Use an appropriate conversion workflow before treating it as a finished positive image.
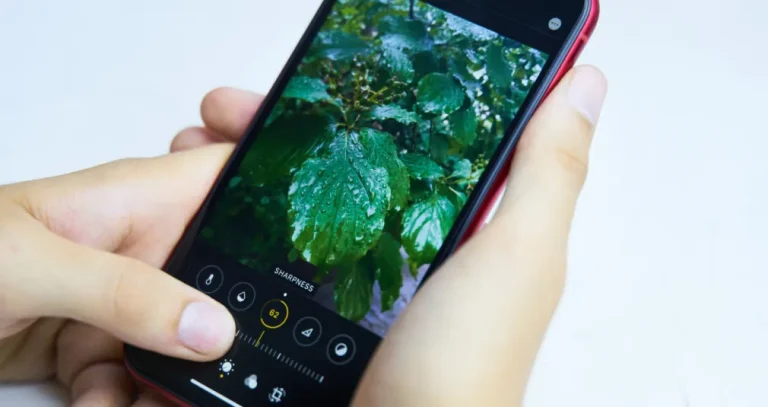
Luminar lets you refine exposure, white balance, contrast, color, and detail in supported scan files. I would use it for finishing a good scan rather than expecting it to correct every capture or processing problem.
Its photo color editing tools can help address unwanted casts or develop a creative look. Remember that a JPEG scan offers less editing latitude than an unprocessed camera RAW file.
| Pros | Cons |
| Combines tonal and color adjustments in one workflow. | It does not develop film or replace scanning equipment. |
| Selective edits can refine specific image areas. | A poor scan may need to be redone before editing. |
| Supports a restrained finish or a creative interpretation. | Automatic enhancement can alter the stock’s character. |
| Lets you prepare digital copies for sharing. | Paid software; features depend on the version and plan. |
A Simple Scan-Editing Workflow
- Keep an untouched copy of the scan.
- Open it in Edit and use Develop for ordinary TIFF or JPEG files.
- Adjust brightness and contrast gently.
- Correct unwanted color casts while retaining intentional lighting.
- Inspect detail before applying sharpening or noise reduction.
- Crop or straighten if necessary.
- Export for the intended display size and preserve the original scan.
Film grain is part of the recorded image’s texture. Scan noise is a separate issue, although they can appear together. Heavy smoothing may remove useful detail along with unwanted texture.
If you want a stylized analog treatment for a digital photograph, Luminar can also add film grain to a photo. Adding simulated grain is different from preserving the grain already present in a film scan.
Keep the First Roll Simple
My suggested first project is a tested camera, fresh film at box speed, a familiar subject, and basic notes. Review the results before changing equipment or adding unusual processing.
A first roll does not need to produce a portfolio. It should help you understand how the camera, film, exposure, and lab workflow fit together.
Frequently Asked Questions
No, you do not always need a light meter for film photography. Many film cameras have built-in light meters, and photographers can also use smartphone light meter apps or rely on exposure guidelines like the Sunny 16 rule. However, an external light meter is especially useful for achieving more accurate exposure in difficult lighting conditions, studio setups, or when shooting fully manual film cameras.
Some of the most important film photography tips for beginners include understanding exposure, choosing the right film stock, using a light meter, and shooting with intention. Since film offers fewer instant corrections than digital photography, careful composition and thoughtful camera settings lead to stronger results.
Some of the best film photography ideas include street photography, portraits in natural light, double exposures, storytelling photo series, and experimenting with different film stocks. These exercises help photographers better understand light, composition, and the unique aesthetic qualities of film.