Anyone can capture the Milky Way on a smartphone without professional equipment. Find out what to do and what settings to use on your smartphone.
Do you enjoy watching the stars in the sky? Do you enjoy taking photos? If you answered “yes” to both of these questions, then you should definitely try astrophotography. There is no need for expensive cameras or lenses. All you need is a cell phone and the confidence to take action when hunting for that perfect shot.
Don’t feel like reading the whole breakdown? We’ve pulled together a quick summary below.
Key Takeaways
- Optimal location and timing. To photograph the Milky Way, you must travel away from city light pollution and plan your shoot during a “new moon” phase, when the sky is darkest and clearest.
- Manual settings approach. Use “Pro” or manual mode to set focus to infinity, aperture to its widest possible setting, and ISO between 1600-3200, while keeping shutter speeds under 25 seconds to prevent star trailing caused by Earth’s rotation.
- RAW file format. Always shoot in RAW mode rather than JPEG; this preserves critical image data and details that are otherwise compressed, allowing for far more effective adjustments during post-processing.
- Post-processing workflow. Use AI-powered editing tools to remove digital noise, balance exposure, adjust white balance to a cooler blue tint, and use “dehaze” or structure tools to make the cosmic dust clouds pop.
Milky Way Photography with Your Phone

Good Milky Way galaxy photography is only possible if you follow a few rules. It’s best to take photos away from the city, where there’s no artificial lighting or smog. That way, the light isn’t reflected by the atmosphere and doesn’t block your view of the stars. Go during a “new moon” so that the Moon doesn’t appear in the frame.
Since you’ll be shooting in complete darkness and the planet is constantly moving, you’ll need to set an extremely long exposure time. Compensate for this by setting the ISO to 1600-3200 and opening the aperture as wide as possible. If you do everything correctly, the image will be sharp, and noise will be minimal.
Make sure to save your files in RAW format. If your phone doesn’t support this mode, download a special app for it. Unlike JPEG or TIFF, RAW photos preserve the maximum amount of detail. The human eye can’t perceive all the differences, so the photo simply appears more contrasty to us. The full difference becomes apparent once you start editing the image.
Professional Editing. Now in Your Pocket.
Download Luminar on your Mobile Device
Essential Equipment and Settings for Phone Astrophotography

Unlike professional cameras, smartphones offer fewer adjustable settings and less control over them. Therefore, the main goal is to capture high-quality source footage that can later be enhanced with photo-editing software. It may seem that the photo will no longer look natural as a result, but you don’t necessarily have to alter it drastically.
Before you start taking photos, you should set up your phone and bring along some optional equipment. Otherwise, the photo may turn out too faint, blurry, or the galaxy may not be visible at all. It would be a huge mistake to drive a hundred miles from the city, only to discover later that there’s no tripod in the trunk and the astrophotography settings on your phone are set incorrectly.
- Exposure. As mentioned earlier, you’ll need to work with extremely high settings. For Milky Way photography, the optimal frame rate is 20-25 frames per second. This speed is sufficient to provide a sharp image.
- Light Sensitivity. Setting the ISO too high can make your photo brighter, but it also brings out background noise along with the scene’s details. Therefore, it’s best not to set it higher than 3200 whenever possible.
- Aperture. This controls the amount of light that hits the sensor. It’s usually set to its maximum aperture by default, but if your phone offers an adjustment option, set it to the widest aperture.
As for the smartphone itself, things are less clear-cut. There isn’t a single best phone for astrophotography. But most online users and professional photographers agree that the Google Pixel 10 Pro and Samsung Galaxy S26 Ultra are the frontrunners in this category. Thanks to their built-in astrophotography modes and the high resolution of the main camera, they automatically adjust the settings.
What about the iPhone? The iPhone 17 Pro and 16 Pro series feature excellent all-purpose cameras, but when it comes to astrophotography, they fall slightly short of the competition. Apple’s standard camera app doesn’t have a dedicated mode for stars, and the built-in “Night Mode” is limited to a maximum exposure of 30 seconds when used with a tripod.
Preparing Your Phone for Night Sky Shots

Before heading out of town to photograph the Milky Way, make sure your smartphone is in good working order. Clean the camera lens with a microfiber cloth to prevent glare or smudges from fingerprints in the final photo. Be sure to charge the battery to 100%, especially if you’re not bringing a power bank.
It’s a good idea to set your camera to RAW format in advance or install a dedicated app if your camera doesn’t have this feature built in. Take a few photos. If you don’t encounter any issues saving or viewing the images, you’re almost ready. All that’s left is to find the optical image stabilization feature and turn it off if you’re shooting in manual focus mode.
Step-by-Step Guide to Capturing the Milky Way

Are you wondering how to take Milky Way photos with a phone? Let’s break it down in as much detail as possible.
- Leave the city limits. Visit the “Light Pollution Map” or “Dark Site Finder” website to find the most suitable location for your shoot. The blue, gray, and black areas on the map are ideal choices where you can see the Milky Way with the naked eye.
- Set the correct shooting settings. Go through them step by step, adjusting one setting at a time. If you miss a step, your photo will most likely turn out overexposed, underexposed, or blurry.
- Set up the tripod. Find a comfortable spot where nothing will block your view and where you can set up the tripod securely. Secure your phone and connect a power bank if you brought one with you.
Once your shots are ready, edit them. Use advanced editors like Luminar Neo to let the AI automatically select the best settings. Adjust exposure settings and add elements as desired. All features are available in one place, and thanks to the revision history, you can undo a filter or curve adjustment in the blink of an eye.
Tips for Enhancing Milky Way Photos on Your Phone
Since you’re taking the photo with a phone, there are fewer options for improving the shot, but there are still some. Before setting the timer, locate the galactic center. The heart of the Milky Way looks like a small dot with absolutely nothing around it. If you make it the center of your composition, most of the galaxy will fit in a single frame.
Alternatively, you can position the camera so that the silhouette of the object is visible at the edge of the frame, or point the camera straight ahead rather than upward, dividing the frame with the horizon. These photos have a “sense of presence,” which makes them look more natural and really draws attention. Everyone chooses their own spot, so the resulting photo will be one-of-a-kind.
For those who want to earn lots of likes and admiration, it’s worth choosing a shooting location with a body of water. On a windless night, you can use the water as a mirror to capture two Milky Ways at once. The only thing is that you’ll need to increase the ISO and shorten the exposure time. Otherwise, there will be too much light, making it impossible to make out any details in the frame.
Common Challenges and How to Overcome Them

The main problem an astrophotographer faces when capturing the Milky Way is overexposure. Incorrect settings, a poor angle, or a bad location result in white spots of light appearing in the image. Removing them in post-processing is quite challenging, since the light is so bright that all the details beneath it are lost. So be sure to check everything several times.
If the center of the Milky Way is sharp but the edges are heavily blurred, you’ve fallen victim to the optical distortion of the camera’s wide-angle lens. This problem mainly occurs on older smartphone models and cannot be completely resolved. So, try to position the center of the subject exactly in the center of the camera frame, and then crop the image.
The blurring of the stars is caused by a fast shutter speed. If you set the shutter speed on your phone to a value higher than 25, the stars captured by the camera will most likely turn into streaking comets. Start with 20-25 frames per second and gradually decrease the frame rate until the problem disappears. If the image is too dark, compensate by increasing the ISO to 3200, but do not extend the exposure time.
Reviewing and Editing Your Milky Way Images
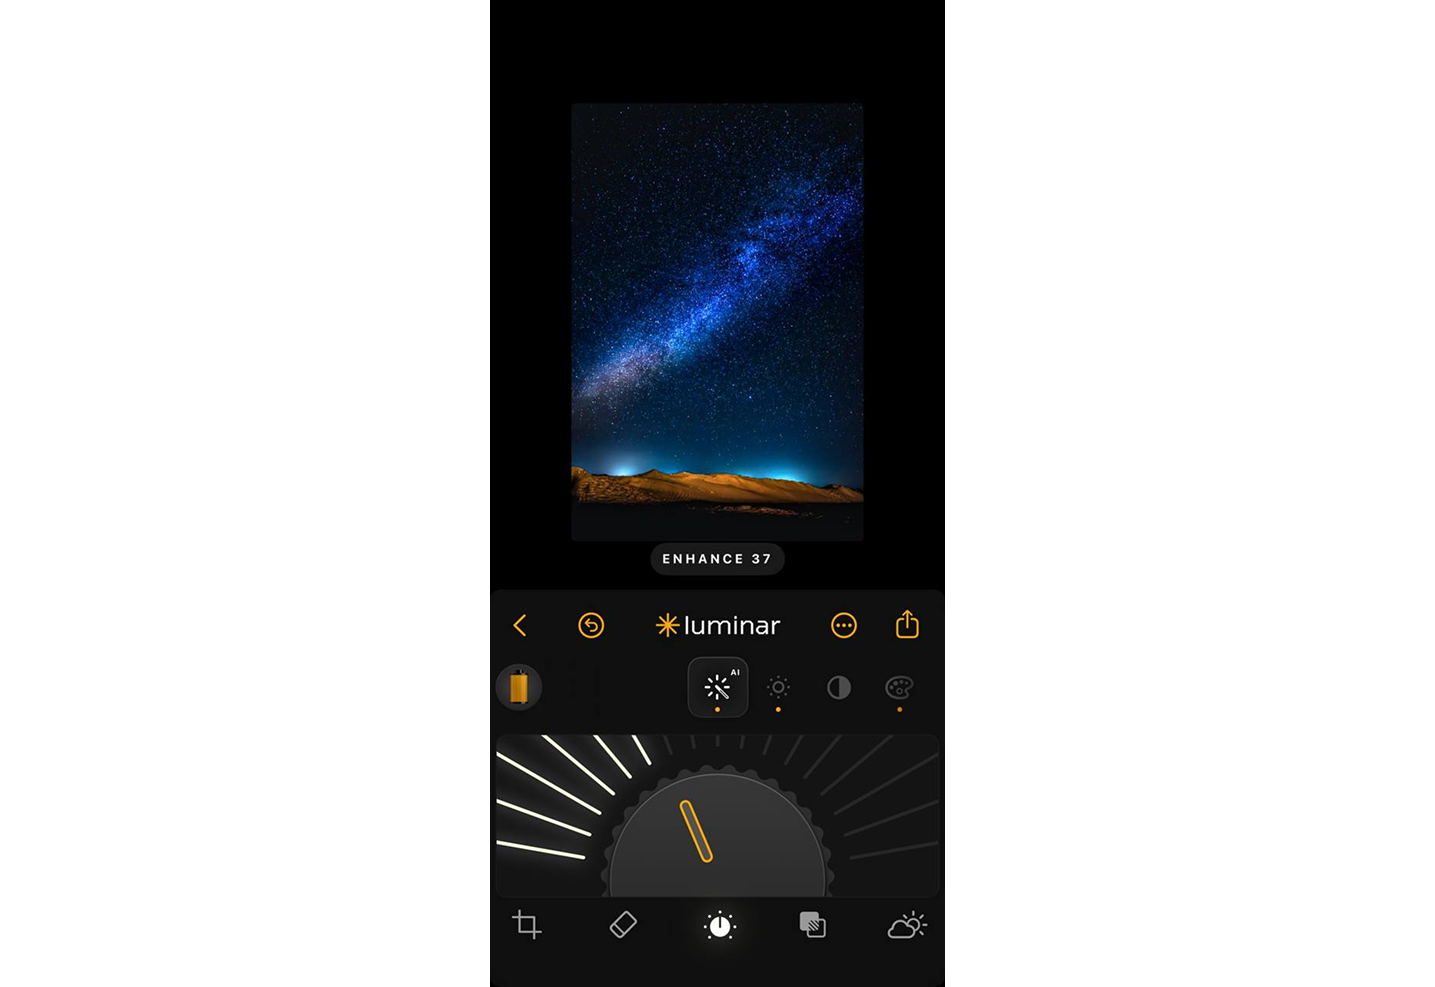
The first step in editing and reviewing Milky Way photos with Luminar Mobile is to take a slow and honest look at the photo before adjusting any of the sliders. The typical problem with “night sky” shots is that issues are only visible when zoomed. Issues here include color noise in shadows, blown stars, and inconsistent tonal response to light pollution.
The challenge here is straightforward: “What do we tidy up that is distracting, what do we retain that feels natural, and what do we not push too far for the phone’s mobile sensor to handle? Luminar Mobile is best used when adjustments are kept in check.
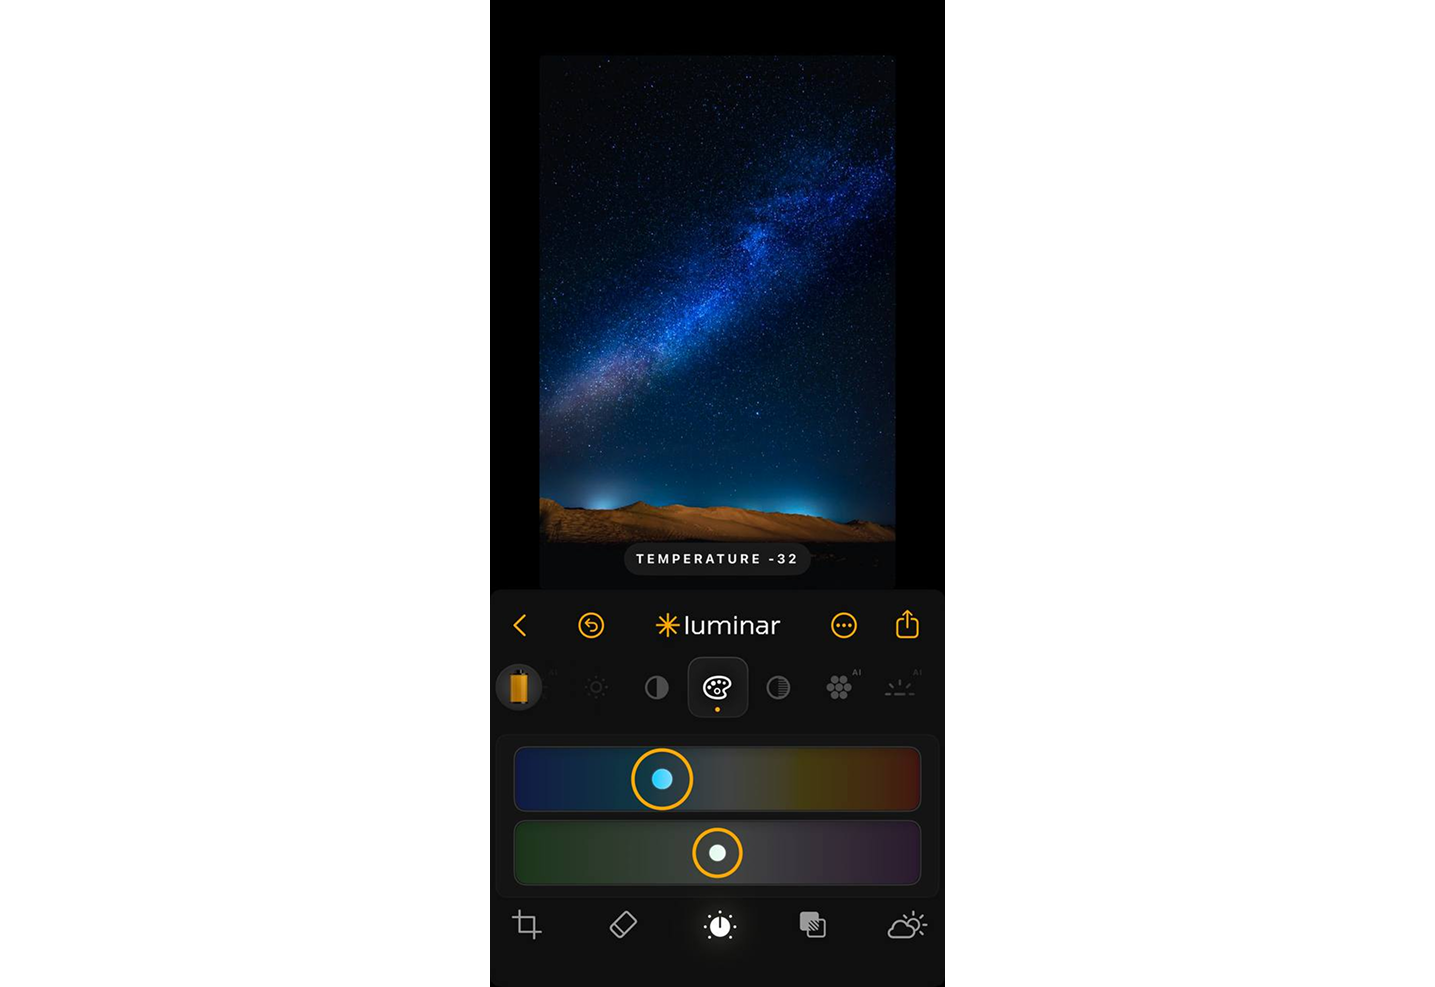
- White Balance. Adjust the Temperature slider a little towards the cooler range in the Color or Light control boxes. The sky should change from muddy gray/brown to clean deep blue, but not purple. Here, there is no Kelvin input, so use visual, rather than numbers.
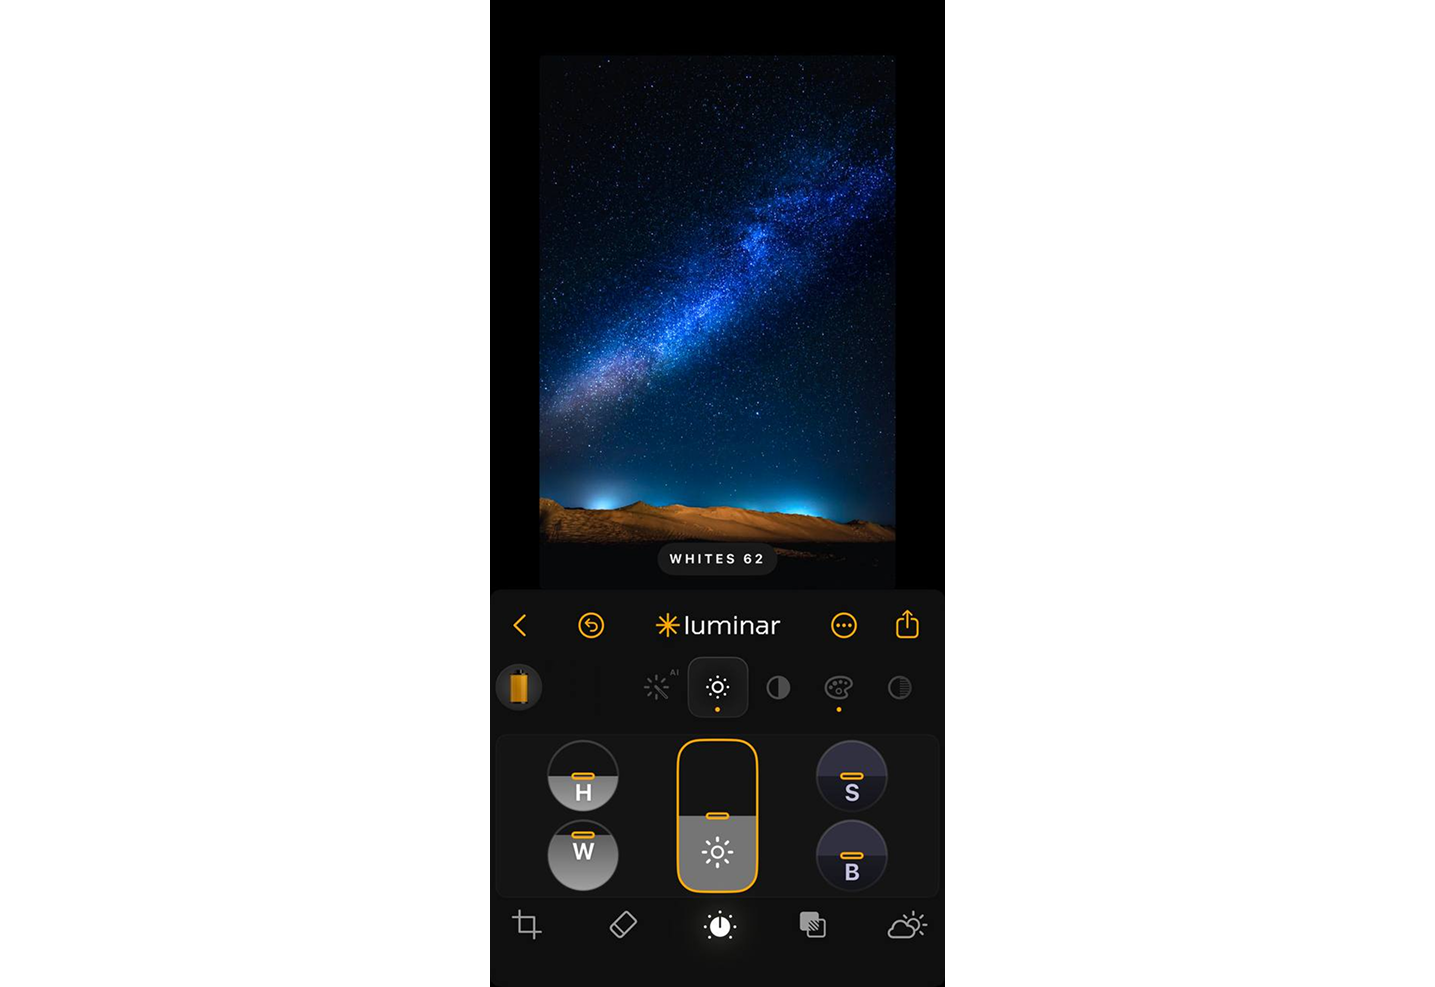
- Highlights and Whites. Be careful with the pulls of Highlights; don’t make them look like dots. Raise Whites a bit to provide a little weight in the background, but not so much as to obscure the galactic core.
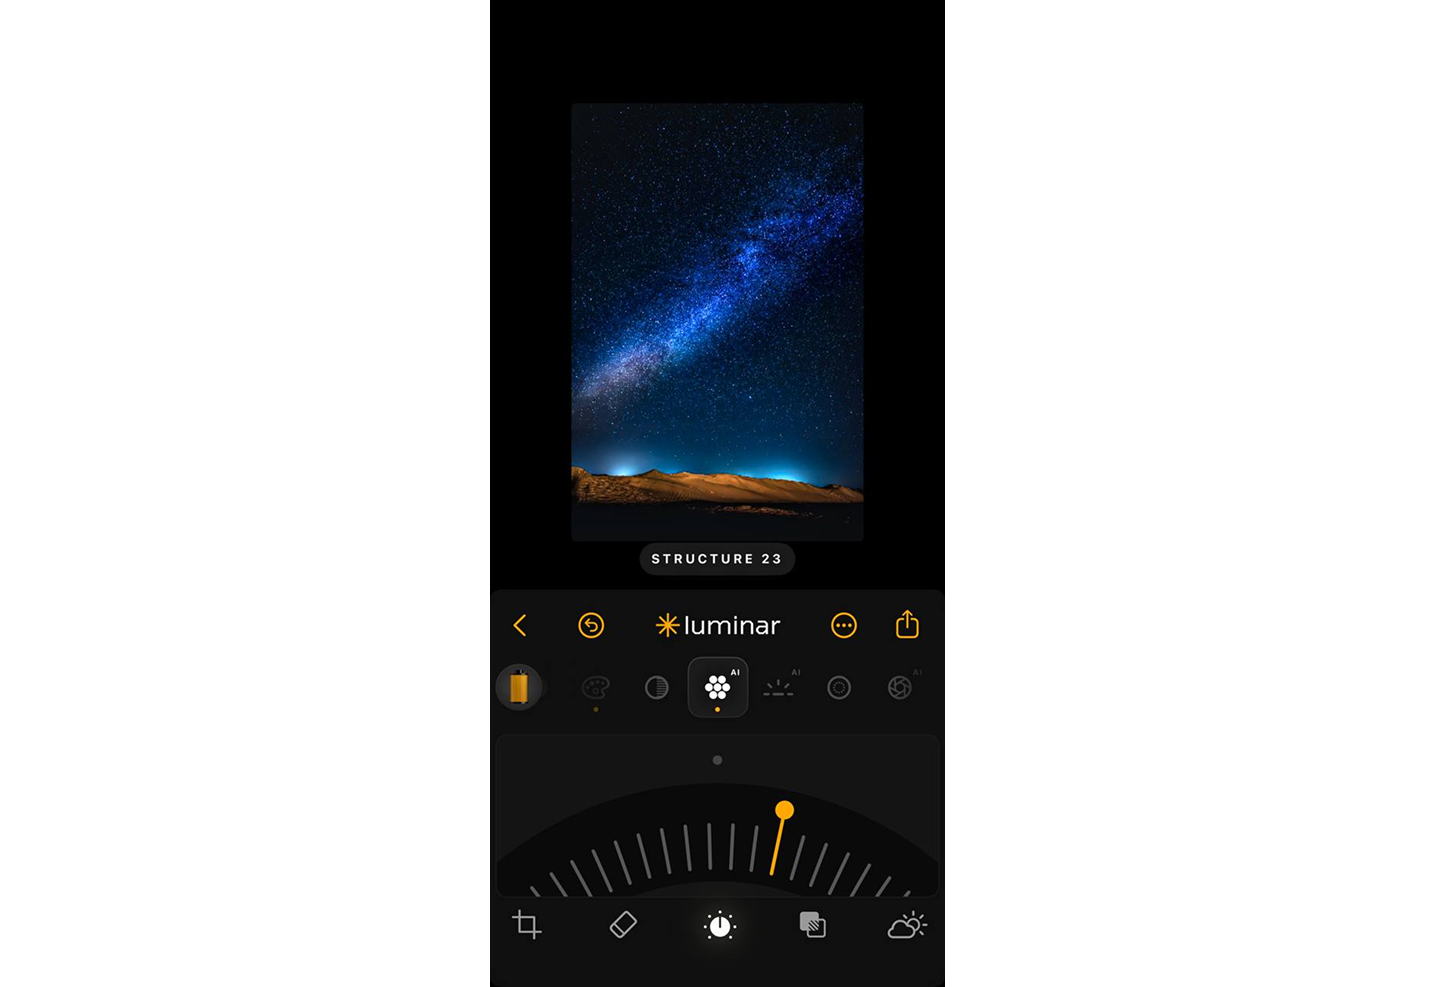
- Structure AI. Use Structure AI sparingly. A small boost will help to make dust lanes and star clusters stand out, but not to make smooth areas of the sky textured. Once you notice grain, you’re overdone.
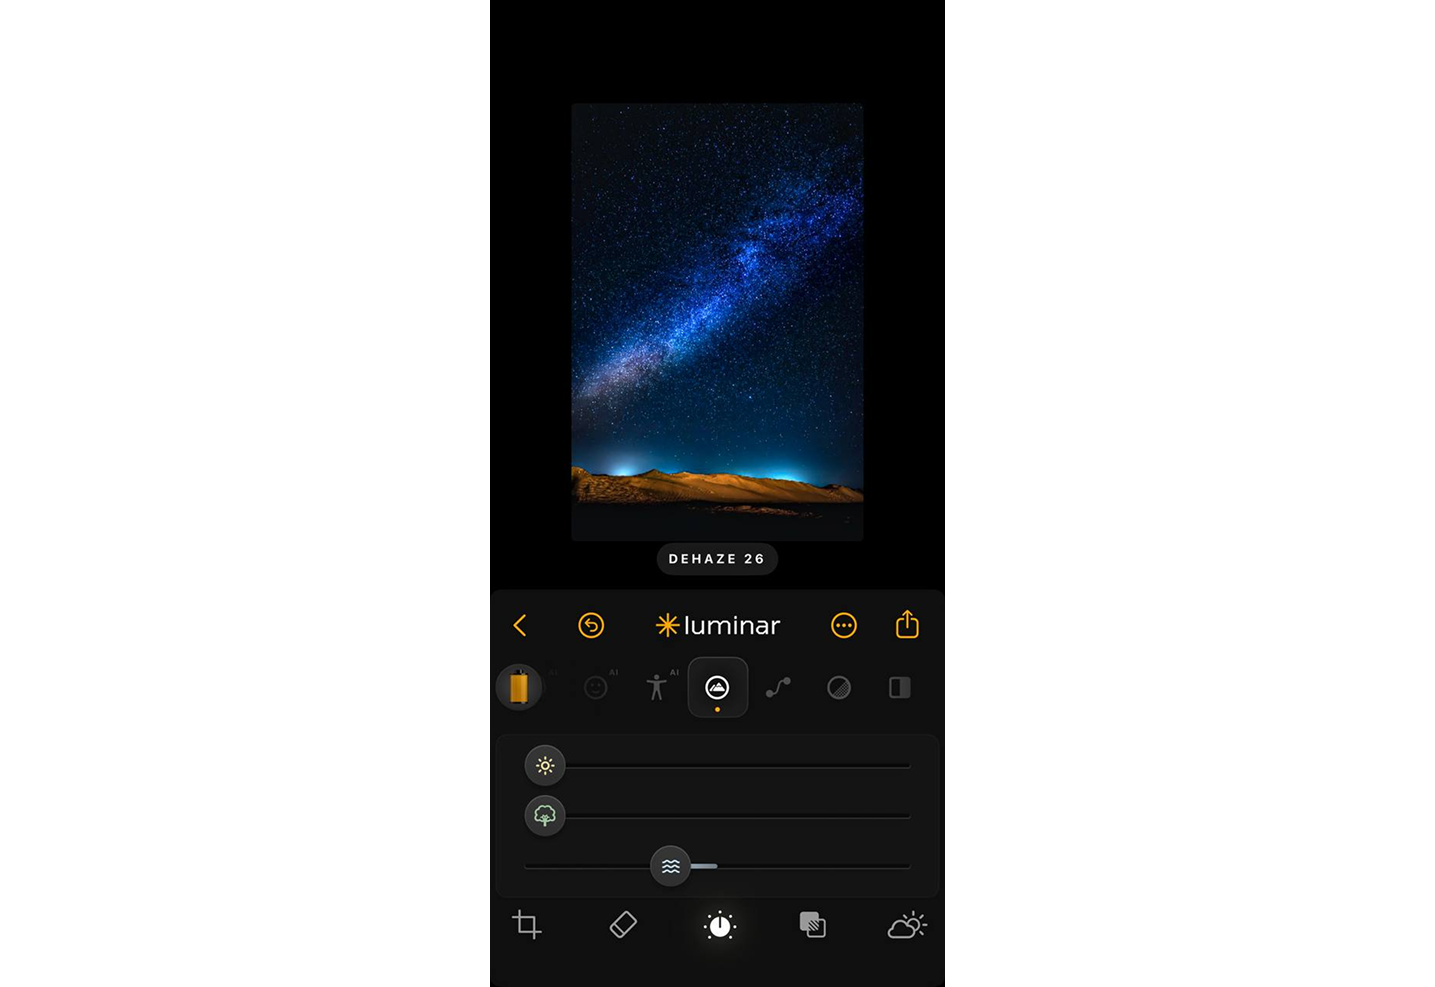
- Clarity and Dehaze. These sliders are for reducing light pollution haze and should be used sparingly. The objective is a separation of the stars from the sky, not grittiness.
- Noise Reduction. Luminar Mobile’s noise controls are fairly simple but effective at low values. Use just enough to smooth out the grain at high ISO speeds, but be careful not to become grainy when zooming in to 100%.
- Sky Replacement (optional). Sky AI in Luminar for Mobile can replace the sky when it is not suitable, but this is a feature that is primarily used for stylistic purposes. If you’re looking to do realistic Milky Way work it’s best to think of it as a creative solution instead of a technical solution.
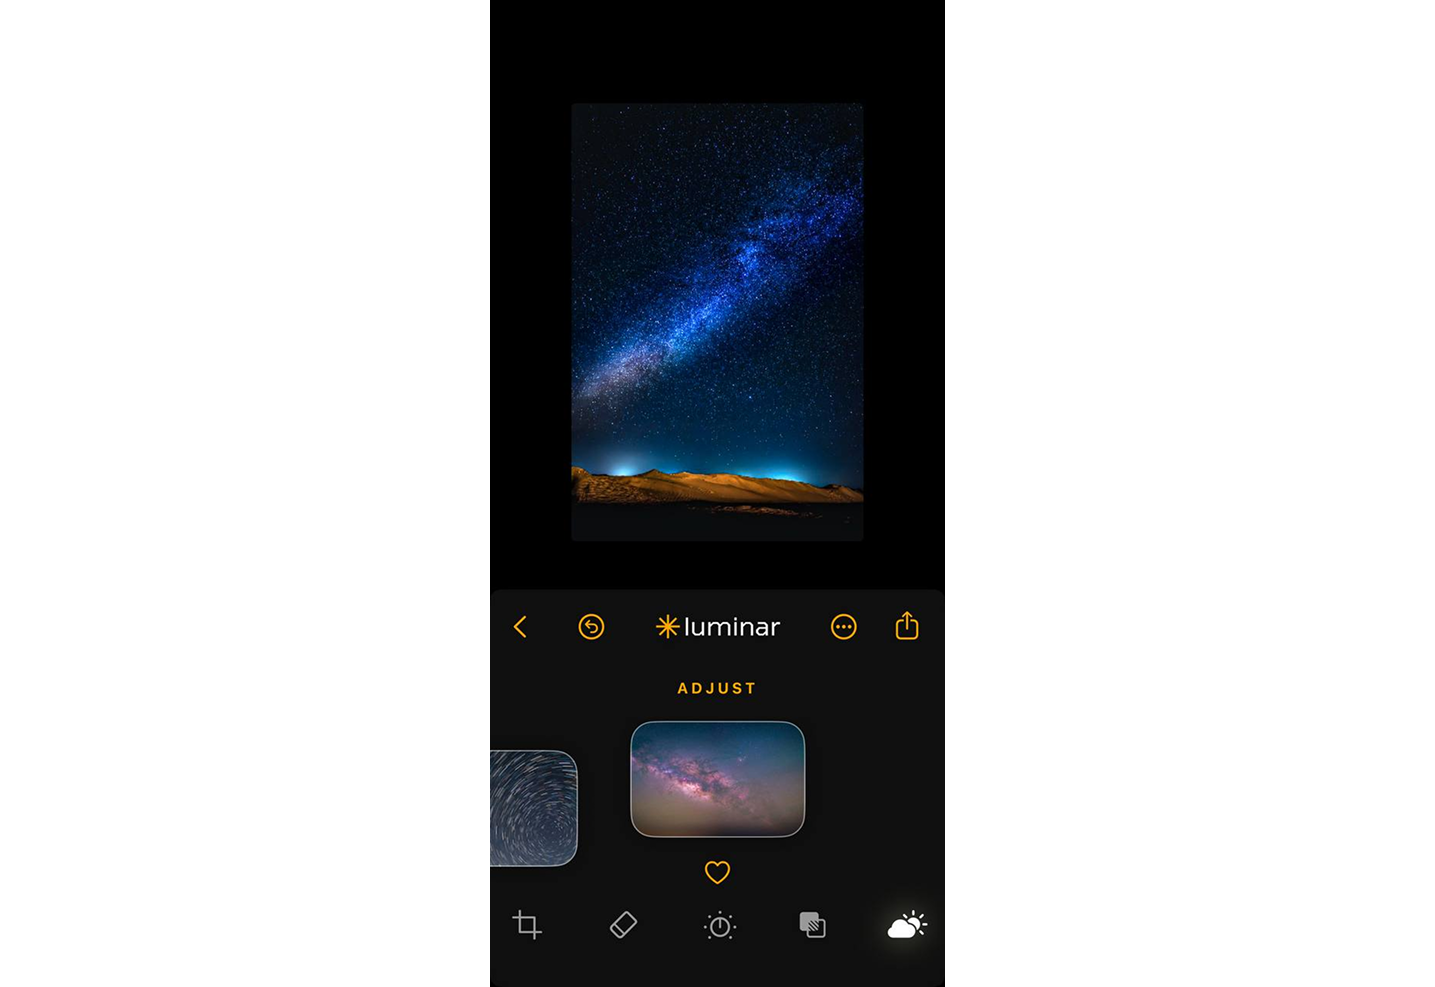


After adjustments, step back and view the image full screen. The edit is complete if the sky is clean, the stars are crisp, and the colors are believable. The Luminar Mobile app gives a nod to moderation, particularly in astrophotography.
Sharing and Showcasing Your Milky Way Photos
We’ve talked about how to photograph the Milky Way, but what about sharing those photos? It’s actually quite simple. Skylum offers a special solution: Luminar Spaces. Create a “space” within the cloud, upload up to 200 images, and then share them via a unique link. Access levels for users can be configured globally or individually for each invited participant.