
Start infrared photography with a practical guide to 590nm, 665nm, 720nm, and 850nm filters, camera setups, common problems, and creative processing.
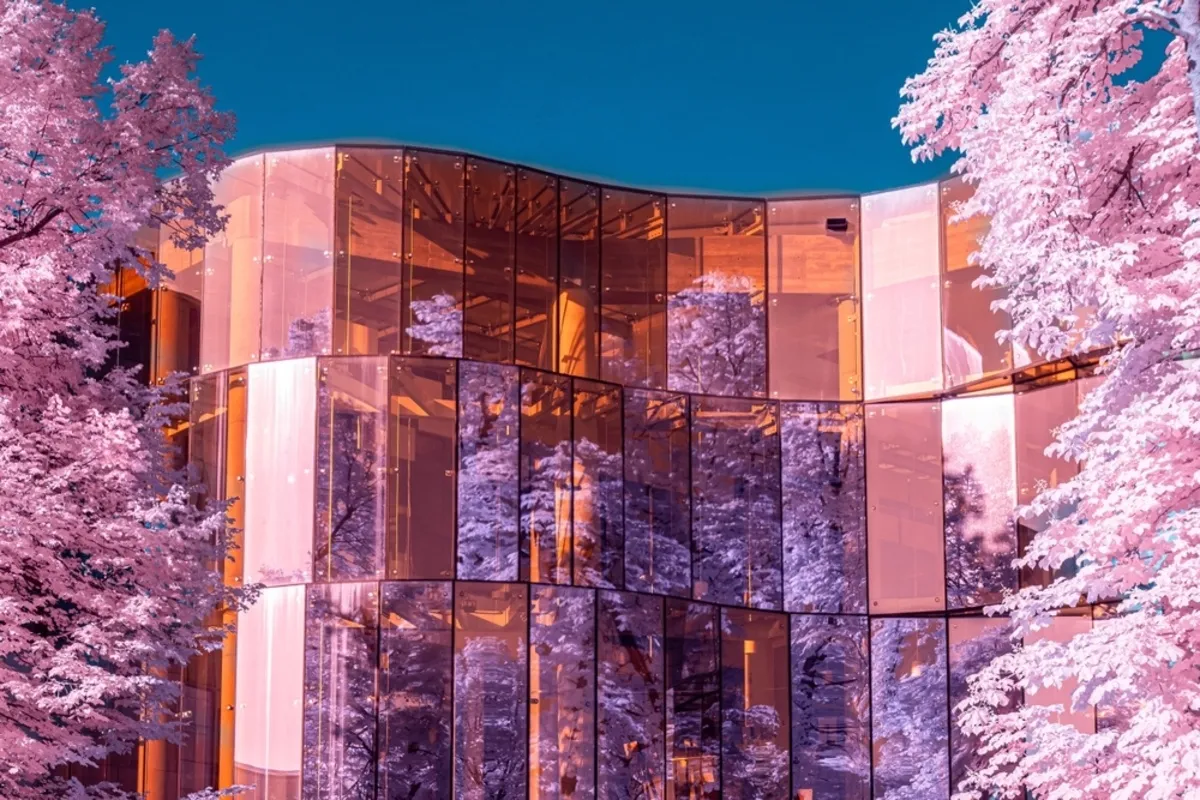
Infrared photography records light outside the visible spectrum, producing images in which familiar materials can look unexpectedly different. Foliage may appear bright, skies can become darker, and fabrics or surfaces may show tonal relationships that are not obvious to the eye.
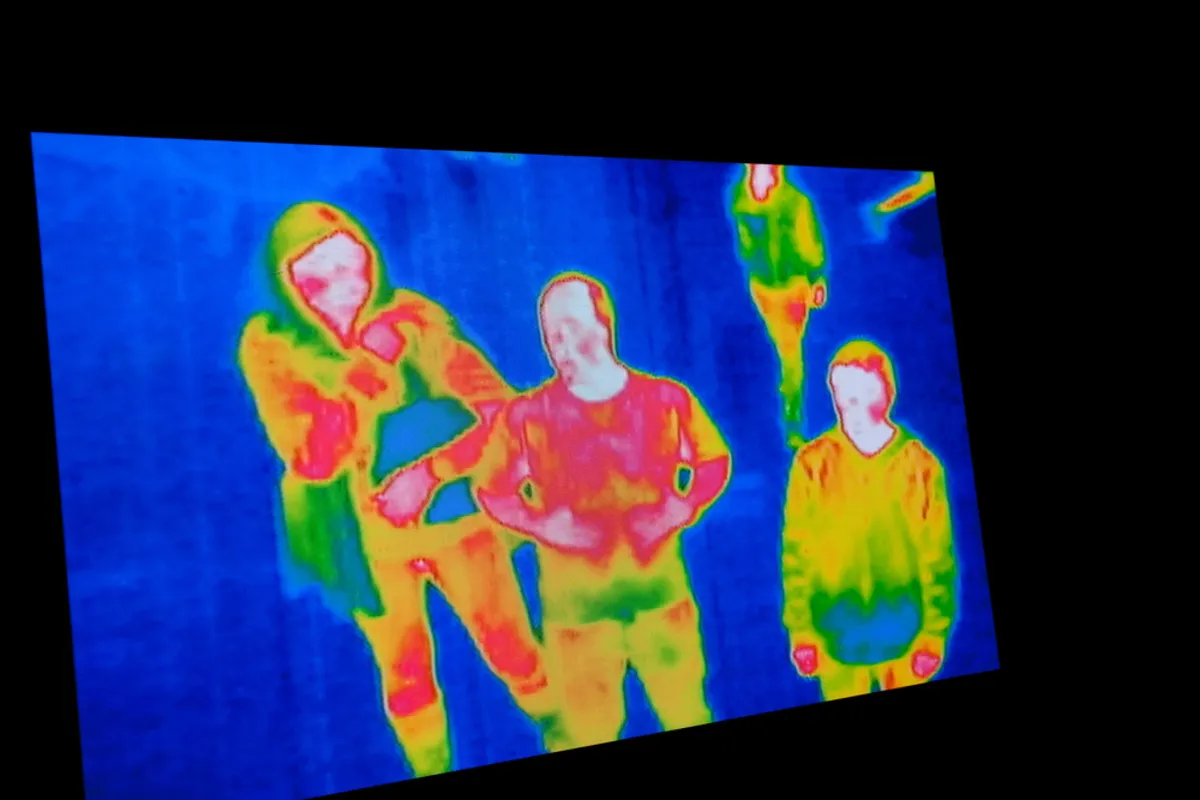
For most photographers, this means reflected near-infrared light, captured with a suitable filter, infrared-sensitive film, or a converted digital camera. It is not the same as thermal imaging, and it does not automatically reveal an object’s temperature.
This guide explains the main camera setups, how common filters differ, which capture problems to check, and how to approach black-and-white or false-color processing.
Don’t feel like reading the whole breakdown? We’ve pulled together a quick summary below.
Key Takeaways
- Near-infrared photography and thermal imaging are different. A converted consumer camera usually records reflected near-IR, not the heat-map view of a thermal camera.
- A stock camera may need long exposures. Its internal IR-blocking filter can strongly reduce the light an external IR-pass filter admits.
- Filter labels describe a transmission cutoff, not one isolated wavelength. Lower-cutoff filters can include more visible light and offer different color possibilities.
- Test the lens and focus. Hot spots and infrared focus behavior can change with lens, focal length, aperture, and filter.
- White balance is setup-dependent. There is no universal Kelvin value that fixes every infrared RAW file.
What Is Infrared Photography?
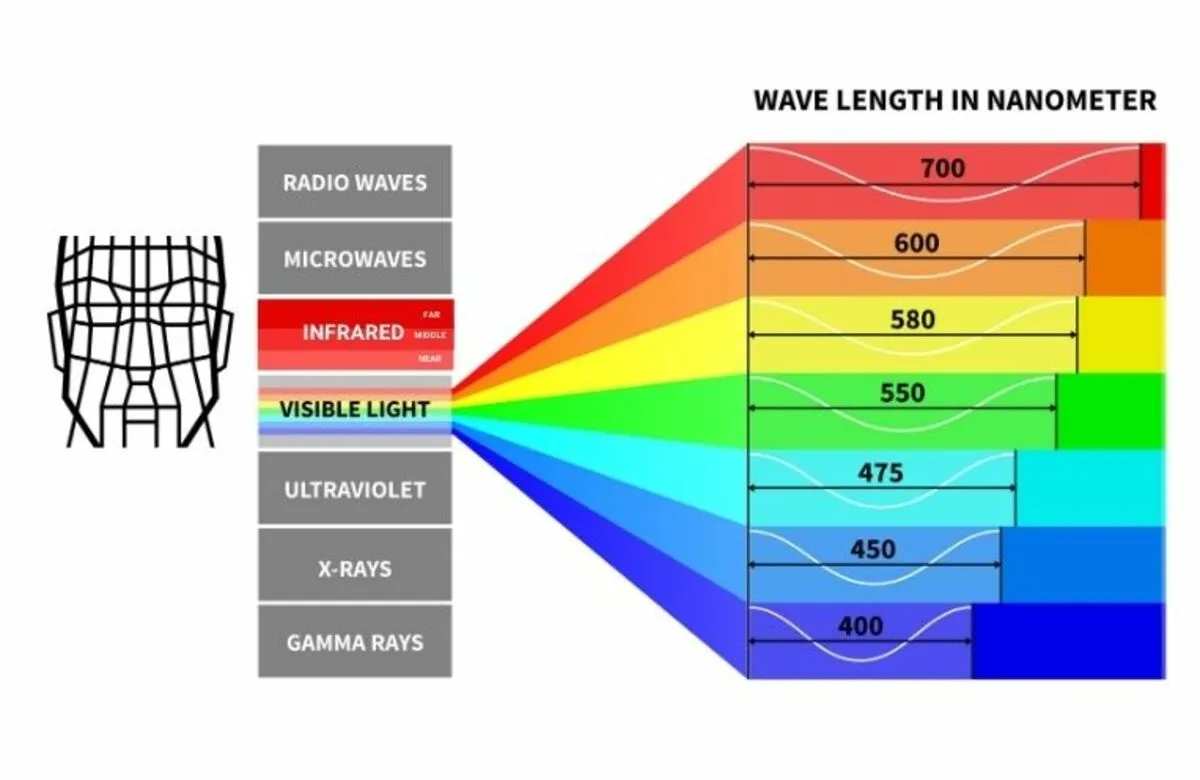
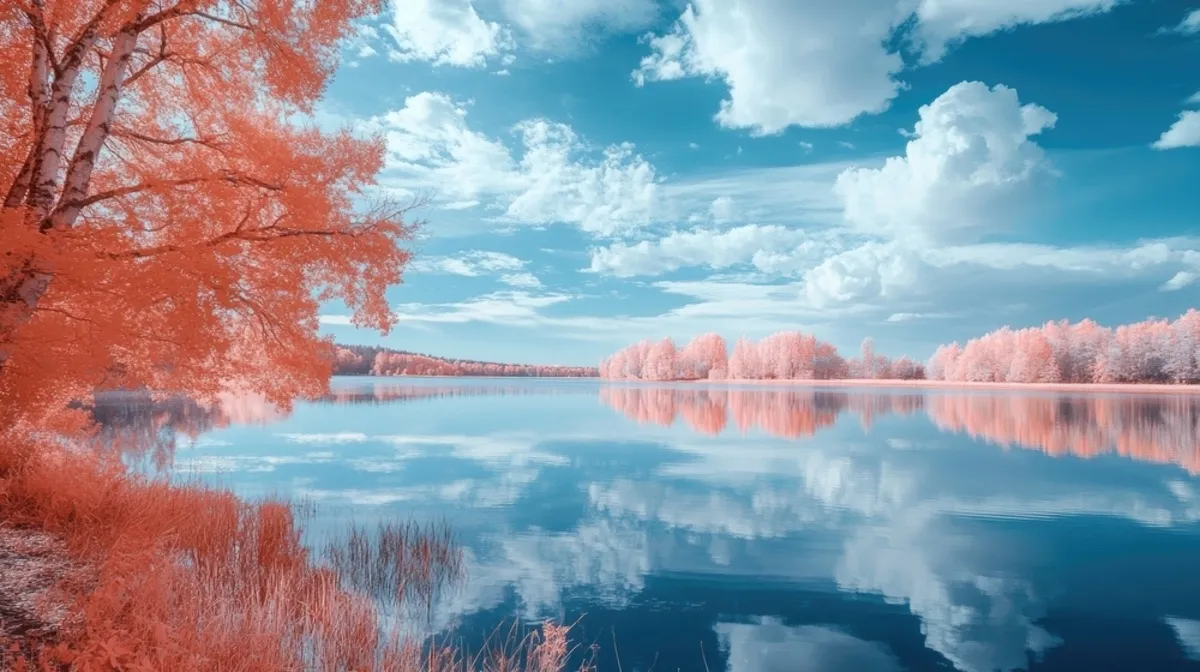 Infrared lies beyond the red end of visible light. Conventional artistic digital IR photography uses the near-infrared region to which a suitable camera sensor and optical system respond.
Ordinary digital sensors can be sensitive to some near-IR, but cameras generally use an internal filter to suppress it and support normal visible-light color. An infrared setup changes which wavelengths reach the sensor and become part of the image.
The recorded tones depend on the subject’s reflectance, illumination, filter transmission, lens, sensor, and processing. White foliage and dark skies are familiar results, but they are not guaranteed in every photograph.
Your AI-Powered Photo Editor for MacOS and Windows
Infrared Is Not Ultraviolet
Ultraviolet lies beyond the violet end of the visible spectrum, while infrared lies beyond red. They require different filtration and may need different optical arrangements.
A 590nm long-pass filter is not a UV filter. It typically allows part of the visible spectrum together with longer wavelengths, subject to its transmission curve and the camera’s sensitivity.
Infrared Photography vs Thermal Imaging
| Reflected near-IR photography | Thermal imaging |
| Records reflected near-infrared illumination | Uses suitable infrared detectors to observe emitted radiation |
| Can be made with appropriately modified conventional cameras | Usually requires a specialized thermal camera |
| Often used for creative landscapes and material comparisons | Can be used to assess temperature-related patterns under appropriate conditions |
| Does not provide a general temperature map | Temperature interpretation depends on the system and measurement conditions |
Specialized infrared instruments also serve science, remote sensing, and art examination. Those applications should not be treated as capabilities of every converted photography camera.
Why Infrared Photos Look Different
Foliage
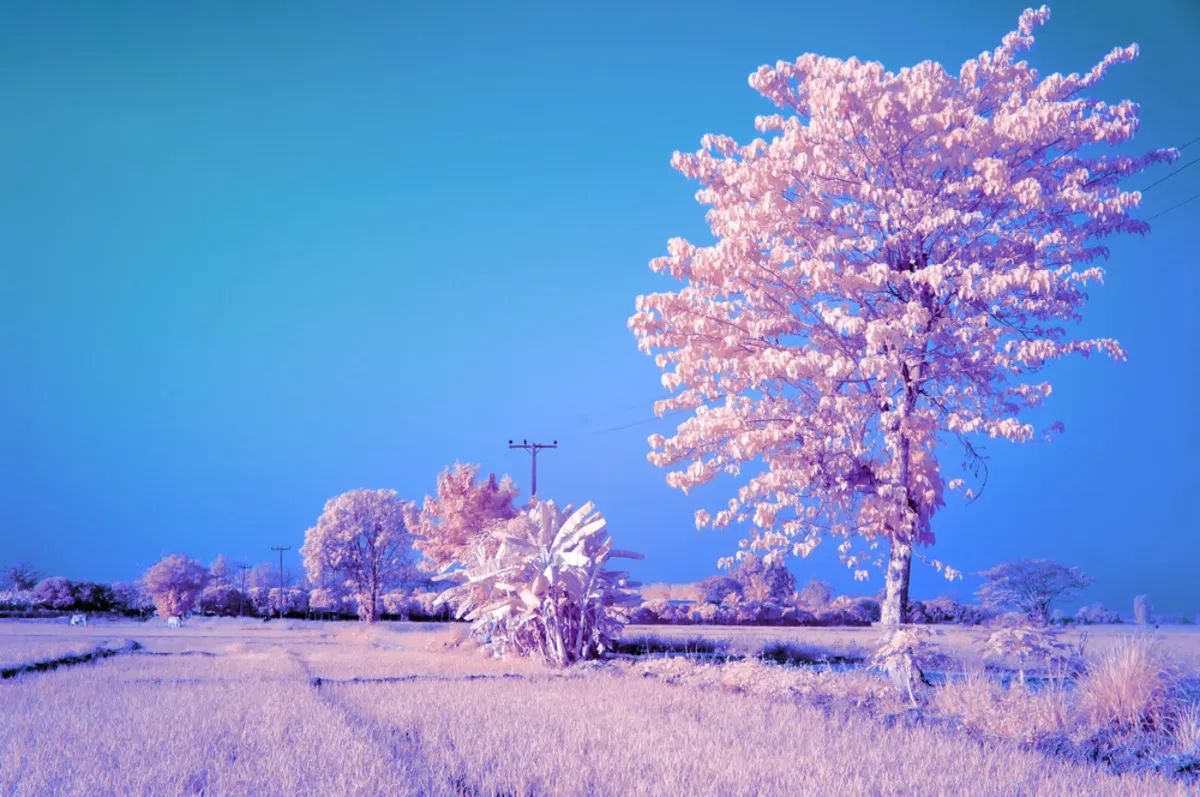
Leaves can strongly reflect near-infrared light because of their internal structure. This contributes to the bright vegetation often seen in infrared landscapes. It is not simply chlorophyll reflecting ultraviolet light.
Species, leaf condition, wavelength, illumination, and processing all influence the result. A familiar green scene may therefore produce varied near-IR tones rather than one uniform white canopy.
Sky and Water
Clear sky can appear relatively dark in some near-IR images, while vegetation remains bright. Water may also look dark, but reflections, angle, surface movement, and surrounding light can change its appearance.
Do not expect every sky to become black or every body of water to lose detail. Those are possible visual outcomes, not a fixed preset created by the filter alone.
Skin, Fabric, and Other Materials
Some materials behave differently in near-IR than in visible light. Clothing that appears similarly dark to the eye can separate into different tones, and skin can have a different rendered appearance.
Use these changes as visual observations rather than a guarantee that portraits or wildlife will look smooth or glowing. Exposure, movement, and focus still matter.
Four Ways to Capture Infrared Photographs
1. A Stock Digital Camera with an External IR-Pass Filter
An external infrared filter blocks much of the visible light while allowing a selected longer-wavelength range through. On an unmodified camera, the internal IR-blocking filter remains in place and may suppress much of that light.
Some cameras can produce useful results with long exposures; others are poor candidates. Check practical compatibility for the exact camera, lens, and filter before buying equipment for this method.
The advantage is trying infrared without permanently modifying the body. The limitation is that exposure times can make moving leaves, people, or animals difficult to photograph sharply.
2. A Dedicated Infrared-Converted Camera
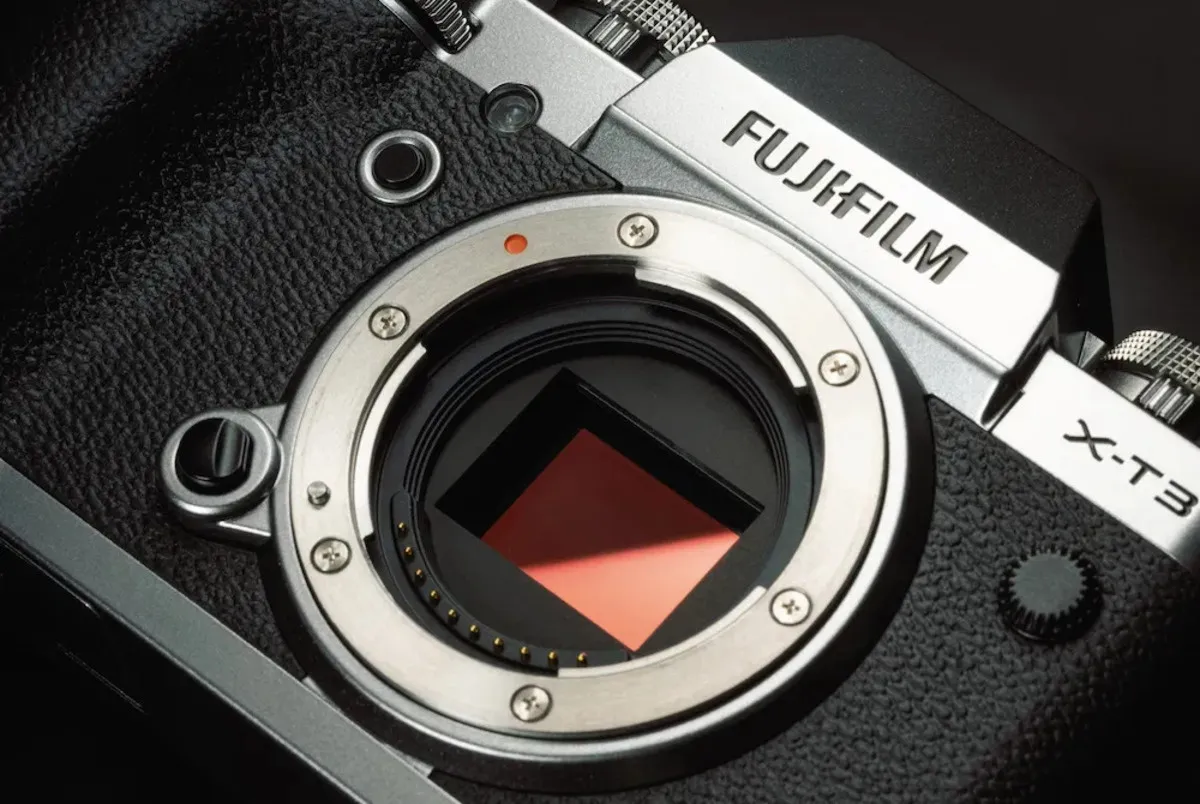
A professional conversion replaces the camera’s original filtration with an arrangement designed for a chosen infrared response. It can allow more useful IR light to reach the sensor than the stock-camera filter method.
This often makes handheld shooting and moving subjects more practical, depending on illumination and filter choice. The camera becomes dedicated to the converted response, so it is no longer a normal visible-light body in the usual sense.
Confirm the converter’s filter options, focus arrangements, lens guidance, and supported camera model. The optical replacement matters; this is more than removing a piece of glass.
3. A Full-Spectrum-Converted Camera
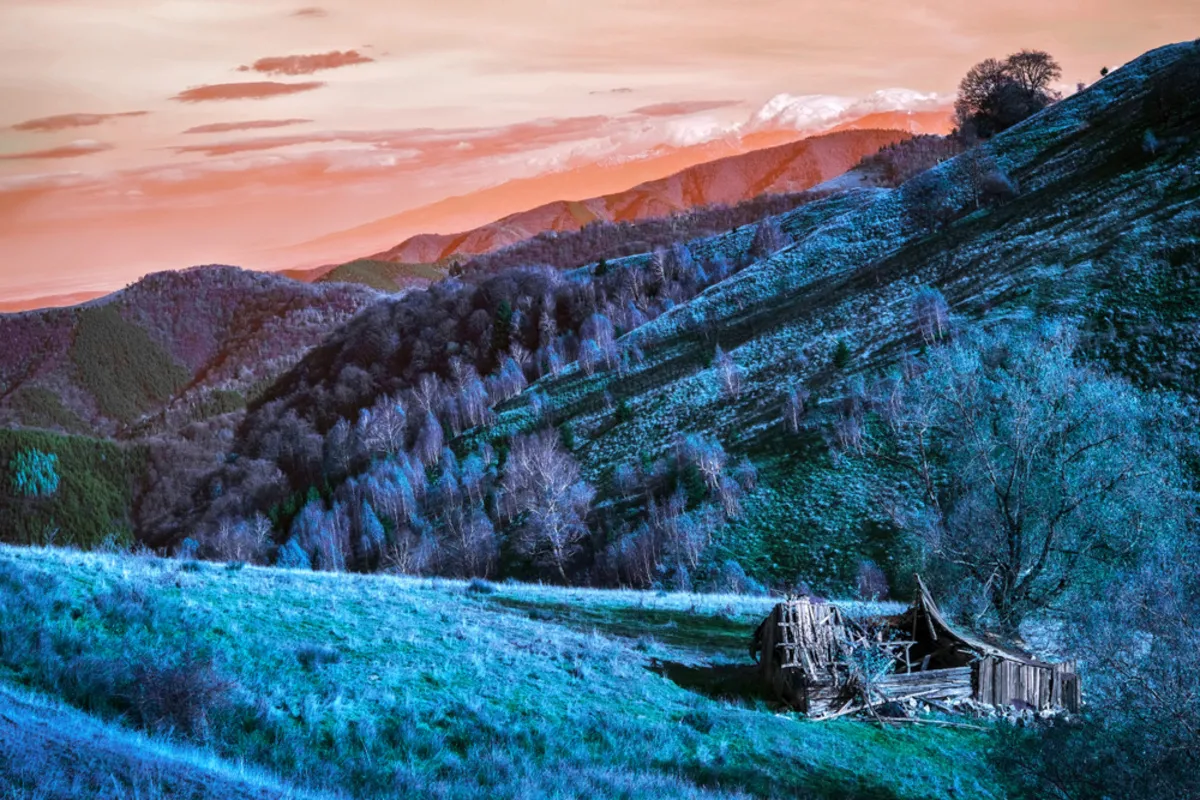
A full-spectrum conversion broadens the camera’s usable spectral response, while external or other compatible filters select the intended range for each session.
This offers flexibility: a suitable IR-pass filter can provide an infrared workflow, while appropriate UV/IR-cut filtration can support visible-light use. Actual performance depends on the camera, replacement window, lens, and filter combination.
“Full spectrum” does not mean every wavelength passes equally or that the camera becomes a thermal imager. UV photography can need additional specialized filtration and optics.
4. Infrared-Sensitive Film
Infrared-sensitive film provides a separate route with its own spectral sensitivity, filters, exposure guidance, and processing requirements. Not every film described as infrared responds to the same range.
Black-and-white infrared film and historical color-infrared materials also produce different results. Follow the current film manufacturer’s instructions for loading, storage, exposure, and development rather than applying one rule to every product.
Film can be a deliberate creative choice, but availability and processing access need checking before planning a project around it.
Choosing an Infrared Filter
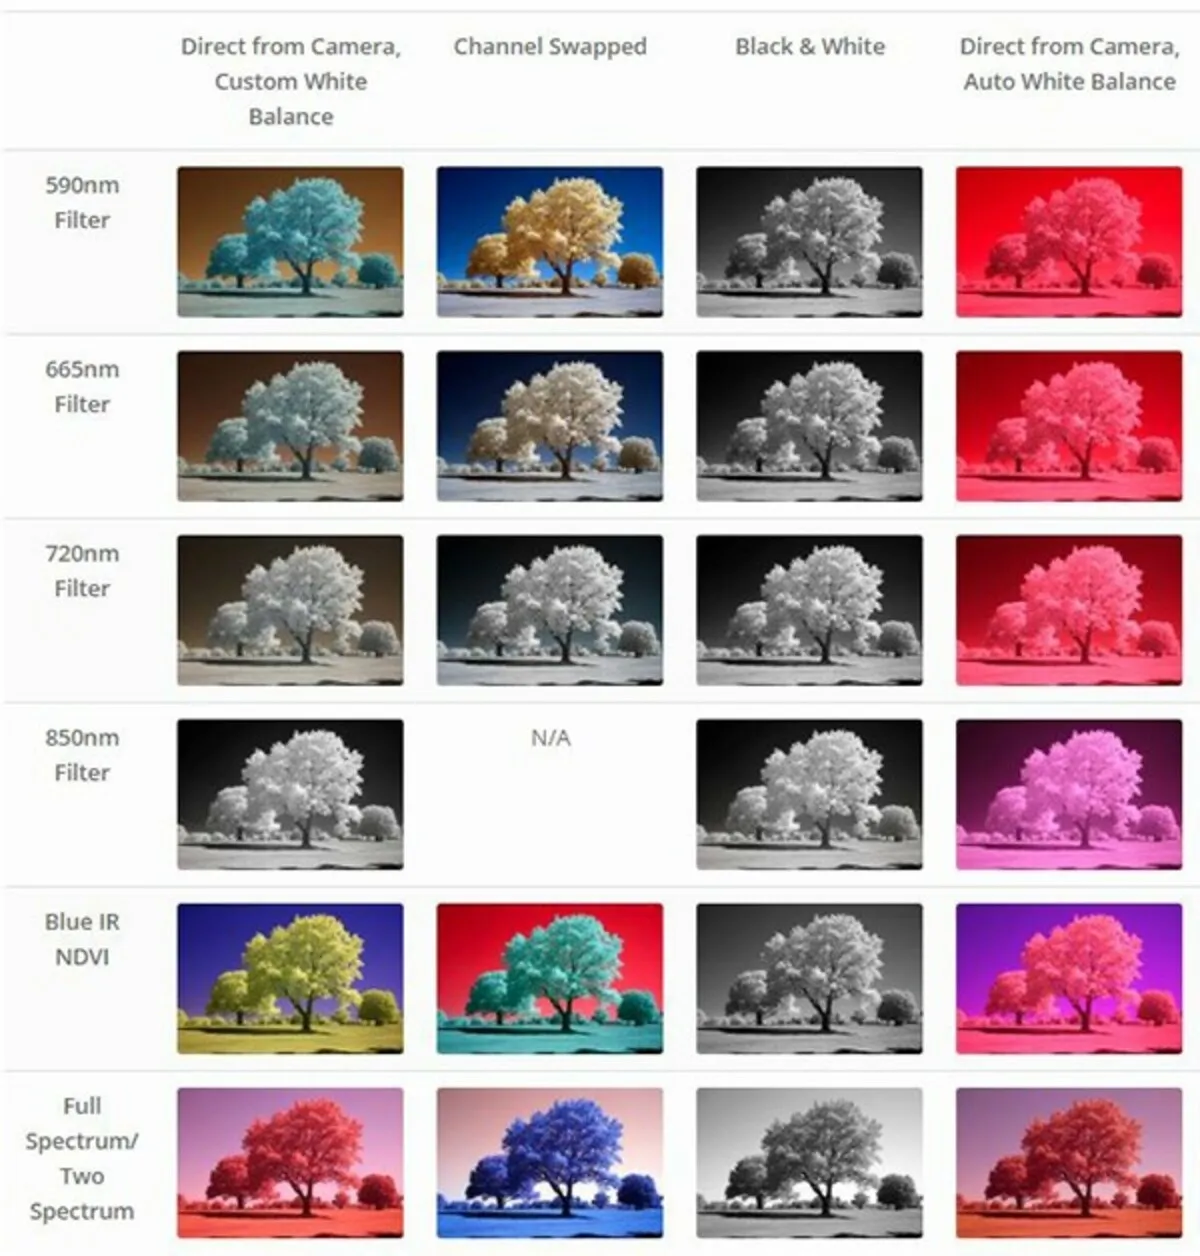
The number printed on a typical IR long-pass filter describes its approximate cutoff region. A “720nm” filter does not transmit only 720nm light. Transmission changes across a range, and manufacturers’ curves can differ.
The table below describes common tendencies on a suitable converted setup. A stock camera’s internal filtration can change the outcome substantially.
| Filter | Typical approach | Main consideration |
| 590nm | Includes more visible-light contribution alongside near-IR; useful for varied false-color work | The palette depends strongly on white balance and processing |
| 665nm | An intermediate option for color and monochrome experimentation | Color possibilities differ from both 590nm and deeper filters |
| 720nm | A common starting point for infrared landscapes and black-and-white work | Some color separation may remain, depending on the setup |
| 850nm | A deeper near-IR approach often chosen for monochrome rendering | Usually offers less useful false-color variation and may need more exposure |
| Full-spectrum setup with selected filters | Changes spectral selection between projects | Requires the appropriate filter for each intended result |
Which Filter Should a Beginner Choose?
For a classic monochrome landscape approach, investigate 720nm first. For stronger false-color flexibility, compare 590nm and 665nm examples made with a similar camera and processing workflow. Consider 850nm when deeper monochrome work is the priority.
Before choosing a dedicated conversion, look at source files as well as finished examples. A dramatic final palette may depend on custom profiles or channel processing that you will need to reproduce separately.
Check filter diameter, mounting compatibility, transmission information, and how the filter will work with the body’s existing conversion. Stacking a filter cannot restore wavelengths already removed by a more restrictive internal filter.
How to Photograph a First Infrared Scene
1. Start with a Static Subject
Choose a scene with foliage, an architectural feature, and an uncluttered background. Static subjects make it easier to compare exposure and focus, especially with a stock-camera long-exposure setup.
Keep the first session simple. One lens and one filter provide a clearer reference than changing the entire setup between frames.
2. Establish the View Before Adding a Very Dark Filter
For a stock camera, compose before attaching the filter if the view becomes difficult to see afterward. Secure the camera when long exposure is needed.
A converted camera may provide a more usable live view through the filter, but the preview can still look different from the final processed file.
 3. Set RAW Capture Where Available
RAW gives more flexibility for developing the unusual color response. It does not remove the need for a good exposure or guarantee that every editor can apply the desired white balance.
Keep a visible-light reference frame when possible. Comparing it with the IR capture helps you understand which materials and tonal relationships changed.
4. Test Exposure and Focus
Make a test image, inspect the histogram and important highlights, and enlarge key details. A preview dominated by red can make tonal judgment difficult, so use the available channel and highlight information carefully.
Keep a moving subject’s shutter-speed needs separate from camera stability. A tripod cannot stop windblown leaves.
5. Check for Lens Hot Spots
Photograph a relatively even scene at several apertures and focal lengths. Look for a brighter or lower-contrast central area that repeats with the setup.
Identifying a lens issue early is easier than trying to correct a whole collection afterward.
Infrared Camera Settings: Useful Starting Points
| Setting | Starting approach | Why it may need to change |
| Aperture | Test moderate settings such as f/5.6–f/8 | Depth requirements and hot spots vary with the lens |
| Shutter speed | Determine from a test exposure | Stock and converted cameras can need very different times |
| ISO | Begin low for a static supported scene | Raise it if movement requires a faster exposure |
| Focus | Use sensor-based live view and inspect the result | Visible-light focus behavior may not match IR |
| White balance | Try a suitable custom reference and retain RAW | Camera and software ranges may not neutralize the file fully |
There is no universal exposure for “infrared photography.” A deep filter on a stock body may need a long exposure, while a converted setup in bright light can behave much more like ordinary handheld photography.
These manual camera settings explain the controls, but use infrared test frames to establish the values for your equipment.
Focus Shift and Calibration
Lenses can focus infrared differently from visible light. The amount depends on the lens and wavelength, so an old IR index mark is not a universal correction for every digital filter.
Live view or autofocus based on the imaging sensor can help because it assesses the light reaching that sensor. Confirm performance after conversion and use the converter’s calibration guidance where applicable.
Common Infrared Photography Problems
| Problem | Possible cause | What to try |
| Exposure is extremely long | Stock filtration strongly suppresses near-IR | Test compatibility or consider a suitable conversion |
| Bright central hot spot | Lens behavior and internal reflections in IR | Test another aperture, focal length, or proven lens combination |
| Subject is soft | Focus shift, movement, or insufficient depth | Check live-view focus and exposure timing separately |
| A color cast remains after white balancing | Converter limits, profile, or setup response | Use an IR-capable development workflow rather than one fixed Kelvin value |
| Leaves blur while architecture stays sharp | Subject movement during a long exposure | Choose calmer conditions or a faster exposure |
| Results look muddy | Mixed spectral response, flare, or exposure choices | Check filtration, light direction, and the original file |
Lens Hot Spots
A hot spot is often a central brightness or contrast problem caused by a lens’s infrared behavior. It can become more noticeable at particular apertures and focal lengths.
Not all manufacturers publish IR compatibility information. Practical tests and the converter’s lens guidance can help. Avoid assuming that an expensive visible-light lens must perform well in infrared.
Unwanted Spectral Mixing
A full-spectrum camera without the intended filter can record an unwanted combination of visible and non-visible response. Use filtration designed for the project rather than trying to repair every mixed-light effect in software.
An IR-pass filter and a UV-pass filter do different jobs. Check the actual transmission information when the result does not match expectations.
Light and Composition for Infrared Photography
Bright sunlight can make reflective near-IR scenes easier to expose, particularly with a stock camera. Midday can be productive rather than something to avoid automatically.
Cloudy conditions can also work. The result depends on illumination, subject, and filtration; cloud cover does not make infrared photography impossible. Wind can be the more immediate problem when exposures are long.
Look for contrasts that remain readable in infrared: bright vegetation against architecture, repeated trees, or a clear foreground shape. These landscape composition techniques can help organize the changed tonal relationships.
Do not rely entirely on how a scene looks in visible light. Take reference frames, then learn which subjects give useful separation with your filter.
Editing Infrared Photos: Choose a Rendering Goal
Black-and-White Infrared
Monochrome is a useful starting point because it concentrates on tone, structure, and separation. Correct exposure, convert to black and white, then adjust contrast and local brightness carefully.
Keep detail in bright foliage and important clouds. Darkening a sky heavily can reveal noise or create harsh transitions, so inspect the image at both enlarged and normal viewing sizes.
False-Color Infrared
False color assigns visible colors to the recorded spectral response. Pink trees, yellow leaves, and blue skies are creative renderings rather than the ordinary visible colors of the scene.
The result depends on filter choice, white balance, camera profile, and processing. Some workflows swap red and blue channels; others use different mappings or custom profiles. A hue or saturation slider is not the same operation as a channel swap.
Choose the look before applying numerous color changes. Keep a reference version so you can compare how the processing affects separation and detail.
White Balance and the Red RAW Preview
Infrared RAW files can initially render with a strong red or magenta cast, though the appearance varies. A custom white balance made from foliage is sometimes used as a practical IR reference; it is not a universal guarantee of “accurate” false color.
The RAW editor may not reproduce the camera preview or provide enough range for the desired neutralization. In that case, an infrared-capable profile or another development step may be needed before finishing the image.
Moving the slider to 3000–4000K is not a general fix. Evaluate the file and the available profile rather than treating one temperature range as an infrared preset.
Finishing Infrared Images in Luminar
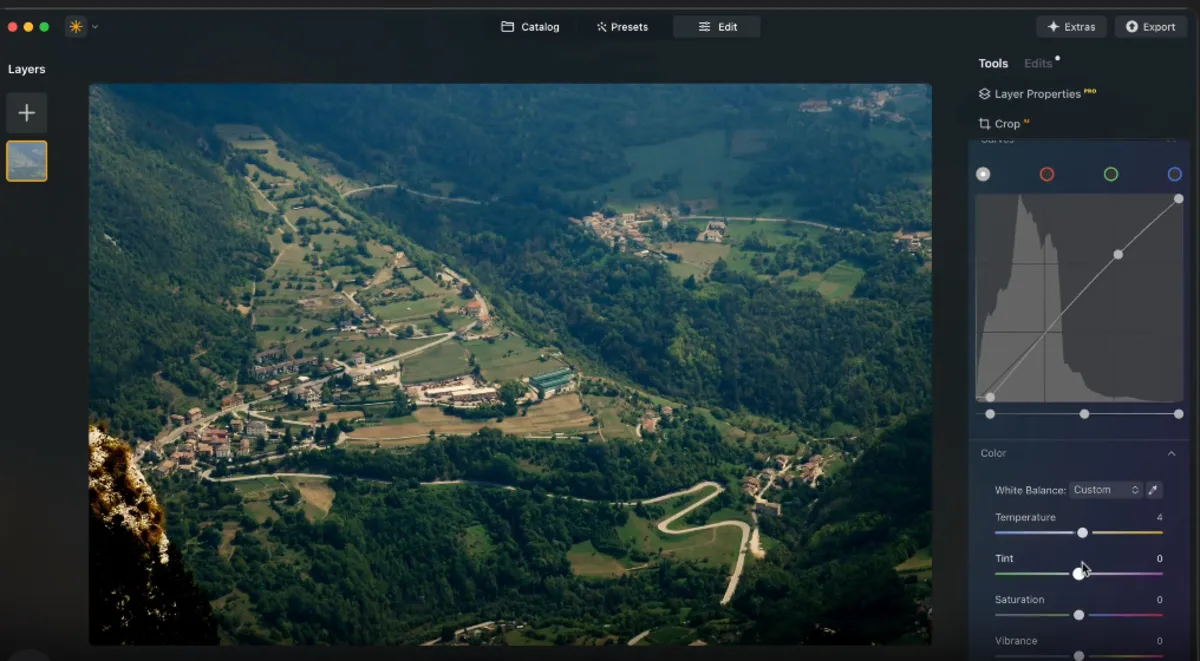
Luminar provides RAW development, exposure and color controls, monochrome adjustments, cropping, and local editing. It can help finish an infrared image once the source and intended rendering are understood.
Begin with a compatible file in a RAW photo editor, refine exposure, and check whether the available white-balance controls can produce the base you need. If a custom IR profile or channel transformation is required, complete that step in a workflow that explicitly supports it before bringing a rendered file into Luminar.
Use photo color editing tools to refine an established false-color palette. For monochrome, emphasize tonal separation and preserve foliage detail. Color Harmony and hue adjustments refine colors; they perform a different task from swapping the red and blue channels.
Finally, use photo cropping tools to simplify distracting edges without removing context. Compare local adjustments with the original and check that bright vegetation has not become featureless white.
Build a Repeatable Infrared Workflow
Start with a suitable camera and filter combination, a tested lens, and a static scene. Record how exposure, aperture, and focus behave, then compare monochrome and false-color versions of the same capture.
Infrared photography becomes easier when the unusual rendering is separated from technical problems. Understanding the spectral setup helps you decide which effects belong to the scene, which come from the filter, and which are choices made during editing.
Frequently Asked Questions
Conventional near-infrared photography with a converted consumer camera records reflected near-IR light. It does not provide the general heat-map view of a specialized thermal camera.
Some stock cameras can produce results with an external IR-pass filter, often using long exposures. Others suppress too much infrared to be practical. Check the exact camera and lens before choosing this route.
720nm is a common starting point for classic IR landscapes and monochrome work. Compare 590nm or 665nm for greater false-color flexibility, and evaluate the result on a similar converted setup.
The camera’s filtered response and the RAW rendering profile can produce a strong red or magenta preview. White balance, an appropriate profile, and the intended monochrome or false-color workflow determine the finished appearance.
Yes. Cloud cover changes illumination and contrast, but does not automatically prevent infrared capture. Use a test exposure and consider subject movement if the light requires a longer shutter time.


