Learn how to set up loop lighting to give your portraits a professional look. Master light placement for natural, sculpted results on any face shape.
Ask on any photography forum, “What is loop lighting?” and “How about the best setup?” for beginners, and everyone will say, “Start with a single light source and learn to read the shadow it casts on the face.” Usually, in these discussions, people agree on loop lighting (the “Loop” setup), since it’s forgiving of mistakes during your first attempts. This guide explains what loop lighting really is and how to adjust a basic loop lighting setup using equipment.
Don’t feel like reading the whole breakdown? We’ve pulled together a quick summary below.
Key Takeaways
- Identify the Pattern: Loop lighting creates a distinct, loop-shaped shadow below the nose that remains separate from the cheek shadow, offering a flattering look for most face shapes.
- Basic Placement: Position the main light source 30 to 45 degrees off the camera axis and slightly above the subject’s eye level to form the shadow naturally.
- Manage the Contrast: Soften harsh edges using a modifier (like a softbox), and bounce light back onto the dark side of the face with a reflector to balance the exposure.
- Broad vs. Short Lighting: Placing the light closer to the camera visually widens the face, while placing it on the far side creates a slimmer, sculpted effect.
- Troubleshoot on the Go: If the nose and cheek shadows merge, bring the light closer to the camera. If catchlights disappear from the eyes, lower the light stand.
- Refine in Post-Processing: Editing should focus on balancing skin tones and blending the transition between light and dark areas without completely removing the shadow.
Understanding Loop Lighting in Portrait Photography
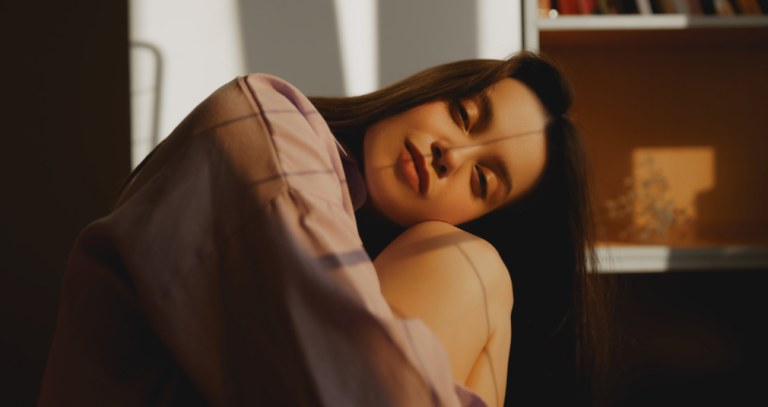
The classic loop lighting definition describes it as a portrait lighting setup that gets its name from a small, loop-shaped shadow. This shadow forms slightly below and to the side of the model’s nose when a single light is positioned slightly above eye level and offset to the side of the camera.
Loop lighting is characterized by a soft shadow that does not blend with the one on the cheek. It looks simpler than the Rembrandt lighting scheme, where these two dark areas merge to form a small triangle on the cheek. It adds enough light to give the face depth without making it look too gloomy or overly stylized.
Exclusive Tools of Endless Possibilities in One Editor
Key Features of Loop Lighting Setup
The basic principle of loop lighting comes down to the angle of the light, its height, and how soft or harsh the transition between light and shadow will be on the face. Position the light at an angle of approximately 30-45 degrees from the camera axis and raise it slightly above the model’s eye line, a loop-shaped shadow should form naturally.
An open, unmodified light source creates a shadow with harsh edges that can emphasize imperfections, so most photographers soften the light using a softbox, or portrait reflector. When working with strobe lighting, a good starting point is ISO 100, an aperture between f/5.6 and f/8, and a shutter speed at or below the camera’s flash sync speed (usually somewhere between 1/160 and 1/250 of a second).
Photographers building their first physical lighting kit often start with a single modifier and one stand. A basic hardware flash or continuous lamp provides more than enough power to learn a proper setup. Instead of buying a second physical light right away, many turn to Luminar Neo during post-processing. Its Studio Light tool accurately copies the effect of a real lamp, allowing you to add extra lighting digitally.
Practical Techniques for Achieving Loop Lighting

Placing the light on the side closest to the camera (known as broad lighting) creates a more open look, visually widening the face. In contrast, placing it on the far side (short lighting) produces a slimmer, more sculpted result that works particularly well for round or wide faces.
- The loop shadow blends into the shadow on the cheek. The light source is positioned too far behind the model and needs to be moved closer to the camera so that the shadows remain distinct.
- There is no catchlight in the eyes. This is usually a sign that the light is positioned too high, so it should be lowered slightly.
- The contrast is too sharp. A reflector placed on the shadow side of the face and directed toward the subject will bounce back some of the light and soften the transition between the lit and dark areas without making the composition completely flat.
If you analyze professional loop lighting examples, you’ll notice that portraits shot with this setup still retain sufficient contrast after post-processing. Running the file through Luminar helps balance skin tones between the light and dark sides. Keep in mind that Skylum stopped selling the older Luminar AI back in October 2022, completely replacing it with Luminar.
Your AI-Powered Photo Editor for MacOS and Windows
Creative Applications of Loop Lighting in Photography

Loop lighting is commonly used in business headshots, magazine portraits, and on-location shoots because it looks sophisticated and professional without drawing undue attention to the light itself. Photographers who shoot corporate portraits know that clients want to look natural and approachable, not artificially lit, and the “Loop” setup achieves this without wasting time on adjustments.
You can use an open shade or even the sun itself as a light source by positioning it at the right angle to the model’s face, without any need for studio flashes. After finishing a portrait photo shoot, photographers often import the entire series of shots into Luminar to apply a consistent color correction to the shoot.
Step-by-Step Guide to Capturing Loop Lighting

Transferring a simple loop lighting diagram to a real photograph boils down to a repetitive sequence of steps.
- Position the model facing directly toward the camera against a plain or solid-color background.
- Place the light at a 30-45-degree angle from the center of the frame and raise it slightly above eye level.
- Check for a small, distinct shadow under the nose that doesn’t touch the shadow on the cheek.
- Add a reflector or fill light from the shadow side if the contrast seems too harsh for the shot.
- Check for a noticeable catchlight in the eyes; if there isn’t one, lower the light source slightly.
- Take a few test shots and adjust the angle in small increments, avoiding drastic changes between shots.
You are going to develop a feel for how small changes in angle affect the shadow’s position. This will help you set up this lighting setup much faster during future shoots.
Common Uses and Benefits of Loop Lighting
Loop lighting is often used in family portraits, graduation photo shoots, and product photography featuring people. This is largely because it’s easy to set up and looks great on skin of various tones and faces of any shape.
For photographers transitioning from amateur photography to commercial portraits, mastering this basic setup builds the muscle memory needed for more complex multi-light setups in the future.
Retouching a portrait with loop lighting typically means blending the transition between light and shadow, rather than removing it entirely. Specialized skin retouching tools handle this subtle work much better than simply increasing sharpness using standard photo retouch or adjusting contrast.
Elevate Your Photography with Our Advanced Software
Comparing Loop Lighting with Other Lighting Styles
Loop lighting is a fundamental technique among classic portrait lighting setups. Once you appreciate its place relative to other lighting patterns, it becomes much easier to choose the right lighting for a specific shot.
| Lighting pattern | Shadow characteristic | Best suited for |
| Butterfly | Small shadow directly under the nose | Glamour shots and beauty photography |
| Loop | Small shadow below the nose, separated from the cheek | General portraits and headshots |
| Rembrandt | Triangle of light on the shadowed cheek | Moody portraits |
| Split | Half the face fully lit, half in shadow | Editorial and character-driven images |
A strongly blurred background perfectly complements a face lit with loop lighting. A soft background doesn’t distract the viewer, keeping the focus on the subject. If you’ve stopped down the aperture too much or the background isn’t blurred enough, add a portrait bokeh effect during post-processing. This will further separate the subject from the background and emphasize their three-dimensionality.
Tips for Enhancing Portraits Using Loop Lighting
The model’s chin is at a natural angle—neither tilted up too high nor lowered too low. The shadow loop is most clearly visible when the face is roughly level with the camera. Watch the background for distracting shadows cast by the same key light. To avoid this, either move the person farther away from the wall behind them or add a second light source directed at the background.
Take a few test shots at each new location before you start shooting. Both natural light from a window and studio strobes can change. The sun moves, and you might accidentally knock a modifier out of place. Keep notes (or even a sketched loop lighting diagram) on what height and angle of the light worked for a specific face shape. After all, a setup that’s perfect for one person often requires minor adjustments for another.