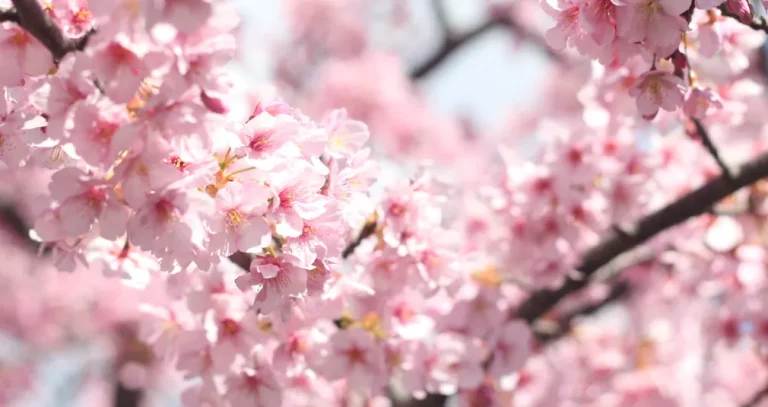
Getting close reveals tiny details, but it also makes focus and camera movement harder to manage. These 10 tips will help you control light, improve sharpness, and build more compelling macro shots.
Macro photography invites viewers into a world of tiny details that are easy to miss in everyday life. Insects, flowers, fruit, textures, and small objects can look completely different when photographed up close, revealing patterns and structures that aren’t visible at a normal viewing distance. Getting sharp and interesting macro shots takes more than simply moving closer to your subject. Focusing, depth of field, lighting, camera stability, and composition all become more important as magnification increases.
Don’t feel like reading the whole breakdown? We’ve pulled together a quick summary below.
Key Takeaways
- A stable camera is essential because even tiny movements can affect sharpness at high magnification.
- Depth of field becomes very shallow as magnification increases, so choosing the right aperture is important.
- A dedicated macro lens isn’t always necessary; extension tubes and other accessories can provide additional magnification.
- Longer macro lenses can give you more working distance, which is useful when photographing insects and other skittish subjects.
- Natural patterns, textures, colors, and small details can all become compelling macro subjects.
- Continuous shooting can increase your chances of capturing insects, moving plants, or other fleeting moments.
- Diffused light can help reduce harsh shadows and preserve detail in close-up photographs.
- Post-processing can enhance texture and detail, but excessive sharpening can make macro images look unnatural.
1. Use a Helping Hand When You Need One

A “third hand” or helping-hand tool is a small clamp or flexible holder that can keep a subject in a fixed position while you photograph it. It can be useful for controlled macro setups involving flowers, leaves, small objects, or other stationary subjects.
For example, if you’re photographing a flower indoors, a helping hand can keep the stem from moving while you adjust your camera and lighting.
However, avoid using clamps or other equipment directly on living insects or delicate plants. For outdoor macro photography, it’s usually better to work with the subject as you find it rather than physically repositioning it.
Your AI-Powered Photo Editor for MacOS and Windows
2. Pay Attention to Depth of Field

Depth of field can become extremely shallow in macro photography. At high magnification, you may find that only a small part of an insect, flower, or object is actually in focus.
Your aperture can help control how much of the subject appears sharp. A wider aperture such as f/2.8 can create a very shallow focus area and a soft background, while a smaller aperture can increase the amount of the subject that falls within the depth of field.
However, simply choosing the smallest available aperture isn’t always the best solution. Very small apertures can reduce overall image sharpness because of diffraction.
Instead, choose an aperture based on the subject and the look you’re trying to achieve. If you need more of a stationary subject in focus, you can also consider focus stacking by capturing multiple frames at different focus distances and combining them during post-processing.
3. Prevent Camera Shake

Sharpness is especially important in macro photography because you’re working with extremely fine details. Even a small amount of camera movement can become obvious when the image is enlarged.
A tripod can provide valuable stability when you’re photographing stationary subjects. You can also use a self-timer, cable release, or electronic remote release to reduce movement caused by pressing the shutter button.
When shooting handheld, use a shutter speed that’s fast enough for your subject and camera movement. Image stabilization can help with some types of movement, but it doesn’t replace good technique or a sufficiently fast shutter speed.
If you’re photographing outdoors, wind can be just as problematic as camera shake. Look for a sheltered position or wait for a calmer moment rather than trying to hold a moving flower perfectly still.
4. Try Extension Tubes

Extension tubes are placed between the camera body and lens. They don’t contain optical elements; instead, they increase the distance between the lens and the camera’s sensor, allowing the lens to focus closer than it normally would.
This can increase magnification and turn an ordinary lens into a useful close-up tool.
Extension tubes are available in different lengths, and some models preserve electronic communication between the camera and lens. Compatibility is important, so check that an extension tube is designed for your camera and lens mount.
Keep in mind that increasing magnification can also reduce working distance and make focusing more demanding.
5. Choose the Right Macro Lens

A dedicated macro lens is one of the most convenient tools for serious close-up photography. Macro lenses are available in a range of focal lengths, and the best choice depends on your subject and shooting conditions.
Shorter macro lenses can be practical for flowers, objects, and other subjects that don’t mind being photographed from relatively close range. Longer macro lenses provide greater working distance, which can be particularly useful when photographing insects or other subjects that may move when you approach them.
When choosing a macro lens, don’t focus only on focal length. Look at its maximum magnification, minimum focusing distance, autofocus performance, image stabilization, and compatibility with your camera system.
6. Look for Interesting Subjects

One of the best things about macro photography is that you don’t need an exotic location to find interesting subjects. A garden, park, kitchen, or even your desk can become a source of photographs.
Look beyond the obvious subject and search for:
- Interesting colors
- Repeating patterns
- Fine textures
- Tiny imperfections
- Reflections
- Natural shapes
- Contrasting surfaces
Moving closer can completely change how an ordinary object looks. A leaf may become a study in veins and texture, while a piece of fruit can reveal patterns and structures that aren’t obvious from a distance.
Try changing your angle as well. Photographing the same subject from above, from the side, or at its level can produce dramatically different compositions.
Elevate Your Photography with Our Advanced Software
7. Explore What’s Inside

Close-up photography gives you an opportunity to photograph details that normally remain hidden.
Think about what happens when you cut something open. A passion fruit, for example, has a relatively simple exterior but reveals a complex interior of seeds, pulp, color, and texture when opened.
The same idea can work with many everyday subjects. Look for layers, cross-sections, surfaces, and structures that become interesting when viewed up close.
This approach can turn an ordinary object into an abstract or almost unfamiliar photograph.
8. Control Your Light

Lighting becomes particularly important in macro photography because the lens and camera can easily cast shadows onto a nearby subject.
A small reflector can help redirect light toward a subject and soften areas that are too dark. Diffused natural light is another excellent option, especially for flowers and other subjects with delicate textures.
Avoid harsh direct sunlight when possible. Strong midday light can create deep shadows and bright highlights that are difficult to balance.
For indoor macro photography, you can experiment with a window as a large natural light source. A simple diffuser or sheer curtain can soften the light and create more even illumination.
The goal isn’t necessarily to eliminate every shadow. Shadows can provide depth and dimension, so use them deliberately.
9. Use Continuous Shooting for Moving Subjects

Macro subjects don’t always stay still. An insect may take flight, a flower may move in the wind, or a tiny change in position may completely alter your composition.
Continuous shooting can help when you’re trying to capture a fleeting moment. Instead of taking one photograph and waiting for the next opportunity, you can capture a short burst of images and choose the strongest frame afterward.
This can be especially useful for:
- Bees and butterflies
- Moving insects
- Flowers in the wind
- Water droplets
- Small animals
- Other unpredictable subjects
Don’t rely on burst mode alone, though. Anticipating movement and choosing the right focus mode and shutter speed are still important.
10. Fine-Tune Your Macro Photos in Editing
Once you’ve captured your images, careful editing can help emphasize the details that attracted you to the subject in the first place.
Start with basic adjustments such as exposure, white balance, contrast, and highlights. Then consider whether the image needs additional texture or detail.
Luminar can be useful for this stage. Its editing tools allow you to refine contrast, structure, sharpness, and color without requiring a complicated workflow. Use these adjustments selectively: excessive sharpening or structure can create halos and make fine textures look harsh.

Cropping can also be useful in macro photography. A tighter crop can remove distracting elements and direct attention toward the most interesting part of the subject.
Exclusive Tools of Endless Possibilities in One Editor
Close-Up Photography: A Few Extra Tips
Macro photography rewards patience. Before taking a photograph, take a moment to look at the subject and consider what makes it interesting.
Ask yourself:
- What detail do I want the viewer to notice?
- Is the background distracting?
- Where should the focus be?
- Would a different angle improve the composition?
- Is the light showing the texture clearly?
- Would a tighter crop make the image stronger?
You don’t always need expensive equipment to experiment. A standard lens with an extension tube, a tripod, and simple natural lighting can already give you plenty of opportunities to explore close-up photography.
Conclusion
Close-up photography gives you a different way to see familiar subjects. Flowers, insects, fruit, leaves, textures, and everyday objects can reveal completely different visual worlds when photographed at high magnification.
Start by paying attention to focus, depth of field, stability, and light. Then experiment with different angles, subjects, and compositions. You don’t need to capture something exotic to create an interesting macro photograph—the smallest details can often provide the most compelling images.
Frequently Asked Questions
There is no single best aperture for every macro photograph. A wider aperture can create a shallow depth of field and blurred background, while stopping down can increase the area in focus. Start around the middle of your lens’s aperture range and adjust based on your subject and desired depth of field.
No. A dedicated macro lens makes close-up photography easier, but extension tubes, close-up filters, and some standard lenses can also be used to achieve greater magnification.
Use an appropriate shutter speed, stabilize the camera when possible, focus carefully, and avoid photographing moving subjects at shutter speeds that are too slow. For stationary subjects, a tripod and focus stacking can help when you need greater depth of field.
Soft, diffused light is often a good choice because it reduces harsh shadows and highlights while preserving texture. Natural window light, overcast outdoor conditions, or a diffuser can all work well.
Yes. Adjusting exposure, contrast, color, sharpness, and texture can enhance a macro photograph after shooting. Tools in Luminar can help refine these elements while keeping the editing process relatively straightforward.