Master Photoshop’s AI tools to speed up your editing, sharpen results, and open up new creative options in every project.
Photoshop’s AI tools have moved well past the gimmick stage. A single beta button for generative fill has grown into a full set of tools built into the main workspace. Now it is covering everything from removing a stray cable in a portrait to rebuilding an entire sky. Learning how to use AI with Photoshop can noticeably speed up your editing process. By combining these features with your standard tools, you can finish complex projects much faster.
Don’t feel like reading the whole breakdown? We’ve pulled together a quick summary below.
Key Takeaways
- Locate the right tools: Photoshop splits its AI features between the Contextual Task Bar for selection-based generation and Neural Filters for targeted portrait and restoration edits.
- Write smart prompts: Keep text prompts short and direct when adding new objects, but leave the prompt completely blank when removing items or expanding the canvas so the AI reads the surrounding pixels.
- Refine automatic masks: Tools like Select Subject and Sky replacement speed up the initial isolation process, though complex edges like hair or fur still require manual brush refinements.
- Clean up low-light shots: Camera Raw uses a dedicated neural network to process high-ISO noise while preserving fine textures, making it a better option than older noise-reduction sliders.
- Generate elements directly: Instead of hunting for stock photos, compositors now use text prompts to create specific props and background layers directly in the document, saving time on masking and scaling.
- Build a hybrid workflow: When native tools fall short, many editors pass their files through external plugins like Luminar Neo for a fast round of global adjustments before finishing the finer details in Photoshop.
- Work in small increments: Expanding a canvas gradually and keeping each AI pass on a separate layer produces cleaner results and makes it easier to undo mistakes.
- Expect manual touch-ups: Generative algorithms still struggle to render realistic faces and hands, so you will usually need to finish those areas with manual retouching.
How to Use AI in Photoshop to Enhance Creativity
Most of Photoshop’s AI features fall into two categories. The Contextual Task Bar appears once you make a selection, and the Neural Filters panel under the Filter menu. The first one handles generation and removal tasks tied to a selection, such as filling, expanding, or replacing part of an image.
Neural Filters focuses on portrait retouching, colorizing, and detail work. When a photographer gets comfortable, switching between editing sessions often blends manual retouching with a handful of AI passes.
Exclusive Tools of Endless Possibilities in One Editor
Getting Started: Where Photoshop’s AI Tools Are Located
Open any image and select the Lasso, Object Selection, or Select Subject tool. Naturally, the Contextual Task Bar appears near the selection, with options for Generative Fill and Remove.
They are needed for testing before Adobe considers them stable, so results can vary more than with the Featured group. For anyone building AI into a regular workflow, a dedicated plugin such as the Luminar Neo plugin for Photoshop adds another layer of generative and portrait tools directly inside the same panel.
Generative Fill for Creating New Elements
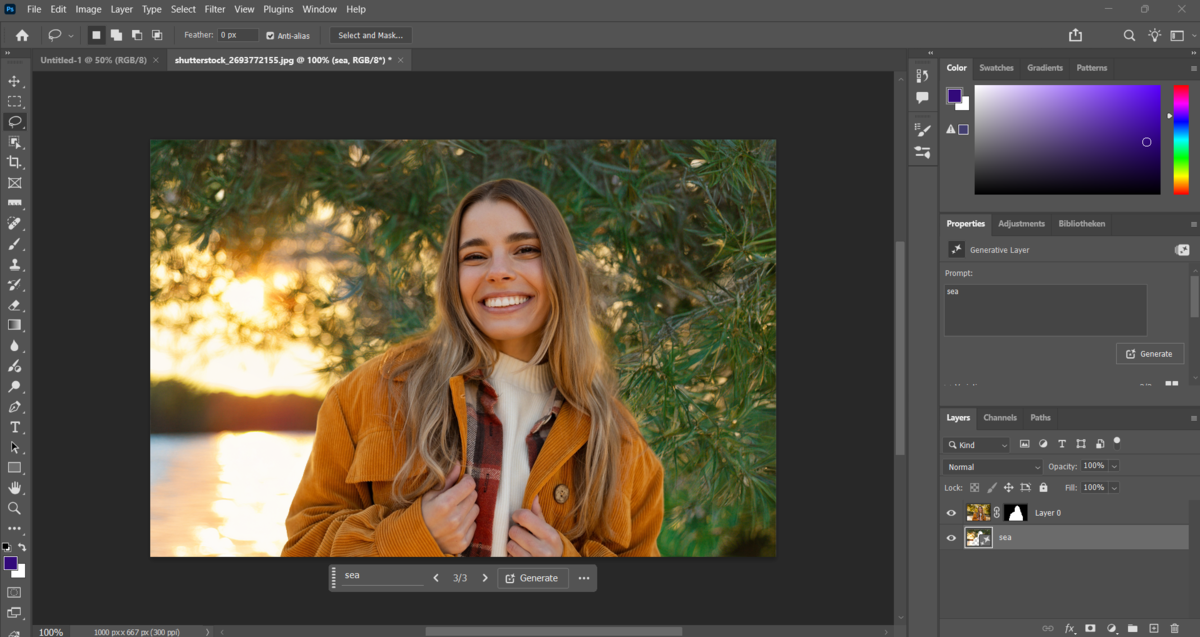
Generative Fill works from a simple selection and a text prompt, or no prompt at all if you just want Photoshop to extend the surrounding pixels. Make a selection, click Generative Fill in the Contextual Task Bar, type a short description, and Photoshop returns three variations built on a separate, non-destructive layer.
The tool now runs on Adobe’s Firefly Image 5 model by default, with partner models including Gemini 3.1 with Nano Banana 2 and FLUX.2 pro available from the same model picker for different styles of output. A blank prompt tends to work best for object removal or canvas extension, since Photoshop automatically reads the surrounding scene, whereas a short, specific prompt works better for adding something new.
Firefly Text Prompts for Image Editing
Some specific phrases outperform long descriptive paragraphs almost every time. Firefly already reads color, lighting, and perspective from the surrounding pixels and only needs the missing piece named directly. A prompt like “leather armchair” tends to work better than a long, stagnant description of the project’s mood.
Neural Filters for Portrait and Face Enhancements
The panel offers a wide range of portrait and restoration tasks. Each filter targets a specific fix rather than trying to do everything at once. Photographers reach for a handful of these far more often than the rest, since most everyday edits come down to skin tone, expression, or fixing up an old print.
| Neural Filter | What it does |
| Skin smoothing | Evens out tone and reduces blemishes with a couple of sliders |
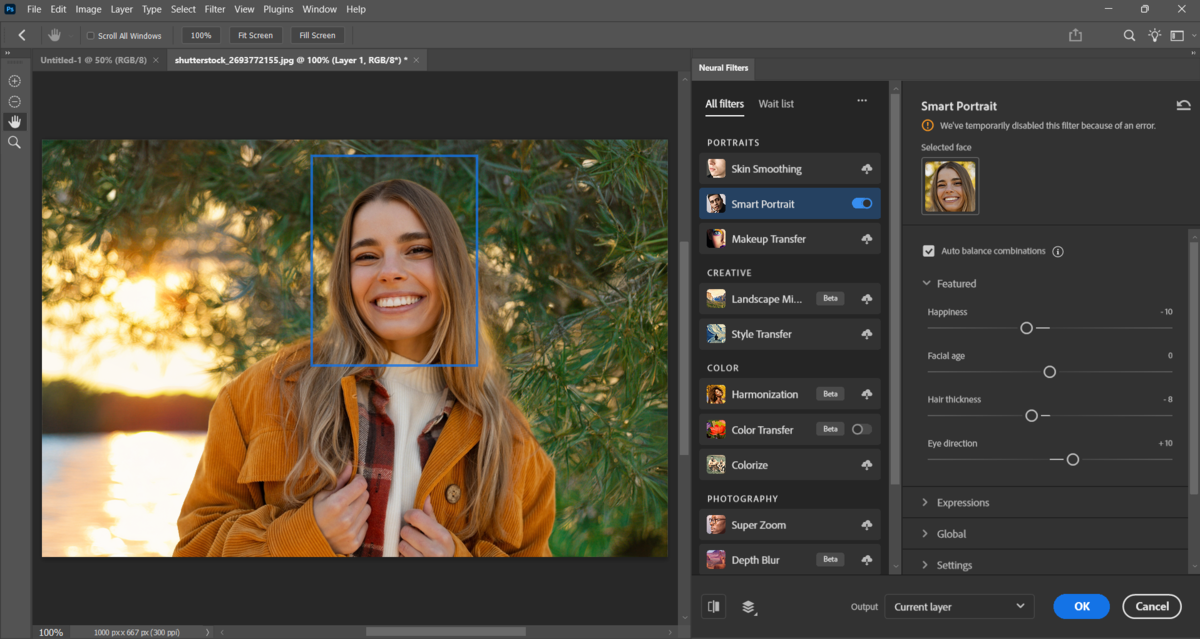
| Smart portrait | Adjusts expression, gaze direction, and apparent age |
| Style transfer | Applies the look of a reference image to a photo |
| Photo restoration | Repairs scratches and damage on old prints |
| Colorize | Adds color to black-and-white photos with adjustable focal points |
| Super zoom | Compensates for lost detail when cropping in tight on a face |
| Landscape mixer | Changes seasonal elements like foliage or snow |
Most of these filters are processed in the cloud, so a stable internet connection matters more here than it does for standard Photoshop tools, and results on the newer Beta filters like Landscape Mixer still tend to be less consistent than the portrait-focused ones in the Featured tab.
Your AI-Powered Photo Editor for MacOS and Windows
Smart Selection and AI-Assisted Masks
Select Subject and Select Sky use machines to isolate the clouds in a click, cutting down the manual masking that used to eat up most of an editing session.

Enhance Details: Denoise, Sharpen, and Upscale
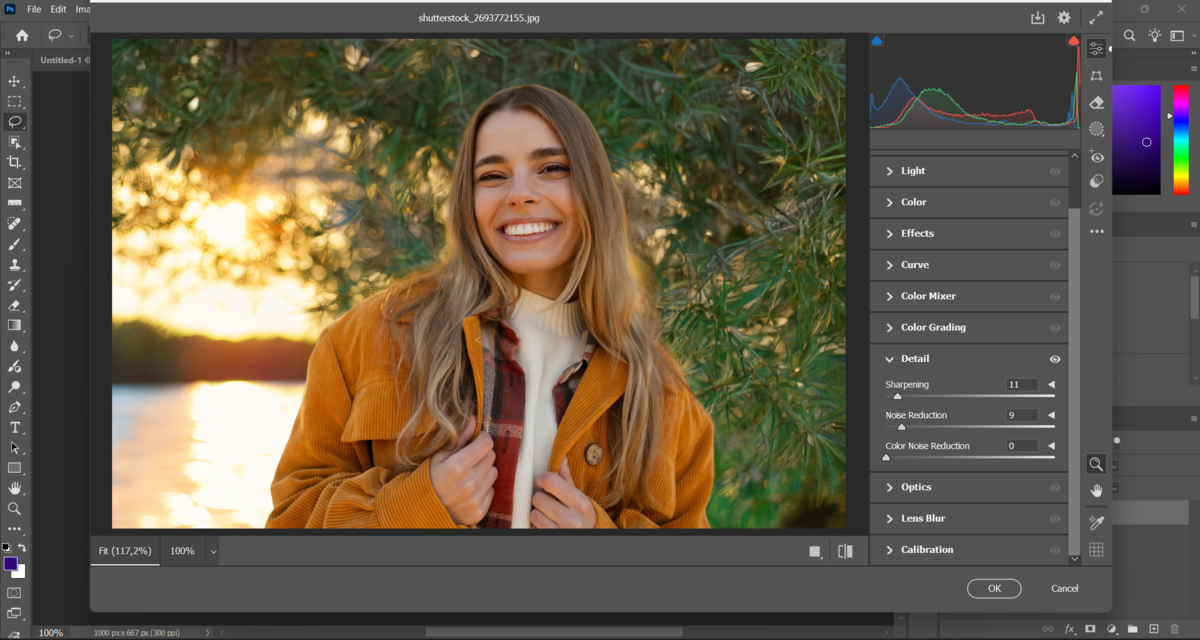
Camera Raw’s Denoise filter uses a neural network to clean up high-ISO noise while preserving texture, and it works noticeably better on grainy low-light files. Super Resolution doubles a file’s linear resolution and uses the same kind of AI upscaling, useful for cropping tightly into a shot or preparing a print from a file.
Sharpen tools built on similar technology target edges more precisely than a standard unsharp mask and avoid the halos that used to show up around high-contrast lines.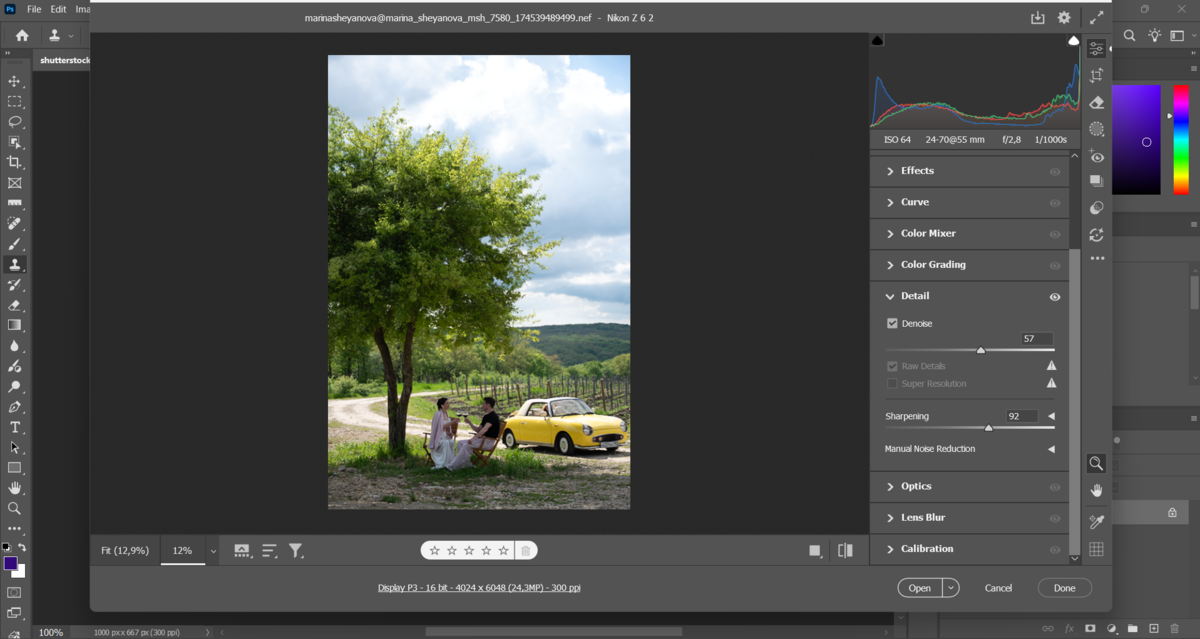 Figuring out how to use AI tools in Photoshop often leads to a hybrid workflow. Many editors first drop their files into Luminar Neo for quick automated adjustments, then return to Photoshop to finish the individual shots.
Creative Workflows: From Idea to Final Edit with AI
A typical editing session now counts on a few different tools instead of staying inside one panel from start to finish. A photographer working on a portrait might isolate the subject, clean up the background, and smooth out small facial details before the file ever leaves Photoshop.
- Isolate the subject with Select Subject or a manual selection.
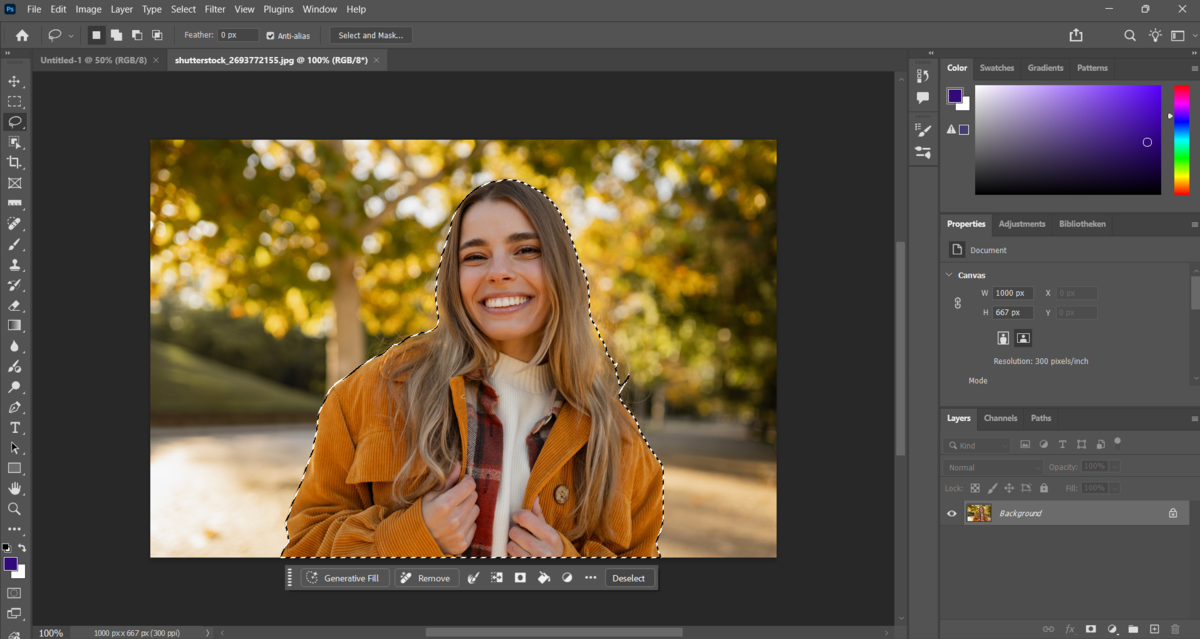
- Clean up the background with Generative Fill, using a blank prompt for a simple removal.
- Apply Smart Portrait or Skin Smoothing for small facial adjustments.
- Run Denoise or Super Resolution to fix detail issues before export.
- Finish with manual retouching on any area the AI passes left rough, especially hands or hair.


Designers building composite images often rely more heavily on Generative Fill and Firefly prompts from the first step onward, generating background elements or props rather than sourcing stock photos for every piece. Building a workflow like this takes some trial and error at first, and pairing Photoshop with Luminar gives a second set of AI tools to fall back on when a particular filter isn’t producing the result a project needs.
Elevate Your Photography with Our Advanced Software
Best Practices and Prompt Tips for Natural Results

Edits that look natural almost always come down to restraint rather than any hidden setting buried in a panel somewhere. Professionals who achieve convincing results tend to treat each AI pass as a small adjustment and keep their prompts and edits deliberately modest.
- keep prompts short and specific rather than descriptive;
- expand a canvas 10% at a time instead of doubling it in one pass;
- save each AI pass on its own layer so a bad result can be undone;
- compare a few generated variations before picking one;
- test on a duplicate layer first.
Faces and hands still trip up most generative tools, including Photoshop’s own filters, so those areas usually need a manual touch-up pass even after an AI tool does most of the work. Treating each of these habits as a default tends to separate a quick, convincing edit from one that needs a second round of fixes.