Discover how to shift from flat shots to aesthetic colors, perfect tones, and eye-catching motion effects.
People want to know how to make a photo “move” and how to achieve the jerky style popular in fan edits and AMVs (anime music videos). Retouching and color filters are more like antonyms when it comes to viral photo editing hacks, since the focus here is on transforming static images into dynamic ones.
Don’t feel like reading the whole breakdown? We’ve pulled together a quick summary below.
Key Takeaways
- Motion Over Static Editing: Modern viral TikTok trends are less about basic color filters and more about transforming static images into dynamic content. Audiences are actively looking for photos that “move” through 3D effects, parallel motion, and fast-paced fan edits.
- Mastering the Exposure Trick: The viral iPhone editing hack relies on a deliberate distortion of the dynamic range (cranking Exposure and Brilliance to +100, dropping Highlights and Shadows, and resetting Exposure back to 0).
- Combating Mobile Compressed Pixels: Direct adjustments in native smartphone apps often cause unflattering orange skin tones and pixel distortion. Moving your workflow to smart editors helps protect pixel quality and balance shadows.
- Capitalizing on Three Hot Aesthetics: To grab attention within the first half-second of scrolling, editors must master specific subculture styles: the nostalgic, harsh-flash Vintage Film Camera, the high-contrast Y2K Cyber Glow with its signature motion blur, or the ultra-sharp Cinematic Portrait that utilizes heavy lens blur to isolate the subject.
- Optimizing for the Small Screen: TikTok ruthlessly compresses files, meaning fine, raw details often turn into a pixelated blur. To make photos pop, focus on enhancing the micro-contrast of midtones, boosting overall brightness, and keeping the visual structure bold enough to stand out on mid-brightness mobile displays.
- Protecting Quality at Upload: A perfect edit can easily be ruined by aggressive compression. Export photos as high-quality sRGB JPEGs or PNGs, and utilize TikTok’s dedicated Photo Mode carousel to maintain maximum file resolution.
Step-by-Step Guide to the iPhone Photo Editing Trick
Your main goal will be to outsmart standard compression algorithms and create a soft, rich image with deep yet clean shadows. Walk through the basic TikTok photo editing trick for your phone and see how to take this visual to the next level using mobile software.
The Exposure Inversion
First, move the Exposure slider all the way up (+100) or at least to +50.

Don’t be alarmed if the image turns completely white—that’s part of the process. Next, go to the brilliance setting and set it to +100 as well.
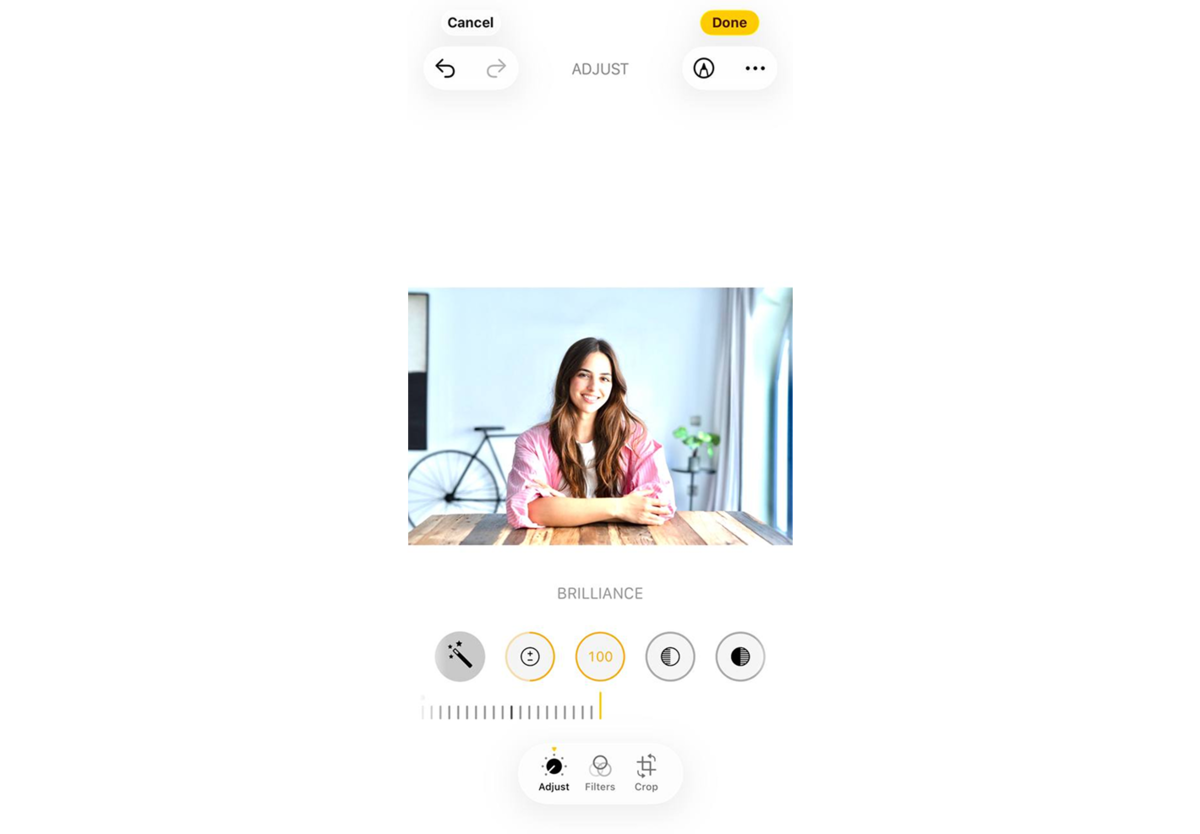
This will expand the dynamic range and reveal hidden fine details. However, be careful, as iOS’s standard algorithms often increase color noise at this stage. If desired, switch to Luminar for mobile to protect pixel quality from overexposure.
Cranking Up the Highlights and Shadows
Compensate for excessive light and restore depth to the image. Go to highlights and set them to a deep negative value (from -30 to -50).
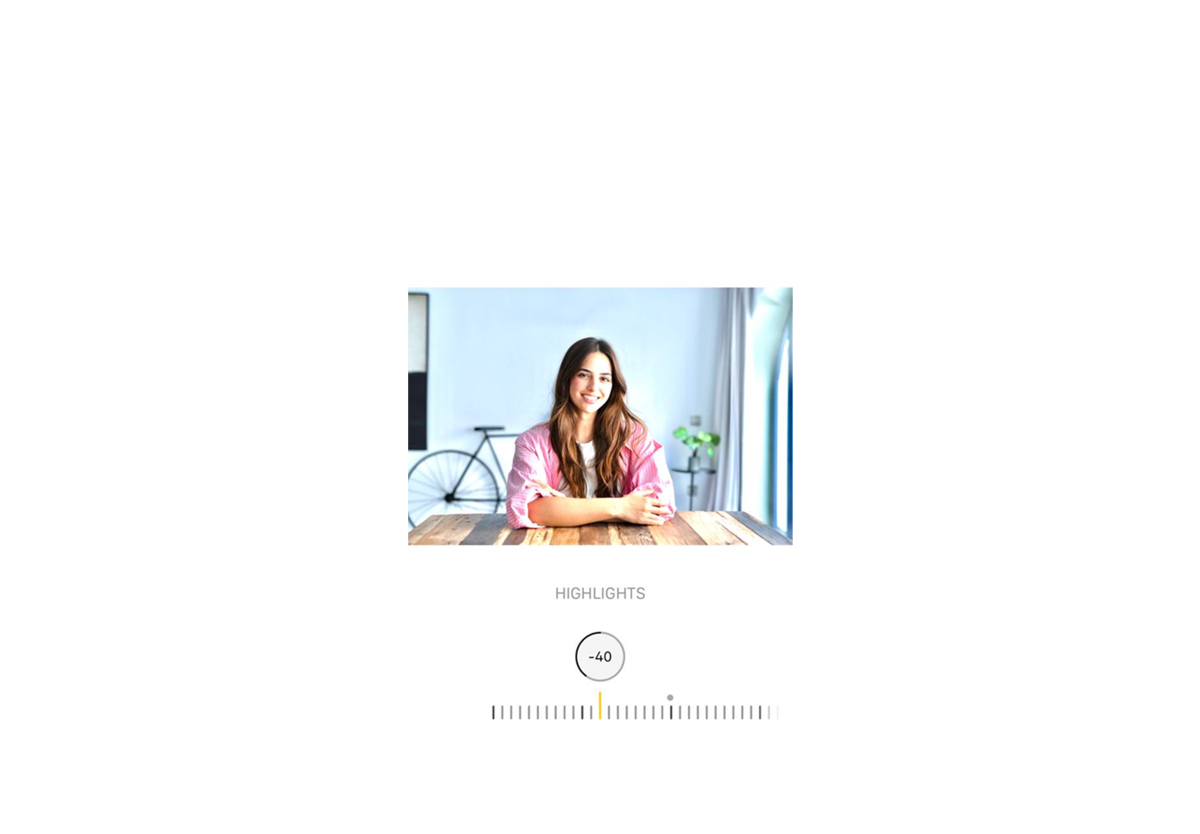
Next, go to shadows and lower them (to about -20 to -30) to restore dramatic contrast to the image.

You can also lower the contrast slider slightly (-15), so the transitions aren’t too harsh.

Boosting the Warmth and Color
Some TikTok iPhone photo editing hacks suggest increasing saturation by +10 and improving vibrance by about +20…+30.
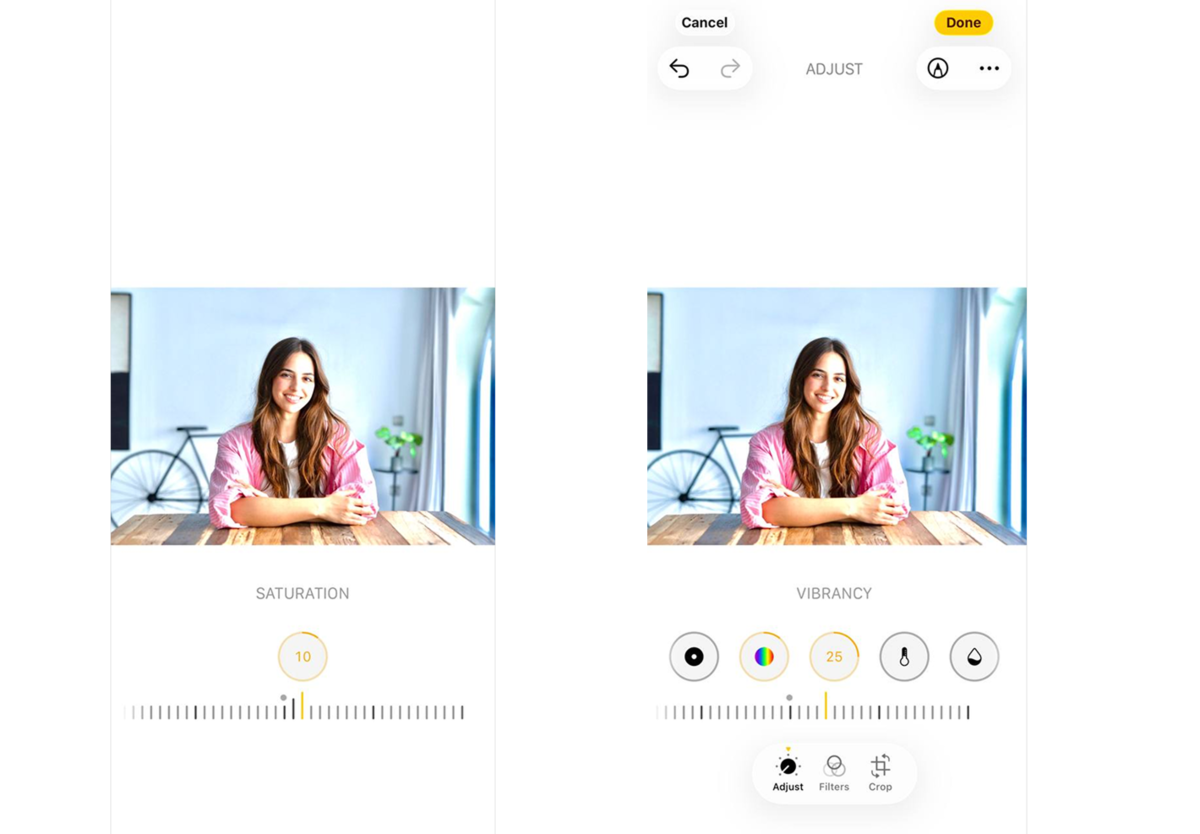
Finally, add some warmth to the frame using the warmth slider by moving it toward the positive end.
Directly increasing saturation on an iPhone often results in an unflattering orange tint on the skin. To make spot corrections to skin tones, try mattifying the face with Luminar for iPhone. This will remove excess “yellowness” and add a soft, cinematic glow (the Orton effect) around light sources.

Professional Editing. Now in Your Pocket.
Download Luminar on your Mobile Device
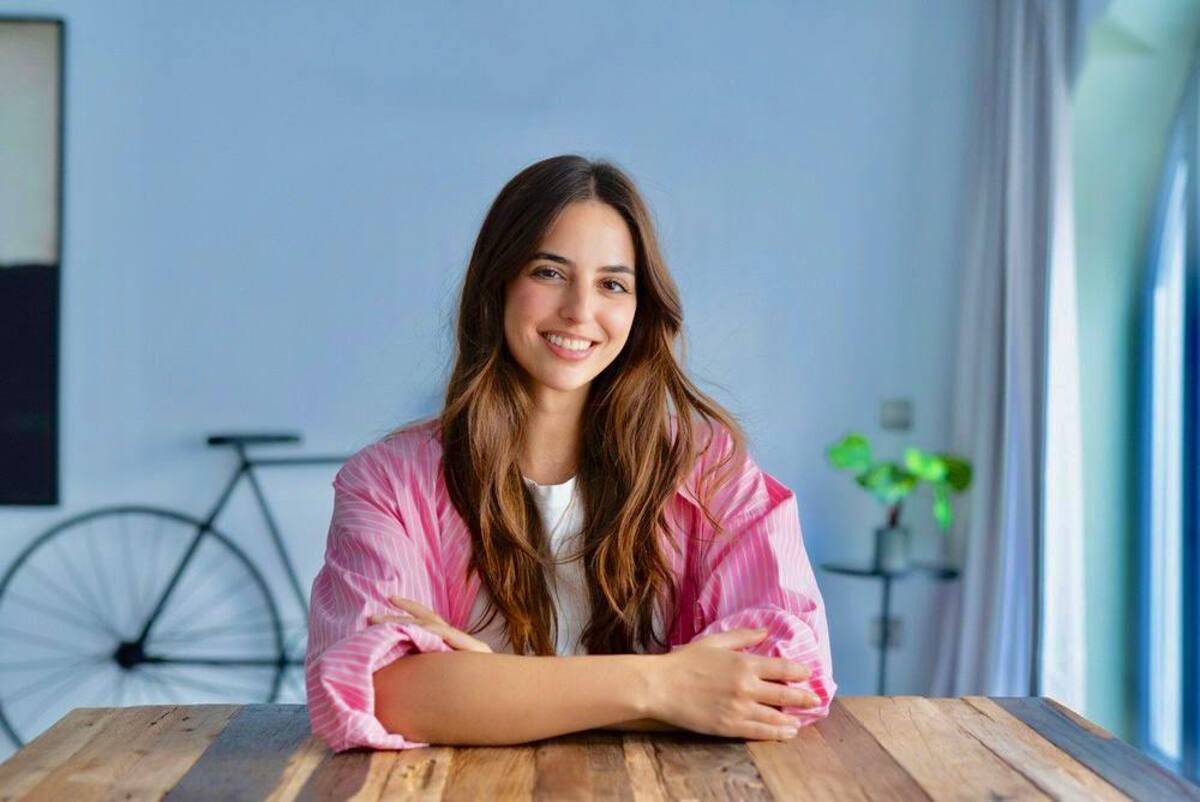
The Magic Reset
Go back to the very beginning, to the exposure slider, and reset it from +100 back to 0 (or even slightly negative, such as -10).

The image will look deep, with beautiful skin tones and soft shadows, as if it were shot with a professional camera at sunset.
This viral photo editing hack works best on photos taken in good daylight or backlight. On nighttime shots or photos with poor artificial lighting, this trick will simply amplify digital noise in the shadows.
Creative Examples of TikTok Photo Edits
On every fast-paced social media platform, there were people asking, “How do I get into the ‘For You’ feed?” A simple, well-composed photo won’t catch anyone’s eye here—the image has to evoke an emotion within the first half-second of scrolling.
- The vintage “film camera”. A representation of a distinctive old point-and-shoot camera. Colors should be slightly faded but warm. The key elements are noticeable analog grain, a slight blur around the edges of the frame (simulating a cheap plastic lens), and a harsh, direct flash effect. Shadows behind the subject should be sharp and black.
- The Y2K cyber glow. Used in fan edits, music videos, and covers. The base photo is processed to have high contrast, meaning deep shadows are combined with very bright highlights. A blue-pink or purple filter is applied to the color accents via the HSL palette. And don’t forget about motion blur.
- The “unreal peak” cinematic portrait. Faces in these photos look flawlessly sharp, while the background is completely blurred. Here, the main focus shifts to selective texture work. The background is blurred using the Lens Blur tool to isolate the subject as much as possible.
To create this kind of ultra-sharp portrait, mobile creators use intelligent local masking. For example, Luminar Mobile skin AI automatically evens out skin tone, gently removes minor imperfections caused by poor mobile lighting, and reduces oily digital shine. All while fully preserving the natural texture of pores and eyelashes.
Regardless of the style you choose, remember the three-second rule. If you’re creating a video carousel from photos, the first image should be the most high-contrast or contain an intriguing text hook, and the subsequent frames should change strictly in time with the music beat.
Tips to Enhance Your TikTok Photo Edits

Mobile screens and compression algorithms must be taken into account first and foremost. What looks great during detailed editing in a dark room can be completely lost when a user is scrolling through their feed on the go in bright sunlight.
Optimize for Mobile Screens
For a photo to “stand out” in the news feed, it should have high midtone clarity and optimized contrast. Always make the final image a little brighter and more contrasty than usual. When people scroll through TikTok, they often keep their screen brightness set to a medium level. If your image is too dark or washed out, viewers will simply scroll past it.
Smart Sharpness over Raw Detail
TikTok ruthlessly compresses files during upload, turning fine, delicate details into a blur of pixels. Instead of simply tweaking the standard sharpness slider, focus on the microcontrast of large and medium-sized objects. Smart tools like Luminar Mobile Enhance AI use exposure, highlight the texture of clothing or hair, and bring out buried shadows.
“Before/After” Psychology
Never show the final result right away. Start the video with a dull, unflattering, or overly simple initial photo (you can even deliberately lower the quality for the first second), and then, set to a powerful beat or sound effect, reveal your final cinematic edit.
Consistency and Quick Workflow
Trends on TikTok come and go in a matter of days. If you spend several hours editing each individual frame for a carousel, you simply won’t be able to keep up with the platform’s pace.
Learn to automate your workflow. Create your own universal formula or use ready-made professional presets that you can copy and apply to an entire series of photos with a single click. To get started quickly and access smart mobile presets and filters, you can download the app via the Luminar Mobile link. This will let you set up a consistent style for your entire visual sequence in a few minutes, freeing up time to work on the dynamics and editing of the video itself.
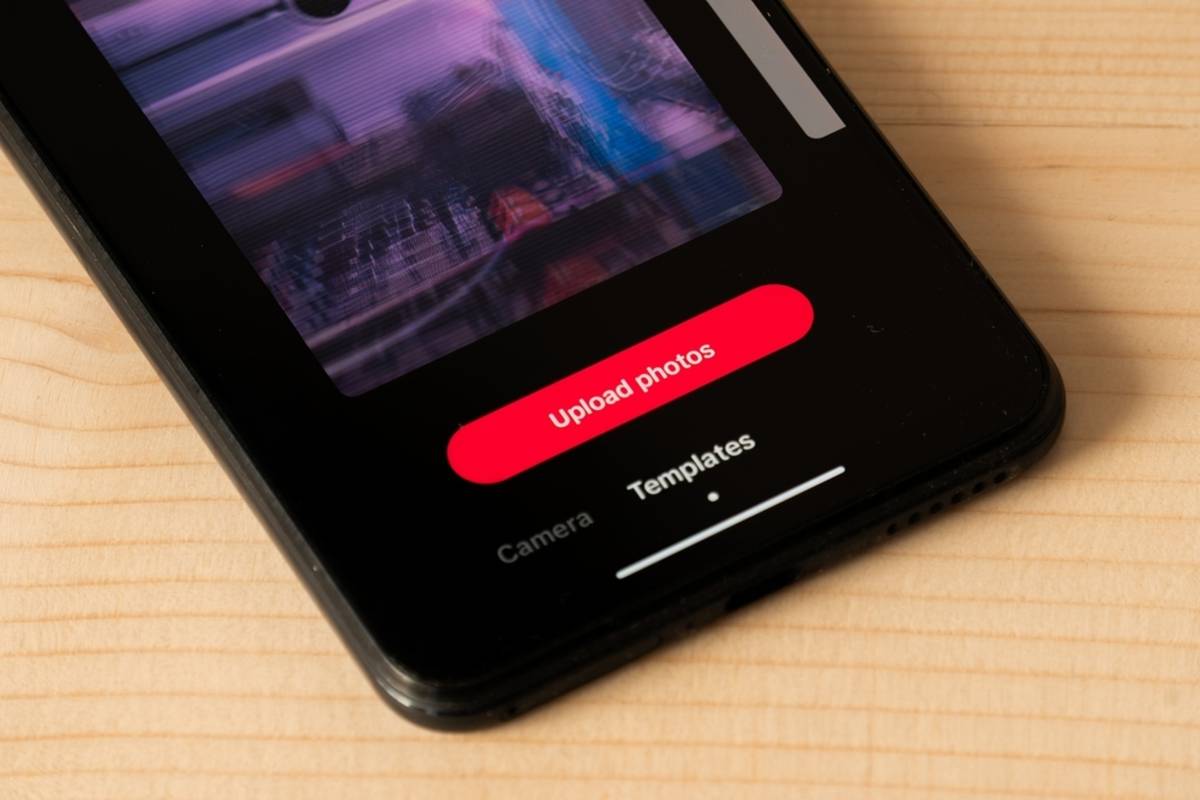
Sharing and Saving Your Edited Photos on TikTok

You’ve found the perfect editing formula, balanced the colors, added a cinematic glow, and fine-tuned the microcontrast. If you upload the photo incorrectly, the app will forcefully compress it, turning your delicate edits into blocky, pixelated squares. To ensure your shot becomes part of the viral TikTok iPhone editing trend and retains maximum quality, you need to properly prepare the media file for publication.
- Format and color space. Before importing a photo into a video editor or directly into the app, make sure the source file is saved in JPEG format with maximum quality (95–100%) or as a PNG.
- Enabling HD uploads. On the final TikTok posting screen, always scroll all the way to the bottom. Open the “More options” tab, find the “Allow high-quality uploads” toggle, and make sure it’s turned on so the app doesn’t reduce the image quality.
- Selecting “Photo carousel” mode. TikTok offers a photo mode where viewers manually swipe through photos. The platform’s algorithms preserve a much higher resolution for still images in this mode than if you convert photos to standard video format (MP4) using third-party software, where the image undergoes two rounds of compression.
Keep in mind that even a perfectly configured export won’t work if you’re posting content over a weak mobile connection. Always upload your trending edits while connected to a stable and fast Wi-Fi network.