A beginner and a professional can open the same Luminar photo and take a surprisingly different path to the final result.
Luminar is designed to let photographers get useful results quickly, but the way people use its tools changes considerably as their editing skills develop. A beginner may start with a single AI slider, while an experienced photographer may use the same tool as only the first step in a more controlled RAW workflow.
The difference is not really about having access to different tools. Beginners and professionals can use many of the same features. What changes is the amount of manual adjustment, selective editing, and technical decision-making that happens after the initial enhancement.
Don’t feel like reading the whole breakdown? We’ve pulled together a quick summary below.
Key Takeaways
- Beginners usually get the most value from Enhance AI, Develop, Crop AI, Supersharp AI, and Noiseless AI because these tools solve common problems without requiring advanced editing knowledge.
- Professionals still use these foundational tools, but they typically combine them with precise RAW adjustments, masking, layers, and selective corrections.
- Develop is worth learning early because exposure, contrast, highlights, shadows, white balance, and other tonal controls form the foundation of more advanced editing.
- Light Depth becomes particularly useful when an experienced photographer wants to shape attention through lighting and depth rather than simply brightening the whole image.
- GenErase is a practical professional tool for removing distracting elements while keeping the surrounding image visually coherent.
The Main Difference Between Beginner and Professional Workflows

The most useful way to compare Luminar users is by looking at how they solve the same editing problem.
A beginner often asks, “How can I make this photo look better quickly?” AI-powered tools are well-suited to that goal. A professional is more likely to ask, “What exactly needs changing, where should it change, and how much control do I need?”
The main difference is how much control the photographer wants. A beginner might use Enhance AI to improve a photo in one step, while a more experienced user may use it as a starting point and then fine-tune the result with Develop, masks, or layers.
Neither approach is better. Beginners can get a good result with fewer adjustments, while experienced photographers usually want more control over specific parts of the image.
Advanced yet easy-to-use photo editor
Key Luminar Tools Preferred by Beginners
For someone learning photo editing, the most useful tools are those that produce a visible improvement while also introducing fundamental editing concepts.
Enhance AI: The Fastest Starting Point

Enhance AI gives beginners an immediate way to improve a photo without adjusting numerous sliders individually. Its main adjustment can balance several fundamental aspects of an image, including exposure, contrast, shadows, highlights, saturation, tone, and detail.
That makes it particularly useful as a first edit. Instead of trying to understand every control immediately, a new user can see what a balanced adjustment looks like and then decide whether the result needs further refinement.
For novices exploring a photo editor for beginners, this kind of visual feedback can make the learning process considerably easier. The important lesson is not to push the slider as far as possible. A moderate adjustment usually provides a better starting point for subsequent edits.
Develop: Learning the Fundamentals

Develop is where beginners start getting more hands-on with their photos. It covers the basics, such as exposure, contrast, highlights, shadows, white balance, color, sharpening, and noise reduction.
For RAW files, Develop RAW is applied first, giving you more room to work with the original image. Learning to bring back highlight detail, open up shadows, and fix exposure and white balance gives you a solid base for editing.
Discover the Magic of Automatic Editing
Crop AI: Improving Composition

Crop AI is another beginner-friendly tool because composition is often easier to understand visually than technically.
Cropping can remove distracting edges, improve subject placement, and create a more appropriate aspect ratio for a particular destination. For someone still developing their photographic eye, an intelligent composition tool can also provide useful starting points for deciding how much of an image actually needs to remain in the frame.
Supersharp AI: Recovering Soft Images

Supersharp AI is useful when an otherwise good photograph lacks clarity because of softness, missed focus, or motion blur. It offers Universal and Motion Blur correction modes and several strength levels. Beginners can therefore start with an automatic correction rather than experimenting with several conventional sharpening controls.
It is still important to inspect the result at 100% magnification. Sharpening can make an image appear impressive at first glance, but it can introduce unnatural edges if pushed too far.
Noiseless AI: Cleaning Up High-ISO Photos
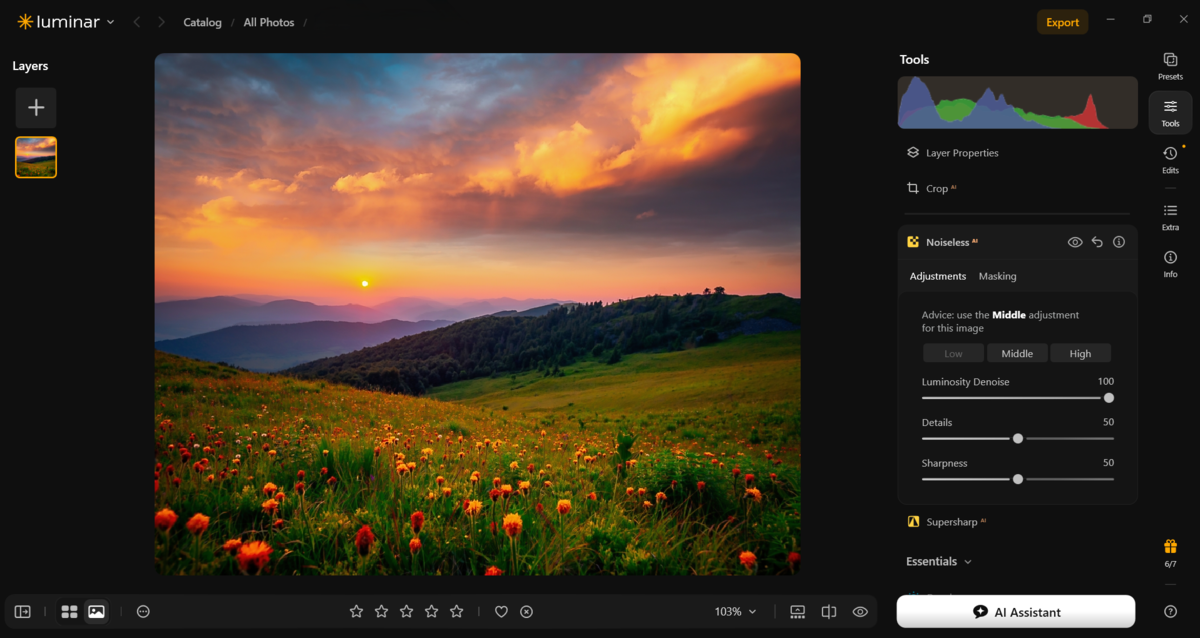
Noiseless AI is particularly practical for beginners who shoot indoors, at night, or in other low-light conditions. It can reduce both luminance noise and color noise, while its manual controls allow users to balance noise reduction against detail and sharpness. It works with RAW and non-RAW images, although RAW files are particularly suitable for noise reduction.
This tool also teaches an important editing principle: removing noise is not automatically better if it destroys texture.
Your Smart AI-Powered Tool for Noise Reduction
Essential Luminar Features for Professional Users
Professionals still use the basic tools. The difference is that they tend to use them more selectively, making smaller adjustments and deciding exactly where each change is needed.
Develop Becomes a Precision Tool
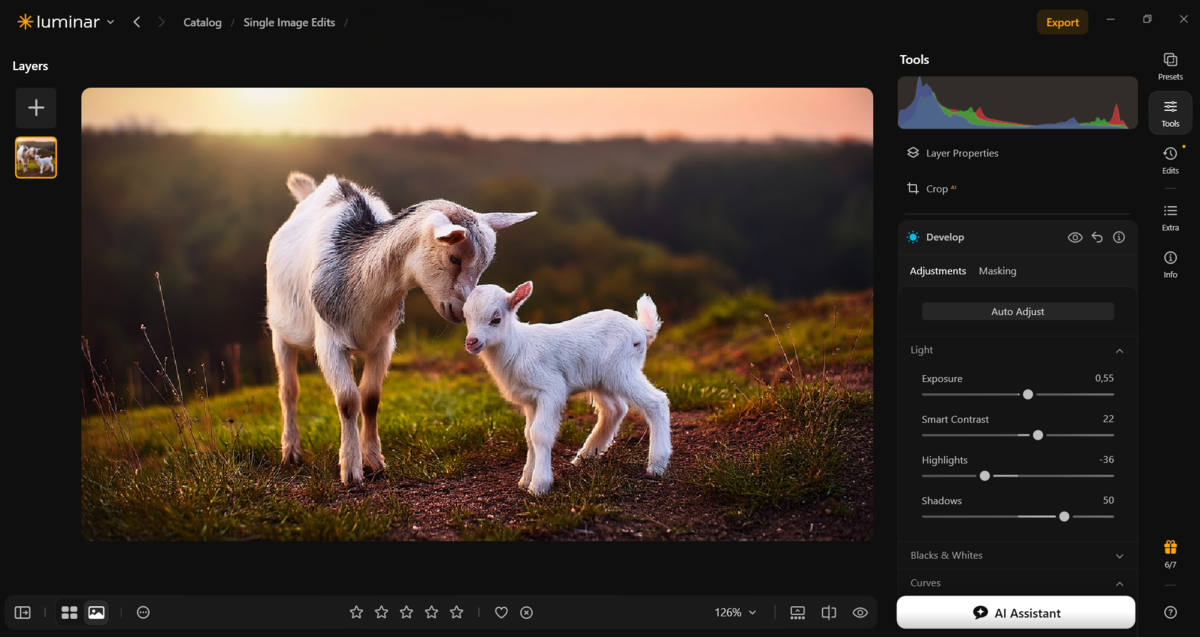
For an experienced photographer, Develop is more than a quick correction panel. It becomes the foundation for preparing an image before creative or local adjustments.
A professional working with RAW files can correct exposure and white balance, recover highlights, open shadows, adjust contrast, correct lens distortion, and address chromatic aberration before moving on to more targeted edits.
Curves are particularly useful when more precise tonal or color control is required. This approach gives the photographer a predictable starting point rather than relying entirely on an automatic enhancement.
Masking and Layers Add Local Control

Once photographers understand global adjustments, the next major step is learning to edit different parts of an image independently.
Luminar supports manual masks as well as AI-assisted selections. This means a photographer can, for example, brighten a subject without applying the same adjustment to the sky, or change the color of one area while leaving the rest of the frame untouched.
Layers extend this control further. They can be used to separate edits, blend images, apply textures, or build more complex compositions.
The important transition is from “make the whole image better” to “make each part of the image serve the final result.”
Light Depth: Shaping Attention Through Lighting

Light Depth is most useful once you have the basics down. It lets you adjust the lighting in the foreground and background separately, soften the transition between them, and control the warmth of each area.
This is particularly useful for portraits, landscapes, interiors, and images where the original lighting does not clearly establish visual hierarchy. Used subtly, it can help an image feel more dimensional without making the lighting effect obvious.
Flat Photo? Give It a New Dimension with Light Depth
GenErase: Removing Distracting Elements

GenErase addresses a different professional need: cleanup. Small distractions such as unwanted objects, signs, people, wires, or other elements can weaken an otherwise strong composition. Rather than rebuilding the surrounding area manually, generative removal can reconstruct the selected region.
The professional advantage is not simply speed. It is the ability to spend less time on repetitive cleanup and more time judging whether the final image remains believable.
How Tool Usage Changes as Skills Develop

The progression can be thought of as three stages.
Beginner: Enhance AI → Develop → Crop AI → Supersharp AI or Noiseless AI.
Intermediate: Develop → Enhance AI → selective adjustments → image-quality tools → creative tools.
Professional: RAW preparation → precise Develop adjustments → masks and layers → targeted lighting or retouching → cleanup with GenErase → final quality check.
These stages are more of a guide than a strict progression. An experienced photographer might get the result they want with just one or two well-chosen adjustments, while a beginner may need more time to experiment with different tools. What really matters is understanding what the photo needs and knowing which tool can solve that specific problem.
Which Tools Should You Learn First?

If you are new to Luminar, learn the tools in this order:
- Develop: Start with exposure, highlights, shadows, contrast, and white balance. These controls form the basis of most edits.
- Enhance AI: Use it to quickly improve exposure, contrast, color, tone, and detail, then compare the result with your manual adjustments.
- Crop AI: Practice improving framing and composition once your basic corrections feel comfortable.
- Supersharp AI and Noiseless AI: Use Supersharp AI for softness or motion blur and Noiseless AI for high-ISO or underexposure noise.
- Masking: Move to masks when you are ready to adjust specific areas instead of the whole image. Luminar offers Brush, gradients, Color, Luminosity, Mask AI, and Object Select AI options.
- Layers: Learn these last. They give you more control when combining images or keeping different edits separate.
For professionals, it is less about learning every tool and more about knowing which one gives the right level of control. AI can handle routine corrections quickly, while Develop, masks, and layers let you fine-tune specific parts of an image when precision matters.