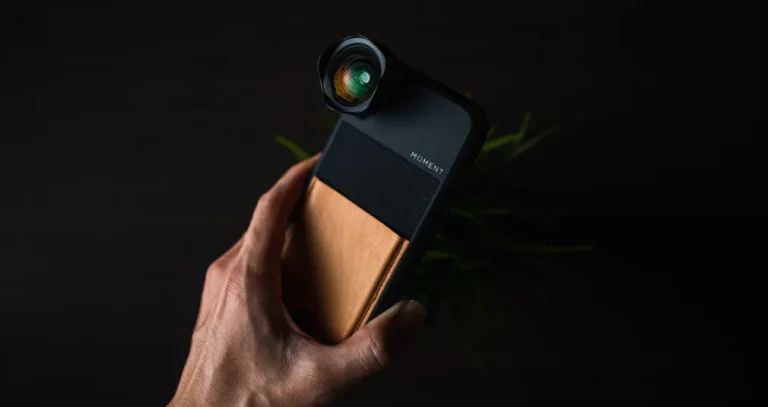
Choose a streaming camera for your setup. Explore webcams, tracking cameras, and interchangeable-lens options, plus practical lighting and software tips.
The best camera for streaming depends on how you connect it, how long you go live, and what appears in the frame. A USB webcam is often enough for a desk broadcast. An interchangeable-lens camera offers more control over framing and depth of field, while a tracking camera can help when a presenter moves around.
Check the live output, not just the recording specification. A camera that records 4K or 5.3K may deliver a lower-resolution USB or wireless stream. Power, heat management, audio, and connection reliability matter as much as the maximum pixel count.
The six options below suit different tasks. Compare the complete setup—including lens, lighting, microphone, and any capture device—before choosing.
Don’t feel like reading the whole breakdown? We’ve pulled together a quick summary below.
Key Takeaways
- Start with the connection. USB webcam mode, HDMI capture, and direct network streaming are different workflows.
- 1080p can be a sensible target. Use 4K when the platform, connection, and production need it—not simply because the camera can record it.
- Test for the full session length. Confirm power, focus, temperature behavior, and audio synchronization before going live.
- Improve light and sound alongside the camera. A good camera cannot compensate for every dim room or distant microphone.
- Keep streaming and photo editing separate. Broadcasting software handles live video; Luminar can help prepare still images and thumbnails.
Best Streaming Cameras at a Glance
| Camera | Suitable use | Connection to evaluate | Main limitation |
| Logitech C920 | A straightforward first desk setup | USB webcam | Up to 1080p/30fps |
| Logitech MX Brio | Higher-resolution desk video | USB webcam | 4K is limited to 30fps; the platform may deliver less |
| OBSBOT Tiny 2 | A presenter who moves within a room | USB tracking webcam | Tracking and reframing need testing in the actual space |
| Sony ZV-E10 II | An interchangeable-lens creator setup | Supported USB streaming or HDMI capture | Lens, power, and heat behavior add setup considerations |
| Panasonic Lumix GH7 | A more involved studio or hybrid production | HDMI capture or supported IP streaming | Larger investment and more configuration |
| GoPro HERO13 Black | Mounted outdoor or point-of-view coverage | Supported app/network live workflow | Live output differs from high-resolution recording |
Each option addresses a different workflow. Regional prices and availability vary, so compare the exact model and required accessories.
Exclusive Tools of Endless Possibilities in One Editor
1. Logitech C920: A Simple Starting Point

The C920 is a USB webcam offering Full HD 1080p video at up to 30fps, autofocus, and built-in microphones. Its monitor clip and tripod attachment make it easy to position for a seated stream.
It makes sense when the aim is a dependable talking-head image without buying a lens or HDMI capture device. Add suitable light and frame the camera near eye level before deciding whether a more expensive model is necessary.
The main compromise is its 30fps limit at 1080p and limited flexibility compared with a dedicated camera. Built-in audio can be a starting point, but microphone position remains important. This is an older model; check the exact variant and included features before purchasing.
| Pros | Cons |
| Simple USB setup | No 4K output |
| Autofocus and practical mounting options | 1080p limited to 30fps |
| No separate lens or capture device required | Built-in microphones may not suit the room |
Choose it for: a first desk stream, interview call, or webinar where 1080p/30 is sufficient.
2. Logitech MX Brio: Higher-Resolution Desk Video

The MX Brio supports up to 4K at 30fps or 1080p at 60fps. It provides a webcam workflow with more resolution and frame-rate flexibility than the C920.
A 4K source can be useful for reframing within a lower-resolution production, but the benefit depends on the crop and final output. Confirm the appropriate USB connection and the resolution selected by the application.
It remains a fixed-lens webcam rather than a camera system with interchangeable optics. Its higher-resolution output also does not ensure viewers receive 4K: the broadcast software, encoder, upload connection, and platform determine the delivered stream.
| Pros | Cons |
| 4K/30 and 1080p/60 options | No 4K/60 output |
| Direct webcam workflow | The application may select a lower mode |
| Extra source resolution can support cropping | Fixed lens limits optical flexibility |
Choose it for: a desk setup that needs better source-resolution options while keeping USB connectivity straightforward.
3. OBSBOT Tiny 2: Tracking for a Moving Presenter

The Tiny 2 is a motorized tracking webcam supporting up to 4K/30fps and 1080p/60fps. Its pan-and-tilt design can follow a presenter without requiring another person to operate the camera.
It is worth evaluating for demonstrations, teaching, or presentations where the speaker moves away from a fixed seated position. Test how it responds to turning, leaving the frame, and other people entering the scene.
Automatic reframing is not always desirable. A close view of hands or a product may require a fixed frame instead. Digital zoom also crops the source image rather than providing the behavior of a long optical lens.
| Pros | Cons |
| Motorized tracking supports movement | Tracking may need adjustment for the room and activity |
| 4K/30 and 1080p/60 options | Automatic reframing can conflict with a planned composition |
| USB setup without a separate camera lens | Digital zoom reduces the available source area |
Choose it for: a presenter who benefits from tracking and can rehearse the movements before broadcasting.
4. Sony ZV-E10 II: An Interchangeable-Lens Streaming Setup

The ZV-E10 II provides an APS-C interchangeable-lens system with supported USB streaming modes including 4K/30p and 1080p/60p. Sony specifies a suitable SuperSpeed USB connection and cable for the higher-resolution modes.
Its main advantage is control over the optical setup. Choose a lens that gives the required framing from your desk distance and enough depth of field to keep normal movement in focus.
Do not budget for the body alone. Include a lens, mounting, compatible power arrangements, and the appropriate connection. Run a full-length test for temperature behavior and focus reliability; a compact camera should not be assumed to run indefinitely in every mode.
| Pros | Cons |
| Interchangeable lenses for framing and background control | Lens and accessories increase total cost |
| Supported 4K/30p and 1080p/60p USB streaming | Requires the correct computer connection and cable |
| A camera system useful beyond streaming | Long-session power and heat behavior need testing |
Choose it for: a creator who needs a dedicated camera for both streaming and other video or photographic work.
5. Panasonic Lumix GH7: A More Involved Production Camera

The GH7 is a Micro Four Thirds interchangeable-lens camera with active cooling and video-oriented features. Panasonic documents HDMI workflows and supported IP streaming methods, including RTMP/RTMPS connections.
It can suit a production that combines streaming with recorded video, external equipment, and more deliberate camera control. Its cooling design addresses demanding recording conditions, but operating limits and configuration still matter.
The extra capability brings additional cost and setup. Confirm the chosen output mode, lens, power supply, and capture or network path. Recording specifications and HDMI modes should not be treated as the maximum quality of every direct IP stream.
| Pros | Cons |
| Active cooling for demanding video work | More expensive and complex than a webcam setup |
| HDMI and supported IP streaming workflows | Each connection has its own settings and limits |
| Interchangeable lenses and production flexibility | Lens, mounting, and accessories add bulk |
Choose it for: an established video workflow that will use its wider production capabilities beyond a basic desk broadcast.
6. GoPro HERO13 Black: Mounted Outdoor Coverage

The HERO13 Black is an action camera suited to compact mounts and point-of-view recording. It can be useful where a conventional desk camera is impractical and a wide view is appropriate.
Its supported live workflow depends on the app, network connection, and destination. Confirm the current setup requirements before relying on it for an event. High-resolution internal recording is a separate capability from live transmission.
Outdoor streaming also depends heavily on upload coverage and available power. Its wide-angle look is not ideal for every close portrait, and connections or external power can change how the camera is protected from the environment.
| Pros | Cons |
| Small body with many mounting possibilities | Live quality differs from recording quality |
| Wide view suits point-of-view coverage | Limited optical framing flexibility |
| Designed for action-oriented use | Network, power, and connection protection need planning |
Choose it for: mounted outdoor coverage after testing the complete live workflow in comparable conditions.
Webcam, Mirrorless, DSLR, or PTZ?
USB Webcams
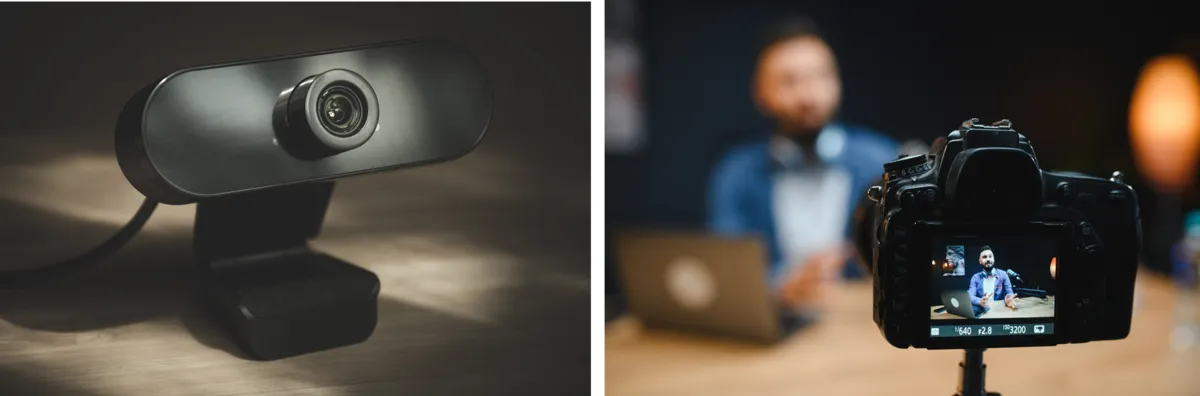
A webcam is usually the simplest computer-based option. It provides a compatible video source through USB without requiring a separate lens or HDMI capture device.
Its limits typically involve optical flexibility, sensor performance, and available controls. Lighting can improve the result substantially, so evaluate the whole setup before replacing it.
Mirrorless and DSLR Cameras
These cameras can provide more lens and exposure control, but their streaming connection must be checked. Some offer supported USB modes; others work best through a clean HDMI output and capture device.
Mirrorless is not a guarantee of compactness, and DSLR is not a guarantee of better image quality. For the underlying design differences, see this mirrorless vs DSLR comparison.
PTZ Cameras
Pan-tilt-zoom cameras can adjust direction and framing remotely. Desktop tracking webcams and installation-focused PTZ cameras serve different purposes; larger production models may offer network, HDMI, or SDI connections.
Check whether zoom is optical or digital, which controller or protocol is required, and whether tracking is included. A PTZ camera is not mandatory for a professional stream, but it may solve a specific movement or remote-operation need.
Your AI-Powered Photo Editor for MacOS and Windows
What to Check Before Buying
Resolution and Frame Rate
1080p/30 is a practical starting point for many seated broadcasts. 60fps can make motion appear smoother, but it does not automatically remove blur; exposure time also affects how movement looks.
4K can support a high-resolution production or cropping, but demands depend on the complete pipeline. The camera, capture device, USB connection, software, encoder, network, and platform all need to support the intended mode.
Focus, Framing, and Light
Choose a camera position before choosing a lens. A narrow view may be awkward in a small room, while an excessively wide view can show more background than intended.
Face or eye autofocus can help, but check how it behaves when showing a product or looking away. A very wide aperture may make a small movement enough to lose focus. Enough light and sensible depth of field often produce a more reliable result.
Power and Session Length
Confirm whether the camera can operate from the chosen power source, not just charge from it. USB charging and continuous USB-powered operation are different capabilities.
Test for the intended broadcast duration with the actual output mode, room temperature, and mounting. Check sleep behavior, power interruptions, and thermal warnings.
Audio and Compatibility
An external microphone can connect to the camera or separately to the computer. Select the intended source in the streaming software and check for duplicated audio.
A USB microphone is often convenient. An XLR microphone needs an appropriate interface or mixer; the connector alone does not guarantee better sound. Placement, room noise, gain, and monitoring matter in either case.
USB Streaming vs HDMI Capture
| Workflow | What you need | Main check |
| USB webcam | Compatible webcam and computer connection | Supported resolution and frame rate in the application |
| Camera USB streaming | A camera with a supported mode and suitable cable | Exact output mode, USB speed, power, and software compatibility |
| HDMI capture | Camera HDMI output, cable, and compatible capture device | Clean output, supported signal, and actual capture resolution |
| Direct IP streaming | Supported camera network mode and a configured destination | Protocol, credentials, network stability, and live output limits |
Clean HDMI means the output can omit camera interface graphics such as focus boxes. Verify it in the chosen mode.
For a capture device, distinguish input acceptance, passthrough, and capture output. A device may accept or pass through 4K while sending only 1080p to the computer. Choose by the signal you need to capture.
Camera Settings for a Reliable Stream
| Setting | Starting approach |
| Frame rate | Match the production and supported platform settings |
| Shutter speed | Try about 1/60 second for 30fps or 1/120 for 60fps, then check motion and flicker |
| Aperture | Keep enough depth of field for normal movement |
| ISO or gain | Use the level needed after establishing light, aperture, and shutter speed |
| White balance | Set it for the actual lights and keep it consistent |
| Focus | Test continuous autofocus or fixed focus for the intended position |
| Picture profile | Use a suitable ready-to-view look unless a managed live grading workflow is planned |
Under some 50Hz lighting, 25/50fps with 1/50 or 1/100 second may help control flicker where supported. Test your lights rather than assuming one shutter-speed rule always works.
White balance should match the light source; there is no universal indoor value such as 6000K. For the relationship between exposure controls, this guide to manual camera settings provides useful background.
Streaming Software: Two Practical Starting Points
OBS Studio
OBS Studio is free, open-source software for recording and live broadcasting. It combines sources such as a camera, screen, images, and audio into scenes that can be switched during a production.
It suits creators who want direct control over the scene and output configuration. Start with the Auto-Configuration Wizard, add the video source, select the microphone, and make a local test recording before configuring the broadcast destination.
Its flexibility requires learning how sources, audio, and encoder settings interact. A recognized camera signal does not guarantee the whole stream is configured correctly.
| Pros | Cons |
| Free and open source | Initial setup requires attention |
| Flexible sources and scene organization | Encoder choices must suit the computer |
| Useful for streaming and local tests | Third-party extensions need separate compatibility checks |
Streamlabs Desktop
Streamlabs Desktop combines broadcasting tools with scenes, alerts, widgets, and other creator-oriented features. The free application includes core streaming and recording tools; some expanded services and assets require Streamlabs Ultra.
It can suit creators who want audience alerts and related presentation tools within the workflow. Begin with a simple scene and add only the elements needed for the format.
Check which features are free and which belong to a paid plan. Extra animated elements and services can also increase the production’s demands, so test the complete scene rather than an empty camera preview.
| Pros | Cons |
| Core broadcasting tools available free | Some features and assets require a paid plan |
| Integrated alerts and widgets | More elements can increase setup complexity |
| Scene and recording tools in one application | Performance depends on the scene and hardware |
Accessories That Solve Real Problems

Prioritize a stable mount, appropriate light, and clear audio. A soft key light near the camera can improve a desk image; headphones help identify monitoring or echo problems.
Add a capture device only if the connection requires it. Use a suitable power solution for the camera and cables that support the intended signal. Wired networking can improve consistency where available, but outdoor streaming may need a tested mobile connection instead.
Avoid buying a full accessory list before choosing the workflow. A USB webcam and separate microphone need a different setup from a network camera or HDMI production.
A Pre-Stream Test Checklist
- Confirm the camera source, resolution, frame rate, and crop.
- Check focus while moving naturally and showing any demonstration objects.
- Set light, exposure, and white balance.
- Listen to the selected microphone and check audio synchronization.
- Run the camera for the expected session length.
- Record locally and inspect the result.
- Test the broadcast connection and destination settings.
A stable local recording helps separate camera problems from network or platform problems. If the source looks good but the broadcast stutters, inspect encoding load and upload conditions before replacing the camera.
The Photo Perspective Correction Tool You've Been Waiting For
Preparing Stream Thumbnails and Photos in Luminar
Luminar can help prepare the still images used around a stream: a thumbnail portrait, channel photograph, or promotional image. Its role here is photographic editing rather than processing the live camera feed.
Use photo cropping tools to frame a portrait for the intended layout. Leave room for text if the thumbnail design requires it, and check how the subject reads at a small size.

Apply photo color editing tools for a consistent palette across related images. For a closer portrait, restrained skin retouching can refine the photograph without removing recognizable texture.
| Pros | Cons or limits |
| Crop and color tools support still-image preparation | Does not handle the live broadcast feed |
| Portrait tools help finish a thumbnail photo | Strong retouching can look unnatural |
| Photographic adjustments support consistent promotional assets | Full thumbnail typography or layout may need a design application |
Choose a Camera Around the Broadcast
For a seated stream, start by evaluating a USB webcam and good light. For movement, consider tracking. For optical flexibility or a wider video-production workflow, evaluate an interchangeable-lens camera with its complete connection and power setup.
The strongest choice is the one that delivers the required signal reliably throughout the session. Higher recording specifications alone do not establish that.
FAQ
A USB webcam such as the Logitech C920 is a practical starting point when 1080p/30 is enough. Set up light and microphone placement before deciding whether the camera needs upgrading.
No. 1080p suits many broadcasts. 4K is useful when the production and destination support it or when a higher-resolution source is needed for cropping. Confirm the complete pipeline.
No. USB webcams and cameras with suitable USB streaming modes can connect directly. HDMI camera workflows usually need a compatible capture device, unless another supported system handles the signal.
Yes. A phone can handle supported direct live apps or act as a source through compatible software. Check power, heat, connection, audio, and framing, just as with a dedicated camera.
Reliable output, appropriate continuous power, stable focus, and temperature behavior suited to the chosen mode. Run a full-duration test with the actual settings instead of relying on recording resolution or brand reputation.