Understand perspective in photography, from vanishing points to forced perspective. Use distance, angles, and light to create a stronger sense of depth.
A road narrowing into the distance, a nearby flower towering over a mountain, or rows of buildings appearing tightly packed together all demonstrate perspective in photography. These relationships help a flat photograph communicate distance, size, and space.
You can change them by moving the camera. Getting closer, stepping back, or choosing a different height changes how objects relate to one another in the frame. Once you understand these effects, you can use them deliberately to emphasize a subject, create depth, or build a convincing visual illusion.
Don’t feel like reading the whole breakdown? We’ve pulled together a quick summary below.
Key Takeaways
- Perspective describes how a photograph represents spatial relationships between objects.
- Camera position controls geometric perspective. Changing focal length from the same viewpoint primarily changes framing.
- Converging lines, relative size, and overlapping objects help viewers recognize depth.
- Atmospheric haze and differences in tone can separate distant layers.
- Forced perspective uses careful positioning to create misleading impressions of size or distance.
- Editing can strengthen depth cues, but the most important decisions happen when positioning the camera.
What Is Perspective in Photography?
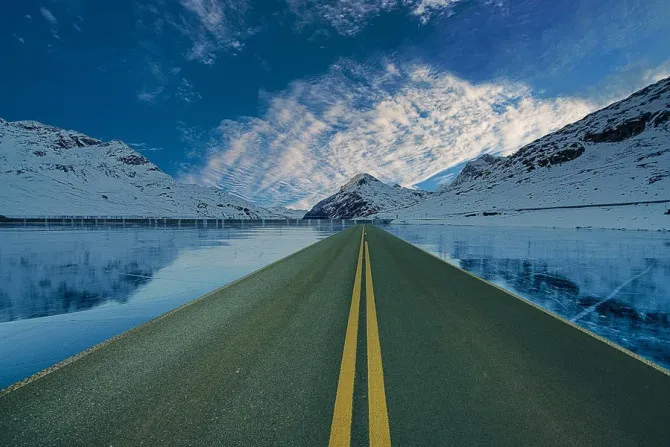
Perspective is the way objects appear in relation to one another from a particular viewpoint. It determines how large nearby objects look compared with distant ones, which objects overlap, and how lines appear to converge.
Imagine photographing a friend standing in front of a building. Move close to your friend, and they occupy a large part of the frame while the building looks relatively small. Move farther away, then use a longer focal length to keep your friend the same size in the photograph. The building now appears larger in relation to them.
The physical scene has not changed. Your viewpoint has changed its appearance.
Photographers also use the word perspective more broadly to describe depth cues such as haze, light, and color. These influence the impression of distance even when they do not change the scene’s geometry.
The Photo Perspective Correction Tool You've Been Waiting For
Types of Perspective and Depth Cues
These effects often work together. A landscape might combine a narrowing path, overlapping trees, and mountains that become progressively paler in the distance.
1. Linear Perspective
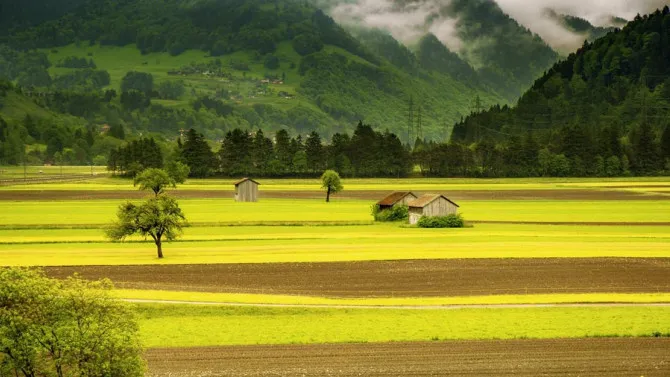
Linear perspective occurs when parallel lines extending away from the camera appear to converge toward a vanishing point.
Look for it in corridors, bridges, fences, and building edges. A straight path can connect the foreground with a distant subject, while the sides of a hallway can draw attention toward a doorway.
Common arrangements include:
- One-point perspective: one main set of receding parallel lines converges toward a single vanishing point.
- Two-point perspective: two sets of receding lines converge in different directions, as when photographing the corner of a building.
- Three-point perspective: vertical lines also converge, commonly when looking sharply up or down at a tall structure.
Vanishing points do not have to sit inside the photograph. Lines can suggest a destination beyond the frame.
Linear perspective and leading lines in photography are related, but they are not identical. A curved river can guide the eye without forming a set of parallel lines converging toward a vanishing point.
2. Relative Size
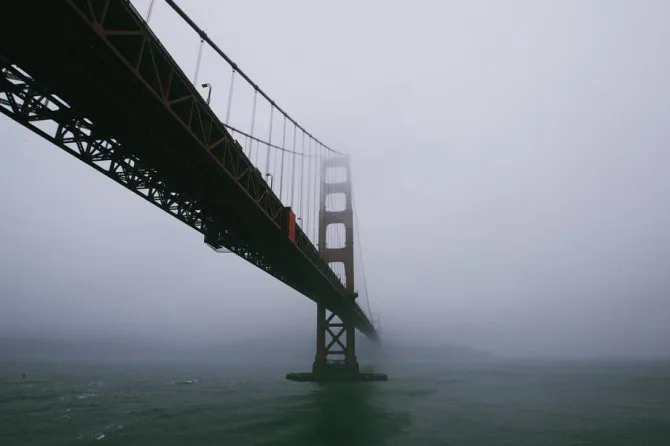
When objects of similar physical size appear progressively smaller, viewers interpret that change as distance.
A row of streetlights is a simple example. The closest light appears largest, while the others shrink as they recede. Repetition makes the distance easier to read because the viewer assumes the objects are roughly equal in size.
A recognizable object can also provide scale. A person standing beneath a cliff helps communicate its height more clearly than the cliff alone.
Pay attention to what sits nearest the camera. A small object can dominate the composition if it is much closer than everything else.
3. Overlap

Overlap helps viewers understand which objects are in front of others. A branch covering part of a building establishes their relative positions, even if both remain sharply focused.
Use this deliberately when building a composition. A doorway can frame a person farther away, or nearby rocks can partially overlap a distant shoreline.
However, overlap can also make a photograph confusing. A pole appearing to grow from someone’s head or two silhouettes merging into one shape weakens separation. A small sideways movement often fixes the problem.
4. Atmospheric Perspective
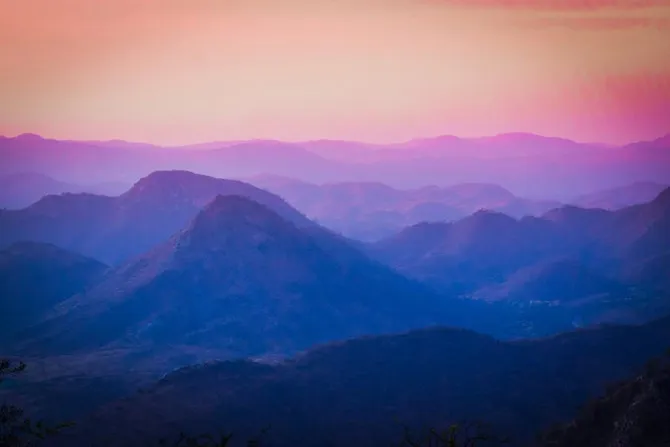
Atmospheric perspective, also called aerial perspective, describes how intervening air affects distant subjects. Haze, mist, and airborne particles can reduce contrast and obscure fine detail.
Mountain ridges often demonstrate this effect: nearby slopes look distinct, while farther ridges become softer and less separated from the sky.
“Aerial” here does not mean the photograph was taken from above. The effect is visible from ground level.
Look for scenes with several layers rather than one isolated distant subject. The gradual change between those layers makes the impression of distance more noticeable.
5. Tonal and Color Separation

Differences in brightness and color can help separate objects and suggest depth.
A dark foreground against a pale, misty background is a familiar arrangement. The reverse can work too: a sunlit person against a shaded woodland may appear clearly separated from their surroundings.
These are useful visual relationships rather than fixed rules. Dark objects do not always look closer, and warm colors do not always move forward. Their effect depends on surrounding tones, lighting, and the rest of the composition.
Instead of forcing every scene into a formula, check whether adjacent layers remain distinguishable.
6. Forced Perspective

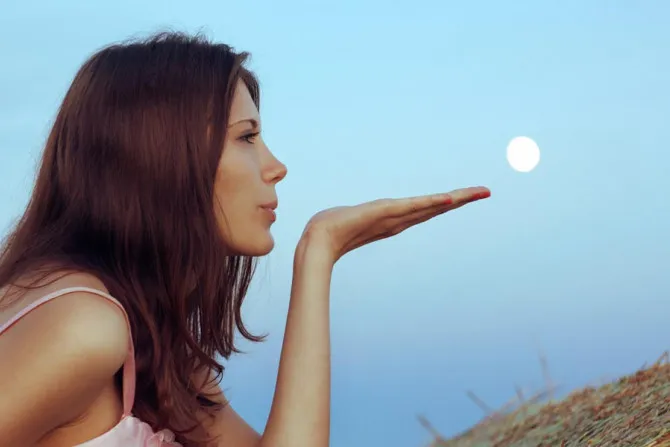
Forced perspective deliberately makes objects appear to have a different size or relationship from reality. Someone may seem to hold the moon, lift a building, or stand beside a life-size toy.
The technique combines camera position, subject distance, and precise alignment. A nearby object appears large enough to interact visually with something much farther away.
Start with a simple setup: place a small object near the camera and ask a person to stand farther back. Adjust their positions until the intended interaction looks convincing through the camera. This guide to forced perspective photography explores more ways to build these illusions.
Exclusive Tools of Endless Possibilities in One Editor
Does Focal Length Change Perspective?

Changing focal length without moving the camera does not change the underlying geometric relationships between objects. It changes how much of the scene you include and how large that portion appears in the frame.
The familiar “telephoto compression” effect comes from photographing at a greater distance, often with a longer lens to maintain the desired framing. From farther away, the difference between the distances to foreground and background objects becomes proportionally smaller. They consequently appear closer together in depth.
| What you change | What happens |
| Use a longer focal length without moving | The framing becomes tighter; relative object sizes remain consistent |
| Move closer and use a wider lens to retain the subject’s framing | Nearby features appear larger relative to distant ones |
| Move farther away and use a longer lens to retain the subject’s framing | Differences in apparent size become less pronounced |
| Move sideways or change camera height | Overlap, visible surfaces, and subject alignment change |
This also explains why close-up portraits can exaggerate a nose or an outstretched hand. The nearest feature is substantially closer to the camera than the rest of the subject.
That effect differs from optical barrel or pincushion distortion, which can make straight lines appear curved. Lens corrections may address those optical distortions, but they do not replace choosing an appropriate shooting distance.
How to Use Perspective in Your Photos
Choose the Relationship Before the Lens
Decide what should dominate the photograph.
For an expansive landscape, you might want nearby rocks to feel prominent against distant mountains. For a portrait, you might want more restrained proportions and a background that occupies a larger part of the composition.
Move until the relationship looks right, then choose a focal length that gives you the framing you need.
Build a Useful Foreground
A foreground element gives viewers a nearby reference point. It can introduce scale, frame a subject, or connect the bottom of the image to the distance.
However, including something close to the camera is not enough by itself. It should contribute to the picture. A rock that echoes the mountain’s shape or a path that leads toward a person is more useful than an unrelated object occupying half the frame.
These foreground photography techniques can help you choose elements that support the scene.
Change Your Camera Height
Photograph the same subject from standing height, waist height, and near the ground.
A lower viewpoint may emphasize nearby textures and make a subject appear taller. A higher viewpoint can reveal the spacing between objects and reduce overlap.
Check the background after each change. Lowering the camera might place a person against a clear sky, while raising it could position them against a busy pavement.
Decide How Much Should Be Sharp
Perspective and focus do different jobs. Perspective establishes spatial relationships; focus determines which parts appear sharp.
For a layered landscape, keeping several distances recognizable may help viewers explore the scene. In a portrait, a softer background can separate the person from their surroundings.
When creating forced perspective, both the near and far subjects may need enough sharpness to support the illusion. Adjust aperture, focus distance, and object placement together. Understanding depth of field helps you make those decisions.
Make Three Versions Before Moving On
Try a short exercise with one stationary subject:
- Photograph it from your initial position.
- Move closer and use a wider focal length to maintain similar framing.
- Move farther away and use a longer focal length to maintain similar framing.
Compare the size of the background, the prominence of nearby features, and the space between objects. This makes perspective easier to understand than changing lenses from one fixed spot.
Your AI-Powered Photo Editor for MacOS and Windows
Strengthening Depth During Editing
Editing works best when it supports relationships already visible in the photograph.
Start by checking whether the foreground, subject, and background are distinguishable. Local brightness adjustments can make a subject easier to read without increasing contrast everywhere.
In Luminar, Light Depth uses AI depth mapping to guide lighting adjustments across the scene. Its near and far controls let you refine brightness and warmth in different depth regions. Use a restrained amount and inspect transitions around people, trees, and buildings.

Preserve atmospheric cues where they help the composition. Removing all haze or applying equally strong detail enhancement to every mountain ridge can weaken the sense of distance.
For architecture, decide whether converging verticals support the image or need correction. Straightening them can suit a documentary view of a building, while leaving some convergence may better communicate its height.
Conclusion
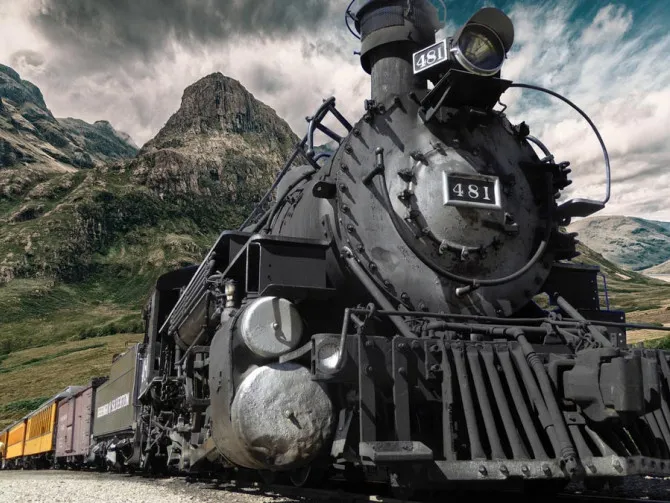
Perspective becomes easier to control when you pay attention to relationships: what looks larger, what overlaps, where lines lead, and how the scene changes with distance.
Before changing equipment or applying an effect, change your position. A few steps forward, a lower viewpoint, or a slight move sideways may give the photograph the depth and clarity it needs.
FAQ
A row of equally sized streetlights appearing progressively smaller is an example. Their changing apparent size helps viewers recognize distance. A corridor with converging edges demonstrates linear perspective.
Perspective describes spatial relationships as seen from the camera’s viewpoint. Composition is the broader arrangement of visual elements within the frame. Perspective is one of the tools used to build a composition.
A wide-angle lens allows you to include more of a scene from a close position. The close viewpoint exaggerates differences between near and far objects. Optical lens distortion, such as curved straight lines, is a separate issue.
Yes. Camera position, overlap, relative size, and alignment work with phone cameras too. Try moving closer or farther away rather than relying only on digital zoom.
Perspective transformations can adjust projected geometry, such as converging building edges. However, ordinary corrections cannot reveal surfaces hidden from the original viewpoint or fully reproduce a photograph taken from another position. Capture the intended spatial relationships in-camera whenever possible.