Camera parts explained for beginners: explore body controls, lens rings, internal components, and accessories, with clear descriptions of their functions.
The main parts of a digital camera are the body, lens, image sensor, shutter system, controls, power source, and storage. Together, they focus light, record image information, and save the photograph.
Some components are easy to identify, such as the shutter button and screen. Others sit inside the body. Their arrangement also varies: a DSLR uses a mirror for its optical viewing system, while a mirrorless camera does not.
This guide explains common camera parts and their functions, including the controls used for everyday shooting and the accessories that support them. Use it alongside your camera’s manual, since button names and layouts differ by model.
Don’t feel like reading the whole breakdown? We’ve pulled together a quick summary below.
Key Takeaways
- The lens focuses light; the sensor records it. These components have different jobs and work together to create the image.
- The shutter system controls exposure timing. It may use moving mechanical parts, electronic sensor control, or a combination.
- Camera layouts vary. A viewfinder, mode dial, built-in flash, or removable lens is not present on every model.
- Lens rings serve different purposes. Focus changes the focused distance, zoom changes focal length, and an aperture ring controls the aperture where fitted.
- Accessories support specific tasks. A tripod reduces camera movement, a flash adds light, and filters alter incoming light before capture.
Parts of a Camera Labeled: A Quick Location Guide

This table describes a typical interchangeable-lens digital camera. The exact position and availability of each part depend on the model.
| Part | Typical location | Main function |
| Camera body | Main housing | Holds the sensor, electronics, controls, and supporting mechanisms |
| Lens | Front of the camera | Focuses light onto the sensor |
| Lens mount | Front of the body | Connects a compatible interchangeable lens |
| Lens release button | Beside the mount | Unlocks the lens for removal |
| Shutter button | Top, near the grip | Starts capture; a half-press often activates focus or metering |
| Mode dial or mode control | Top or in a menu | Selects how exposure is controlled |
| Command dials | Top, front, or rear | Change selected settings |
| Viewfinder | Upper rear, where fitted | Provides an eye-level view for framing |
| Rear screen | Back | Displays menus, live view, and recorded images |
| Hot shoe | Top, where fitted | Connects compatible flash units or accessories |
| Memory card slot | Side or battery compartment | Accepts removable image storage |
| Battery compartment | Usually underneath or beside the grip | Holds the power source |
| Image sensor | Inside the body, behind the lens | Converts incoming light into electrical image information |
| Shutter system | Inside the body and/or integrated with sensor control | Determines exposure timing |
| Image processor | Inside the body | Processes image data and supports camera operations |
| Tripod socket | Base | Attaches the camera to a tripod plate or support |
Exclusive Tools of Endless Possibilities in One Editor
Camera Body Parts and Controls

Camera Body and Grip
The body houses the sensor, processor, power connections, and other internal components. It also provides the physical structure for controls, a screen, and a lens connection.
The grip helps you hold the camera securely and reach the controls. Support the lens with the other hand when appropriate, particularly with larger lenses. Weather resistance varies by camera and lens; a sealed-looking body is not automatically waterproof.
Viewfinder
A viewfinder lets you frame an image at eye level. Two common types work differently:
- Optical viewfinder: in a DSLR, light passes through the lens and is redirected by a mirror and an optical system toward your eye.
- Electronic viewfinder: displays a live electronic image generated from the sensor’s output. It can show settings and, depending on configuration, a preview of brightness and color.
Some cameras use only a rear screen. A separate optical finder on another camera design may not show exactly what the taking lens sees.
If the viewfinder looks blurry but recorded images are sharp, check its diopter adjustment. This changes the eyepiece’s focus for your eyesight; it does not change lens focus.
Shutter Button
The shutter button tells the camera to take a photograph. On many cameras, pressing halfway starts autofocus and exposure metering, while pressing fully starts capture.
The behavior can be customized. With back-button autofocus, for example, a separate control may handle focusing. The shutter button is a control, not the internal shutter mechanism itself.
Mode Dial or Mode Control
The mode selector chooses how exposure settings are managed. Common options include:
| Mode | Typical role |
| Auto | The camera manages most shooting decisions |
| Program, usually P | The camera selects aperture and shutter speed, with other controls available |
| Aperture priority, usually A or Av | You select aperture; the camera selects shutter speed |
| Shutter priority, usually S or Tv | You select shutter speed; the camera selects aperture |
| Manual, usually M | You select aperture and shutter speed; ISO may be fixed or automatic |
Not every camera has a physical mode dial. Some use buttons, menus, or separate exposure controls. For examples of how the settings work together, see this guide to manual camera settings.
Command Dials and Custom Buttons
Command dials adjust settings such as shutter speed, aperture, ISO, or exposure compensation. Their function can change with the shooting mode.
Custom buttons provide shortcuts to frequently used options. Learning the controls for focus area, ISO, and playback is usually more useful than memorizing every menu item immediately.
Rear Screen
The rear screen displays menus, photographs, and usually a live view of the scene. Some screens tilt, rotate, or respond to touch, making low-angle and overhead framing easier.
Screen brightness can make a photograph look lighter or darker than it actually is. Use the histogram and highlight warnings where available to help assess exposure, and enlarge playback to check focus.
Lens Mount and Release Button
The lens mount connects an interchangeable lens to the camera. It provides mechanical alignment and often electrical contacts for communication about aperture, autofocus, and other functions.
Mount compatibility is specific to the system. Two lenses from the same brand may use different mounts, and an adapter does not guarantee every function will work.
The lens release button unlocks the connection. Follow the manual’s procedure when changing lenses, keep the opening protected from dust, and avoid touching the exposed internal surfaces.
Memory Card Slot
The card slot accepts removable storage for photographs and video. Common card families include SD and CFexpress, but the supported type and required performance vary by camera.
Some cameras have two slots that can be configured for backup, overflow, or separate file types. Others have one slot or internal storage. Check compatibility before buying a card, and avoid removing it while the camera is writing data.
Battery Compartment and Connection Ports
The battery powers capture, autofocus, displays, and processing. A compatible spare can be useful for longer sessions, particularly when using live view or video.
Ports may support USB transfer, charging, HDMI output, microphones, headphones, or a wired remote. Their presence does not guarantee every related function: for example, USB charging and operation from USB power depend on the model.
Hot Shoe, Flash, and Tripod Socket
The hot shoe is a top-mounted connection for compatible accessories, often an external flash or trigger. Modern shoes can also support specialized digital connections. Check compatibility before attaching equipment.
A built-in flash is present on some cameras but absent on many others. The tripod socket, usually on the base, connects the body to a support plate. Larger lenses may have their own tripod collar to help balance the setup.
Internal Camera Parts

Image Sensor
The image sensor contains light-sensitive sites that convert incoming light into electrical signals. The camera uses those signals to produce image data.
Most consumer digital cameras use CMOS sensors. Sensor size, design, exposure, and processing all affect the result. Megapixels describe resolution, but they do not explain image quality on their own. This guide to megapixels and photo quality covers that distinction.
The sensor is a delicate internal component. Use the manufacturer’s recommended cleaning procedure or professional service rather than treating it like the exterior lens glass.
The Photo Perspective Correction Tool You've Been Waiting For
Shutter System
The shutter system controls how long image information is collected during an exposure.
- Mechanical shutter: uses moving components, such as curtains in a focal-plane shutter, to control exposure.
- Electronic shutter: controls exposure through the sensor electronically, without requiring mechanical curtains to move for that capture.
- Electronic first-curtain shutter: combines an electronic start with a mechanical end to the exposure.
Available modes vary. Electronic shutter can introduce distortion with movement or banding under some flickering lights, depending on sensor readout and conditions. Flash support also differs by model and shutter mode.
The familiar description of a shutter as a door opening and closing is useful for some mechanisms, but it does not describe every digital camera.
Mirror and Optical Viewing System
A DSLR contains a mirror that directs light toward its optical viewfinder before capture. For a typical photograph, the mirror moves out of the way so light can reach the sensor.
A mirrorless camera does not use this reflex mirror system. The sensor provides the electronic image used for live view and, where fitted, the electronic viewfinder.
Mirror and shutter are different components. A mirrorless camera can still have a mechanical shutter. Read this mirrorless vs DSLR comparison for more about the two designs.
Image Processor and Buffer
The processor helps turn sensor data into usable files and supports operations such as image rendering, autofocus calculations, and noise processing.
The buffer temporarily holds data while it is being written to storage. During a burst, the camera may slow down once the buffer fills. File size, shooting settings, and card performance all affect that workflow.
Autofocus and Metering Systems
Autofocus assesses the selected subject or area and directs the lens to adjust focus. Common approaches include phase detection, contrast detection, or a combination.
Phase detection can estimate the direction and amount of focus correction. Contrast detection assesses image contrast as focus changes. Implementation varies: a DSLR may use a separate autofocus module for viewfinder shooting, while many mirrorless cameras use information from the imaging sensor.
Metering assesses scene brightness to help determine exposure. It may use a separate metering sensor or data from the imaging sensor. Focus and metering serve different purposes, even when one button activates both.
Lens Parts and Their Functions

Lens Elements
A lens contains optical elements arranged to focus light onto the sensor. Their design helps manage aberrations and influences sharpness, flare, and other aspects of the image.
Focal length affects angle of view and magnification for a given sensor format. A prime lens has a fixed focal length; a zoom lens offers a range.
Focus Ring
The focus ring lets you adjust focus manually where the lens supports it. Some rings move the mechanism directly; others send electronic instructions to a focusing motor.
Turning the ring changes the focused distance. It does not perform the same task as zooming. Focus aids such as magnification or peaking can make manual adjustment easier.
Zoom Ring
A zoom ring changes focal length on lenses fitted with that control. It adjusts how much of the scene fills the frame from the current camera position.
Prime lenses have no zoom ring. Some zoom lenses use motorized controls or another mechanism instead of a conventional ring.
Aperture and Aperture Ring
The aperture is the opening through which light passes inside the lens, often controlled by overlapping diaphragm blades. Changing its size affects incoming light and contributes to depth of field.
An aperture ring provides a physical way to select the setting on some lenses. Many lenses rely on camera controls instead, and some camera systems have a fixed aperture.
A smaller f-number represents a wider aperture, such as f/2.8; a larger f-number represents a narrower one, such as f/11. Depth of field also depends on focus distance, focal length, and the framing conditions.
Lens Switches and Control Rings
Depending on the lens, switches may select autofocus or manual focus, enable stabilization, or restrict the focusing range. Some lenses include a customizable ring for settings such as aperture or exposure compensation.
Read the markings before assuming a ring’s function. Lens layouts can differ even within one camera system.
Filter Thread and Lens Hood
A filter thread accepts a compatible screw-in filter, with its diameter usually marked on the lens. Other lenses require a holder or another filter system.
A lens hood helps block unwanted light from outside the frame and offers some physical shielding. It cannot eliminate every reflection or flare, especially when the light source appears in the photograph.
How the Camera Captures an Image

During a typical digital capture:
- The lens focuses the scene’s light. Autofocus or manual focus places the desired subject in focus.
- The aperture and exposure timing govern light collection. The shutter system determines the exposure interval.
- The sensor converts light into signals. These signals represent the recorded image information.
- The camera reads and processes the data. It creates a file according to the selected format and settings.
- The file is saved. It is written to a memory card or supported internal storage.
RAW files retain sensor-derived data with less baked-in rendering than a typical JPEG. They still require interpretation by software; they are not ready-made finished photographs.
ISO affects how the camera handles the captured signal and resulting brightness. Increasing ISO does not make the aperture larger or physically send more light to the sensor.
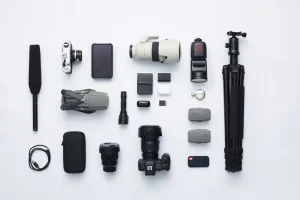
Camera Accessories: What They Add

Accessories are separate from the components required to capture an image. Choose them for a specific task.
| Accessory | Main use | Important limitation |
| Tripod | Stabilizes the camera for long exposures and repeatable framing | Does not freeze a moving subject |
| Neutral-density filter | Reduces incoming light for longer exposures or wider apertures | Requires appropriate strength and can affect color |
| Polarizing filter | Can reduce some reflections and alter sky or foliage appearance | Effect depends on angle and surface; not all reflections disappear |
| Clear or UV filter | Can serve as an additional front-element shield | Not essential for every lens; extra glass can introduce flare |
| External flash | Adds controllable light, including fill in daylight | Requires compatible connections and suitable exposure settings |
| Remote release | Starts capture without pressing the body button | Compatibility and available functions vary |
| Battery grip | May add power capacity and vertical controls | Only supported by certain models and adds bulk |
| Cleaning supplies | Remove appropriate exterior dust and smudges | Lens and sensor cleaning require different methods |
Use a blower to remove loose particles before wiping suitable lens surfaces, then follow the manufacturer’s cleaning guidance. A general lens-cleaning kit should not automatically be used on the sensor.
Your AI-Powered Photo Editor for MacOS and Windows
Editing Captured Images with Luminar
Luminar provides photo-editing tools for refining exposure, color, contrast, cropping, and local adjustments after capture. It supports compatible RAW files as well as common image formats, making it useful for learning how shooting decisions affect the finished photograph.
Begin with a usable image and adjust exposure and white balance before adding creative effects. A RAW photo editor can work with available tonal detail, but missed focus, strong motion blur, and fully clipped information may remain beyond recovery.

Luminar also offers AI-assisted adjustments and portrait tools. These can reduce the setup needed for some edits, while still requiring a review of skin texture, fine detail, and local transitions. Its automatic photo editing tools provide a starting point that can be refined to suit the image.
Learn the Parts by Using Them
Start with the controls needed for one photograph: power, framing, focus, exposure, capture, and playback. Find each on your camera, then take a few test images while changing one setting at a time.
Understanding camera parts is most useful when it explains a result. A shutter-speed change affects movement, an aperture change can affect depth of field, and a focus adjustment changes which distance is sharp. These connections make the equipment easier to use deliberately.
FAQ
The main components include a lens, body, image sensor, shutter or exposure-timing system, processor, power source, and storage. Screens, viewfinders, and physical controls vary by design.
No. A DSLR has a reflex mirror, while a mirrorless camera does not. Some cameras have fixed lenses, no eye-level viewfinder, or no mechanical shutter. The functions can be similar even when the physical layout differs.
The shutter button is the control used to start capture. The shutter system determines exposure timing, using mechanical components, electronic sensor control, or a combination.
The camera evaluates focus information and directs the lens to adjust. Phase detection, contrast detection, and hybrid approaches are common; the hardware and behavior depend on the camera and lens.
Many are optional. A tripod, flash, filter, or remote becomes useful when it solves a particular shooting need. Begin with a working camera setup and add accessories as the task requires.