Creating the perfect portrait using the butterfly light effect can transform your photos. This technique produces soft, smooth shadows that beautifully highlight every detail of the face.
Portraits of the same person can look completely different depending on the lighting—its intensity and direction. Skilled use of light can make a model appear heavier or slimmer, conceal skin flaws, and emphasize their best features. One setup that does this especially well is “butterfly” lighting. So what do you need to recreate it? Let’s find out.
Don’t feel like reading the whole breakdown? We’ve pulled together a quick summary below.
Key Takeaways
- The setup mechanics. Position a single light source directly in front of the model and angled 30 to 45 degrees downward to create a symmetrical, butterfly-shaped shadow beneath the nose.
- Visual benefits. This classic Hollywood technique slims the face, highlights cheekbones, and smooths minor skin imperfections for a flattering, glamorous look.
- Technical parameters. Use an aperture of f/4 to f/5.6 for soft background blur, keep ISO low (100-200) for clean details, and always shoot in RAW format.
- Supplementary gear. Place a reflector below the model’s face to fill in harsh shadows, and add a subtle rear light to separate the subject from the background.
- Common adjustments. Prevent mistakes like lost symmetry by keeping the light slightly above eye level and guaranteeing the model maintains a straight-ahead gaze.
Understanding Butterfly Lighting in Photography
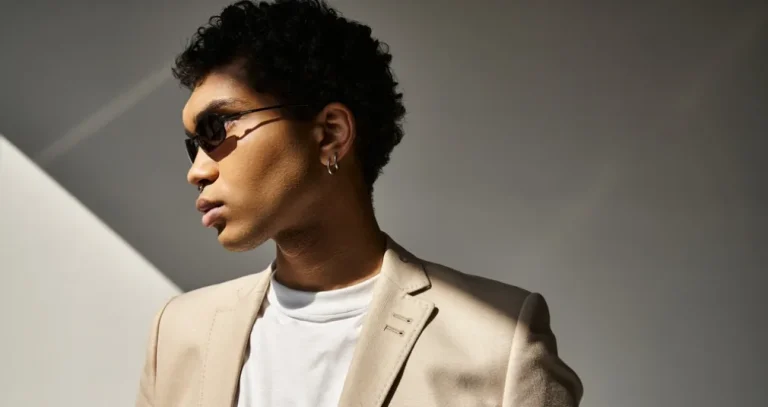
Butterfly lighting gets its name from the shadow under the nose, which resembles the wings of a butterfly. The technique first appeared in the 1930s in Hollywood studios and has remained one of the basic techniques for shooting faces ever since. It can be seen on many glossy magazine covers, such as Vogue, or in celebrity advertising photos. Even pop culture icon Marilyn Monroe had several “butterfly” portraits taken.
But why is butterfly lighting so popular for portraits specifically? It highlights the cheekbones, slims the face, and smooths out minor skin imperfections. Dark circles and nasolabial folds nearly disappear, leaving the skin looking flawless without any retouching. Best of all, you can achieve this effect at home, with no expensive equipment required.
Exclusive Tools of Endless Possibilities in One Editor
Essential Equipment for Butterfly Lighting

To take a photo with butterfly lighting, you’ll need at least a camera. Mirrorless or DSLR models with a lens no wider than 52 mm will work. Adjust your settings based on your camera’s strengths and weaknesses. Alternatively, check out the quick guide below if you don’t want to go through the trouble.
- Light Sensitivity. Set ISO to 100-200 in well-lit rooms for normal brightness without digital noise. Increase it to 400-800 if you are working with low light or natural lighting
- Aperture. To keep the face in focus while blurring the background objects smoothly, set the f-stop to between 4 and 5.6. If there are several people in the photo or if you want the “butterfly” to be more vivid, you can close the aperture to f/8.
- White Balance. Settings can be adjusted manually or by relying on the built-in algorithms. The value is selected based on the color temperature of the specific light source, but 5500-5600 K is typically suitable for studio lighting or daylight.
- Image format. Set your camera settings to save images in RAW format to preserve as much detail as possible. This is especially useful if you plan to edit your photos later in a photo editing program.
Supplementary lighting will also be needed. Softboxes or an external flash can be used to compensate for the lack of light. Just make sure you don’t forget to set up reflectors. Otherwise, instead of an elegant portrait, you’ll end up with a bunch of white spots. Position the reflectors from below and at an angle to the model’s face to make the light more even.
Step-by-Step Guide to Setting Up Butterfly Lighting

Now that you know what butterfly lighting is and you’re eager to take photos, it’s time to get started. There’s nothing complicated about it—the main thing is to pay attention to the model’s positioning and remember to check the shadows so you get the desired effect on the first try.
- Have the model face the camera. Keep their back straight and their chin slightly raised. Tilting the head even slightly to the side will ruin the symmetry of the shadow under the nose, so the model must not move out of position.
- Place the light directly in front of the model, aligned with the nose. Angle it down at 30-45 degrees. Note that raising the light higher will make the shadows longer and more distinct.
- Aim the light directly at the bridge of the nose. This is the main point that determines the shape of the shadow. If you aim at the chin or forehead, the shadow will shift, and the purpose of the pattern, the symmetry, will be lost.
- Check the shape of the shadow. It should resemble butterfly wings—even and not skewed to one side. If the shade is slanted, go back to the first step and keep trying until you get it right.
Use modern tools to improve the quality of the original photo. This won’t make it look any less natural. There’s nothing wrong with enhancing the model’s best features or removing a flaw caused by an accidental movement or the actions of others.
Your AI-Powered Photo Editor for MacOS and Windows
Techniques to Achieve Perfect Butterfly Lighting

A photo is made up of many individual elements that come together. How they come together determines exactly what the photo will look like. Adjust the white balance to make the photo more vibrant, or add portrait bokeh to draw attention to the center. The ability to control these small details is what defines the art of photography.
- Choose modifiers based on face shape. A beauty dish highlights cheekbones with sharp contours, making it ideal for narrow, angular faces. For round faces or problem skin, a softbox is better, as it creates softer shadows and hides texture.
- Backlighting adds dimension. A rear light source, dimmer than the main light, helps separate the model from the background. It doesn’t disrupt the butterfly lighting setup—on the contrary, it makes it more noticeable and expressive.
- Color temperature shifts the shot’s mood. Warm light adds coziness, while white light feels sharper and more striking. The shadow pattern remains identical, but the overall atmosphere changes.
Photographs using butterfly lighting are easy to create. This makes it possible to vary the look by changing the background, adding details, or adjusting the lighting position. Search online for butterfly lighting examples to find the style that suits you best, and try to recreate it. A little practice before you start a full photo shoot never hurts.
Common Mistakes to Avoid in Butterfly Lighting

There’s a common misconception that simple things should turn out right the first time. The butterfly lighting setup is certainly a simple concept, but challenges can arise at various stages regardless of the photographer’s experience. For example, setting the light source at the wrong height will turn a beautiful butterfly pattern into a smudge. This is the most common mistake people make when setting up the lighting.
Position the lamp 20-30 cm above the model’s eye level, angled 30045 degrees downward to avoid a circular shadow under the nose. Watch the gaze direction: even a slight face turn loses symmetry. Set the focal point on the eyes so uneven blur doesn’t ruin the shot. If you go through this list, you’ll be able to prevent the most common problems from occurring.
Creative Uses of Butterfly Lighting in Portraits

Butterfly lighting definition was originally developed for glamorous or “Hollywood-style” portrait photography. What is it? Basically, it’s a trendy term for capturing a flawless face. No skin imperfections, a muted color palette, and staged, slightly theatrical lighting. Under these conditions, the model’s eyes and cheekbones appear mysterious and alluring.
For those seeking creativity beyond the “ideal”, this simple framework requires adjusting basic settings. For example, converting the photo to black and white removes distracting skin and background colors. This turns shadows under the nose and along cheekbones into the main graphic elements, making the model look like a sculpture.
Change the background color and the details in the frame. Add a slight haze or light fog to the shot. Light directed vertically downward beautifully illuminates the smoke particles, creating a visible halo above the model’s head. The style is sophisticated and elegant. If you want photos worthy of a fashion magazine cover, you won’t find anything better.
Comparing Butterfly Lighting with Other Lighting Styles
The “butterfly” lighting setup is a simple yet highly effective technique. Any photographer can master it after just a few tries. But what other alternatives for portraits are worth considering?
| Lighting Pattern | Required Equipment | Visual Effect | Mood |
| Butterfly | One light source centered above the camera, paired with a reflector or fill light underneath | Symmetrical butterfly-shaped shadow under the nose | Glossy, idealized, slightly theatrical |
| Rembrandt | One light source to the side, reflector optional | Triangle of light on the shadow-side cheek, nose shadow merges with cheek shadow | Contrasty, painterly |
| Loop | One light source to the side, often no extra equipment needed | Small loop-shaped nose shadow that doesn’t touch the cheek shadow | Natural, soft, low-drama |
| Split | One light source directly to the side, sometimes with a diffuser to soften the edge | Exactly half the face lit, half in shadow | High-contrast, tense |
If something goes wrong, you can always perform portrait photo editing. With just a few clicks, you can fix any flaws or adjust the brightness. This is especially true if you’re using advanced editing software like Luminar Neo.
Elevate Your Photography with Our Advanced Software
Tips for Enhancing Your Butterfly Lighting Shots

As mentioned earlier, the butterfly lighting setup is a simple technique—anyone with a camera and a single light source can master it. But there’s a difference between taking a photo and taking a good photo. To get the best results with this butterfly-shaped shadow, you need to pay attention to the details.
Choose a neutral background so it doesn’t compete with a colorful outfit or scene. Keep the models’ makeup light, with a matte finish to avoid glare. Shoot in bursts, gradually adjusting the angle, and check your results as you go. Taking one good photo isn’t hard—the real goal is to keep improving from there, not to stop once you’ve got it.